3DPrintCAD › Guides › Tray generator
Tray generator: organisers, stackable bins and Gridfinity
Make organiser trays sized to the millimetre: as many compartments as you need, trays that stack, patterned walls, labels, finger pulls, magnets and lids - or Gridfinity bins and baseplates. Everything happens in your browser, and the result is ready for your slicer.
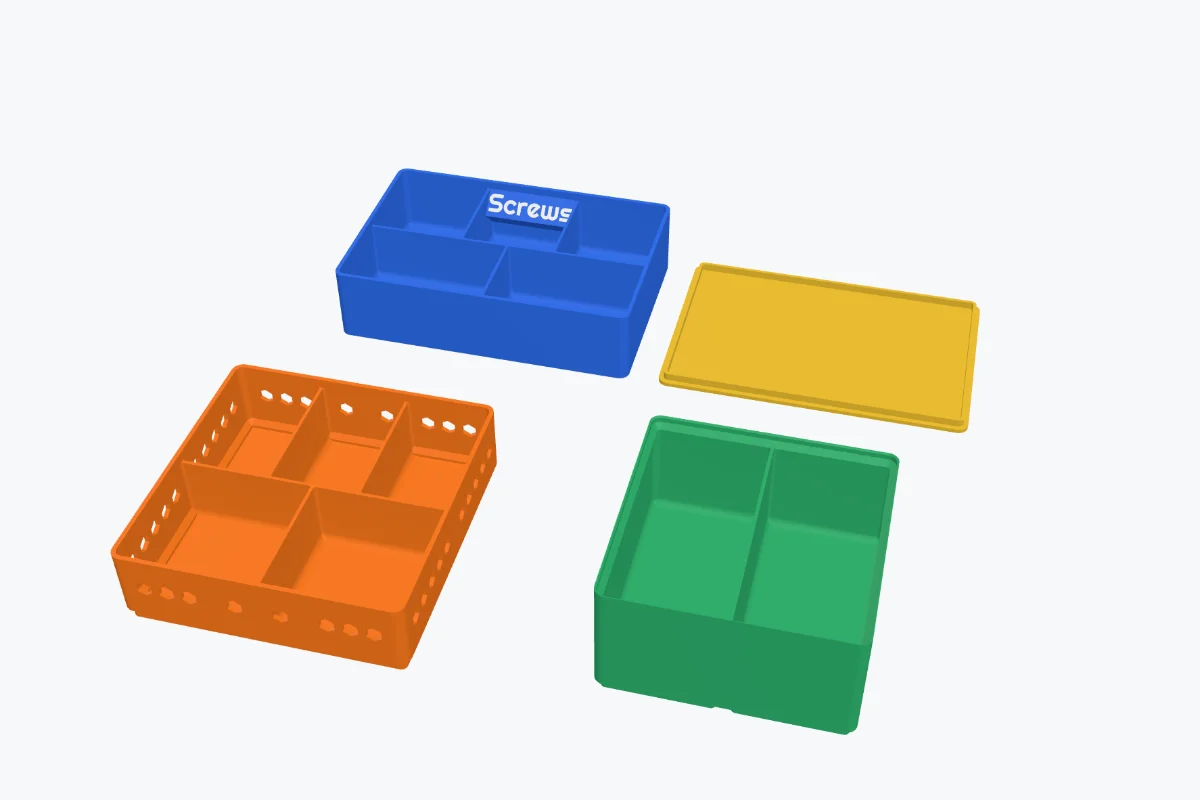
Watch the tutorial
Every option in under three and a half minutes, with subtitles: size, walls, compartments, stacking, wall patterns, labels, lids, Gridfinity bins and baseplates. Watch on YouTube ↗
1Open the tray generator
Open the app and click Tray under Generators on the left (or use this link, which starts a new project with the tray generator open). A tray with five compartments appears. Every setting on the right updates the preview, and the result line under the mode buttons tells you the outside and inside sizes, the compartments, how much it holds and about how much plastic it takes.
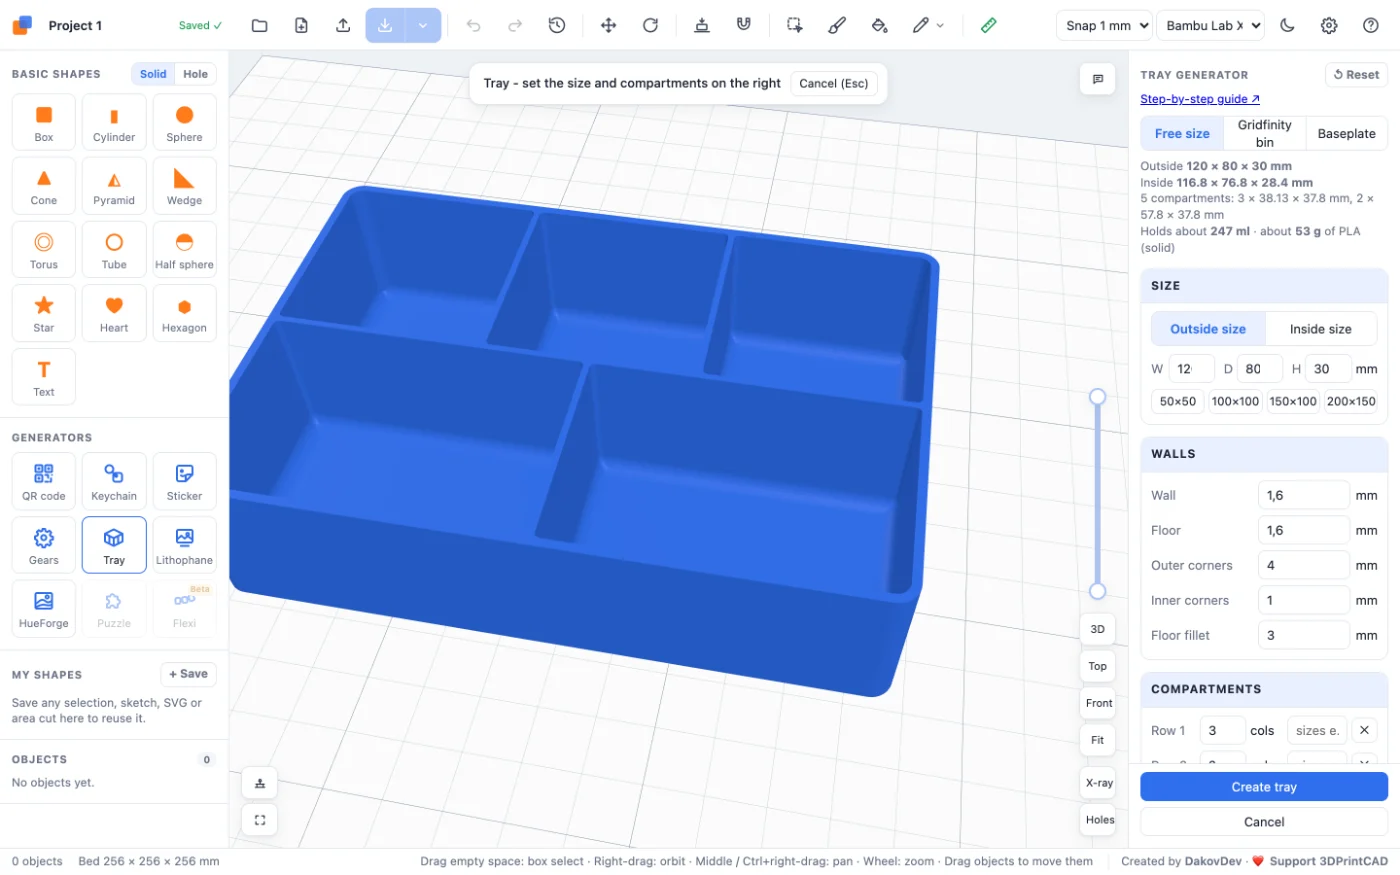
2Size
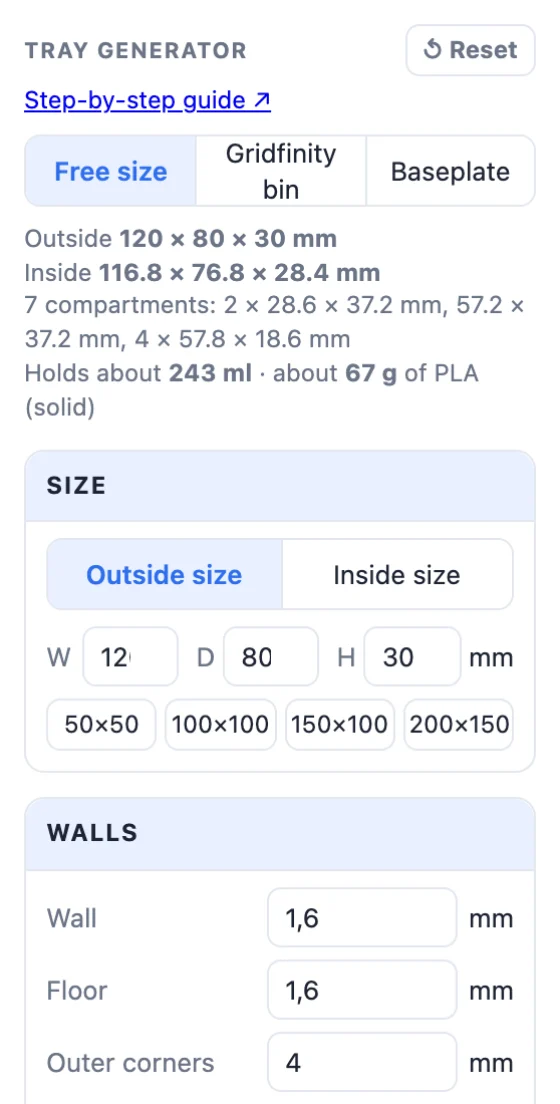
- At the top, choose the first button for a tray of any size, or Gridfinity bin or Baseplate (see Gridfinity).
- Type the width W, depth D and height H in mm, or click a preset (50 × 50 up to 200 × 150).
- Outside size - the tray measures exactly this. Inside size - the space inside is exactly this, to fit an item, and the walls are added around it.
3Walls, corners and floor
- Wall and Floor - their thickness. 1.6 mm is four lines with a 0.4 mm nozzle.
- Outer corners - the corner radius seen from above.
- Inner corners - rounds the corners where dividers meet the walls: easier to clean.
- Floor fillet - a curved floor edge, so small parts slide out easily (0 = square).
4Compartments
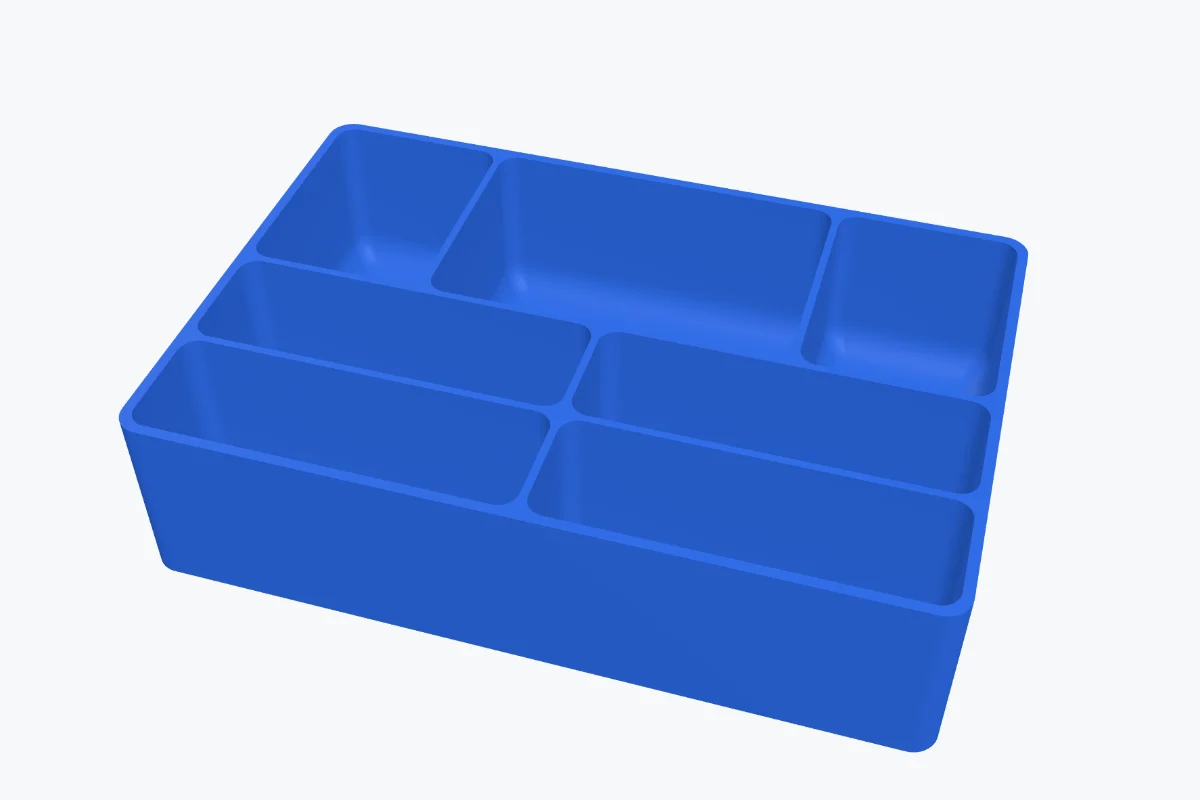
Each Row has a number of columns. Type sizes like 1,2,1 to make the middle column twice as wide (empty = equal). + Add row adds a row, ✕ removes one, and Row sizes (like 2,1) sets how deep each row is, from back to front. The dividers' thickness is taken off before the space is shared, so the compartments really have these proportions.
- Divider height - 0 makes them as tall as the walls; lower dividers make it easy to reach in.
- Divider thickness - 1.2 mm by default.
5Stackable trays
Turn on Stackable: the bottom steps in with a 45° edge (prints without supports) and nests into a tray of the same size. Nesting depth is how far the bottom sits inside the tray below; Fit tolerance is the gap per side - 0.2 mm tight, 0.3 normal, 0.4 loose. The dividers end below the nesting depth, so a tray above sits flat.
6Wall pattern
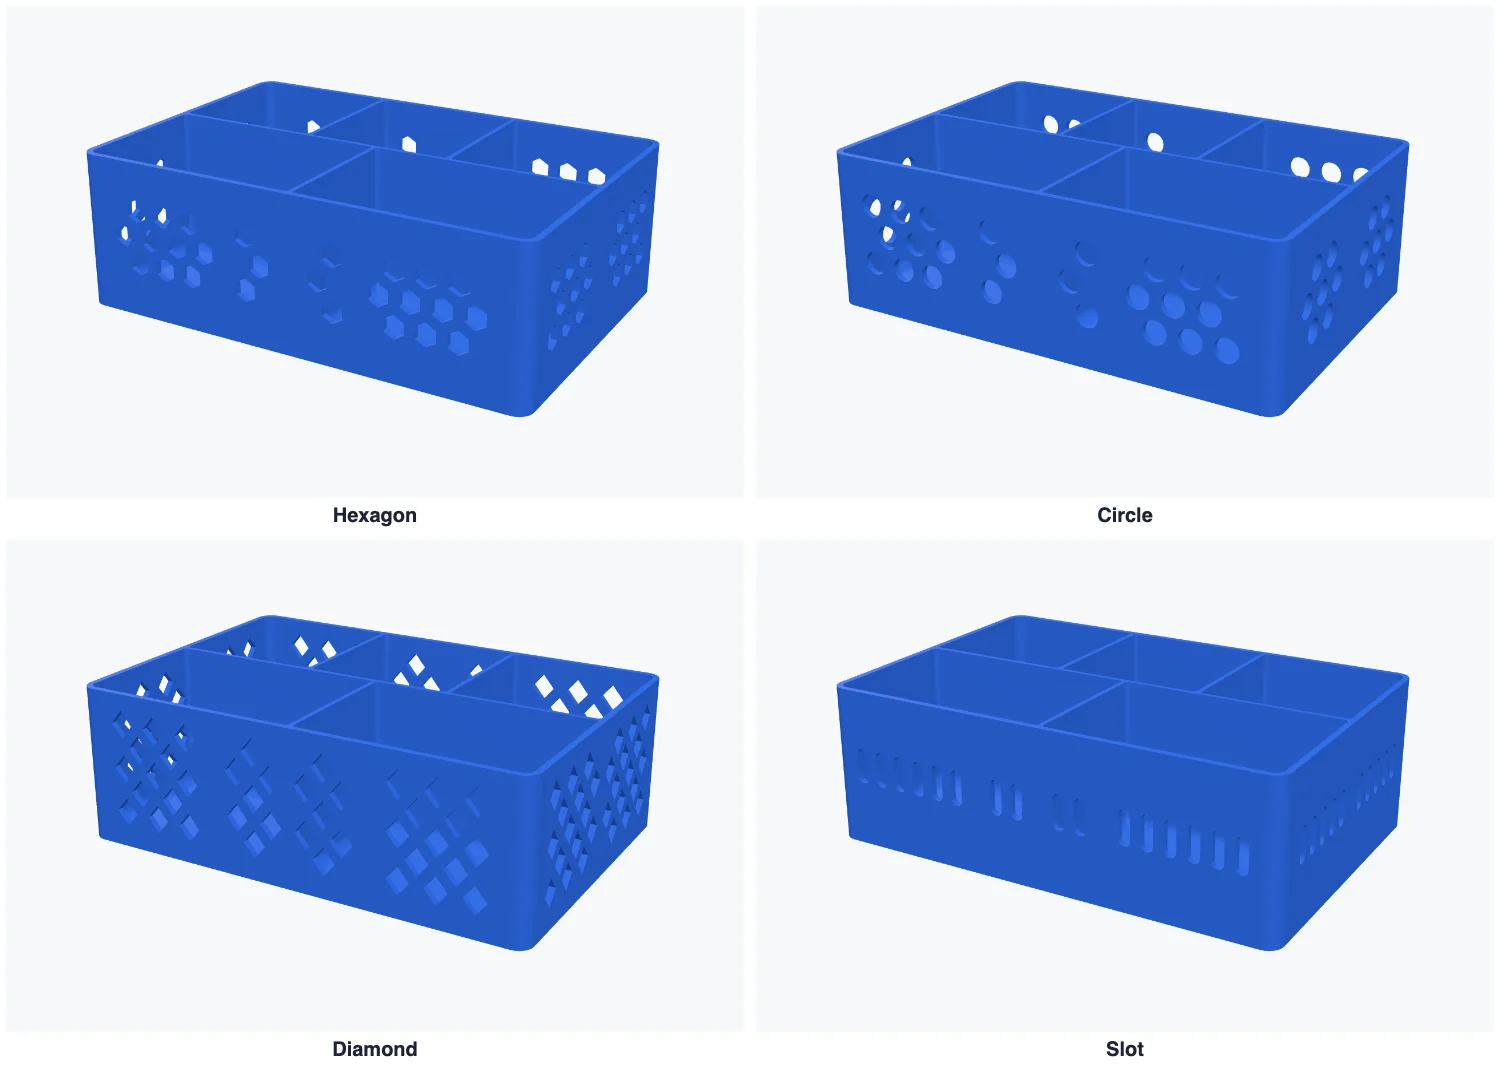
Turn on Wall pattern for holes in the walls: Hexagon, Circle, Diamond or Slot, with a Hole size and Dense, Normal or Relaxed spacing. The holes sit on a staggered lattice with even plastic between them and keep clear of corners, dividers, the label and the finger pull. Full pattern fills the whole wall with half holes at the edges, and Holes in the floor too lets water drain.
7Label, finger pull and magnets
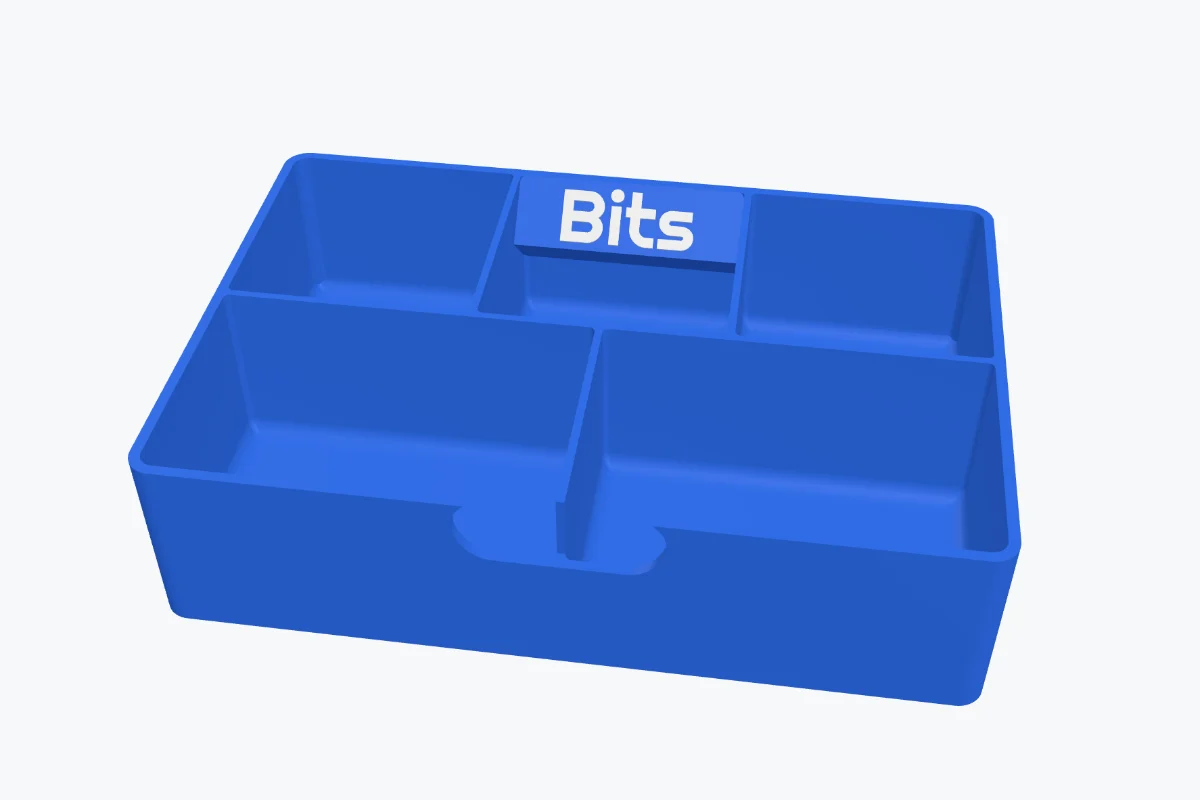
- Label - up to three lines of text in any font, also curved. Back tab is a slanted tab inside the back wall, readable from the front; Front tab is inside the front wall; Outside puts raised text on the outside of the front wall. Set its position (left, centre, right), width, height and text height.
- Finger pull - a notch in the front wall (or front and back) to lift the tray, with its width and depth.
- Magnet pockets - four round pockets under the corners, to hold the tray on a steel shelf. Add about 0.2 mm to the magnet's size (6.2 for 6 mm).
8Lid
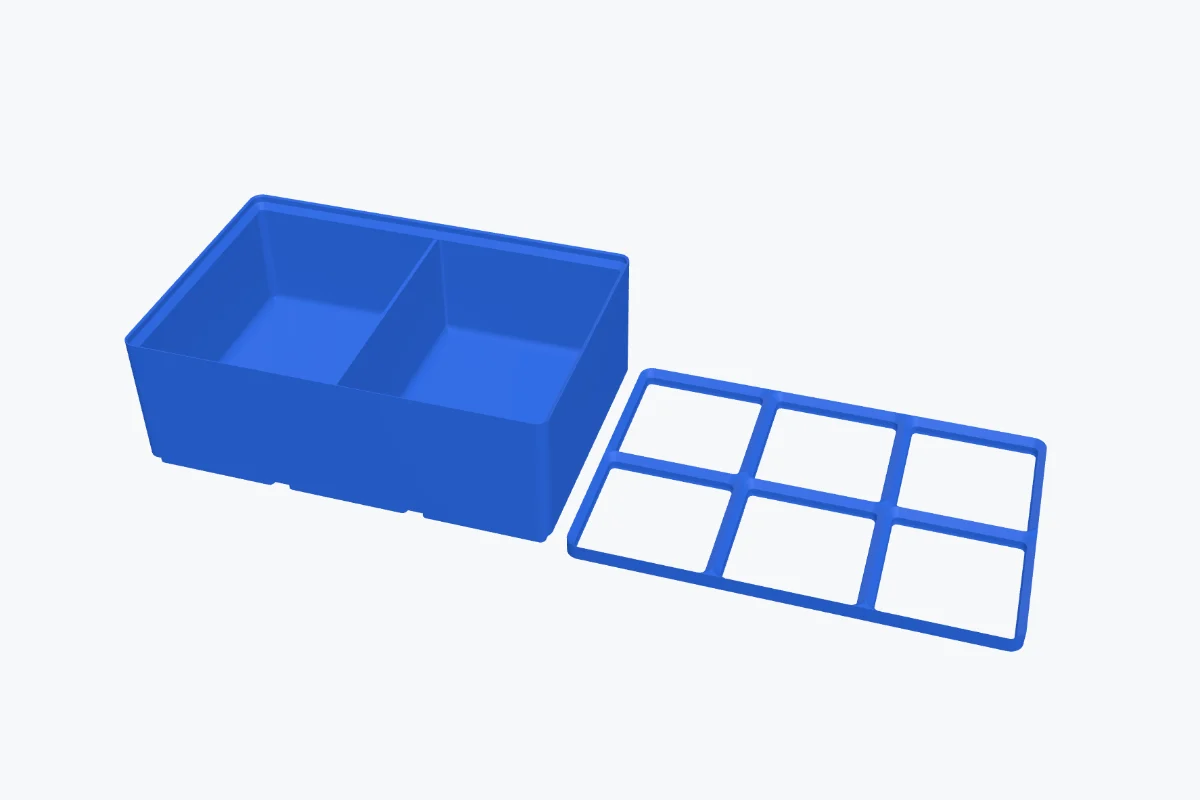
Turn on Lid and pick Inner lip (a rim that drops inside the walls) or Cap (a skirt that fits over the outside). For an inner lip, Make room by chooses Lower walls (the dividers and the label tab end below the lip) or Notch lip (the dividers stay full height and the lip gets cut-outs where they are). Set the lid's thickness, lip or skirt depth and fit tolerance. The lid is made beside the tray, lip up: print it as it lies, then flip it.
9Gridfinity bins and baseplates
- Gridfinity bin - set the units across and deep (42 mm each) and the Height units (7 mm each). The bin has the standard feet and, optionally, the Stacking lip, Magnet holes (6 × 2 mm magnets) and Screw holes (M3). Compartments, the wall pattern, the label and the finger pull work in bins too.
- Baseplate - the grid the bins sit in: Open (just the frame, fast to print) or With floor, which can hold magnets.
10Colours, create and print
- Separate parts makes the tray, the label text and the lid parts of their own, each with a colour - for multi-colour printing.
- Click Create tray (or Create Gridfinity bin / Create baseplate). To change it later, double-click it and the generator opens with its settings.
- Export STL for your slicer, or Multi-colour 3MF to print the label text in another filament.
Printing tips: trays print as they lie, with no supports - the stacking step and the label tab are 45°. The lid prints lip up. For a tight fit, print a small test tray first and adjust the fit tolerance.
Questions
How do I make a tray that fits something exactly?
Choose Inside size and type the item's width, depth and height: the space inside the tray is then exactly that, and the walls are added around it. Add a millimetre or two for an easy fit.
How do I make trays that stack?
Turn on Stackable. The bottom steps in with a 45° edge, which prints without supports, and nests into a tray of the same size. 0.3 mm fit tolerance is a normal fit; use 0.2 for tight and 0.4 for loose.
Are the Gridfinity bins compatible with other Gridfinity models?
Yes. Bins use the 42 mm grid and 7 mm height units, with the standard feet, stacking lip, 6 × 2 mm magnet holes and M3 screw holes. They fit standard baseplates, and the baseplates take any Gridfinity bin.
How do I print the lid?
The lid is made beside the tray with its lip facing up. Print it as it lies, then flip it onto the tray. An inner lip drops inside the walls; a cap fits over the outside.
Can I change a tray after creating it?
Yes. Double-click the tray (or select it and click Edit generator) and the generator opens with its settings.
Make your tray now
Open the tray generator, set the size and the compartments, and print.
Make a tray nowAlso see: Lithophane maker, Gear generator, Image to 3D sticker, Keychain generator and How to resize an STL file.