3DPrintCAD › Guides › Keychain generator
Keychain generator: make a 3D printable name keychain
Design a custom keychain with a name, a short message and your own icons, then print it in one or several colours. Type the text, pick a shape and a font, drag things where you want them, and download an STL, or a multi-colour 3MF that opens in your slicer with every colour on its own filament.
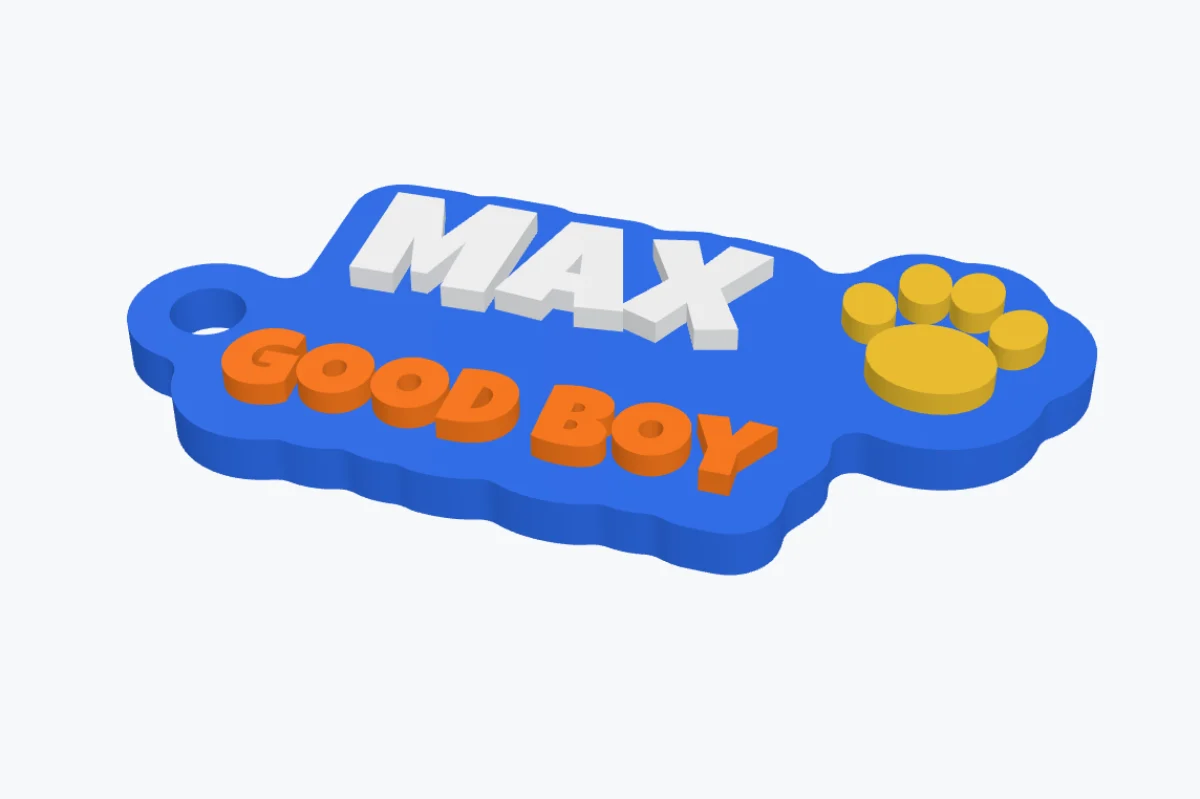
What you can make
- Name keychains for bags, keys, pets and gifts, in 26 fonts or a font of your own.
- Keychains with icons: add SVG logos or symbols next to the text, or make a keychain in the shape of the icon.
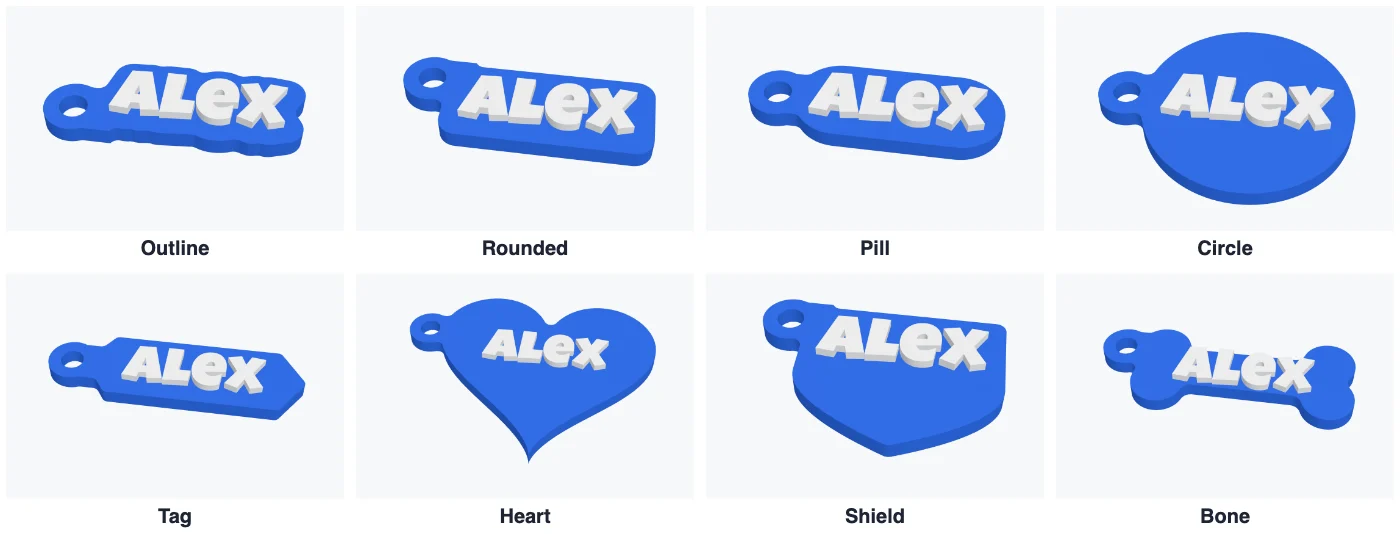
- Eight shapes: an outline that follows the letters, rounded, pill, circle, tag, heart, shield and bone.
- Raised, flush or engraved text, with borders, one or more key rings and even an NFC tag inside.
- Single-colour or multi-colour prints: STL for any printer, or a 3MF with ready-made colour parts for an AMS or other multi-material printer.
1Open the keychain generator
Open the keychain generator: it starts a new project with the generator ready. In the app you can also click Keychain… under Generators in the left panel, or pick the Keychain example on the start screen.
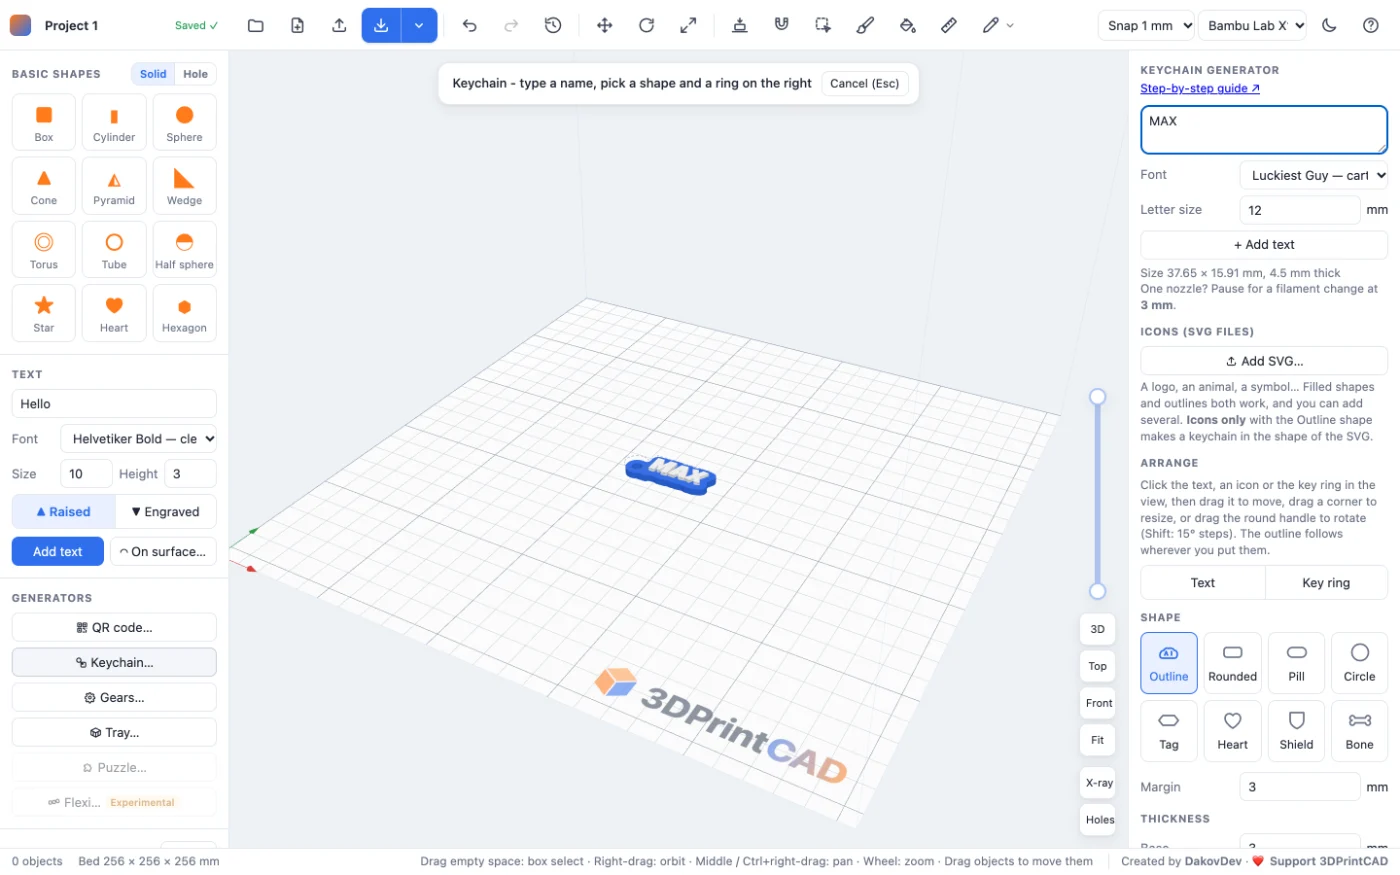
2Type the name
- Text: a name or any text, up to 3 lines (press Enter for a new line). With more lines, Other lines makes the lines after the first smaller.
- Font: 26 fonts grouped by style (classic, script, bold and fun, display, elegant). Fonts marked Кирилица also have Cyrillic letters. At the end of the list, Upload a font adds your own TTF, OTF or WOFF font; it stays in your browser.
- Letter size: the height of the letters in mm (12 mm by default).
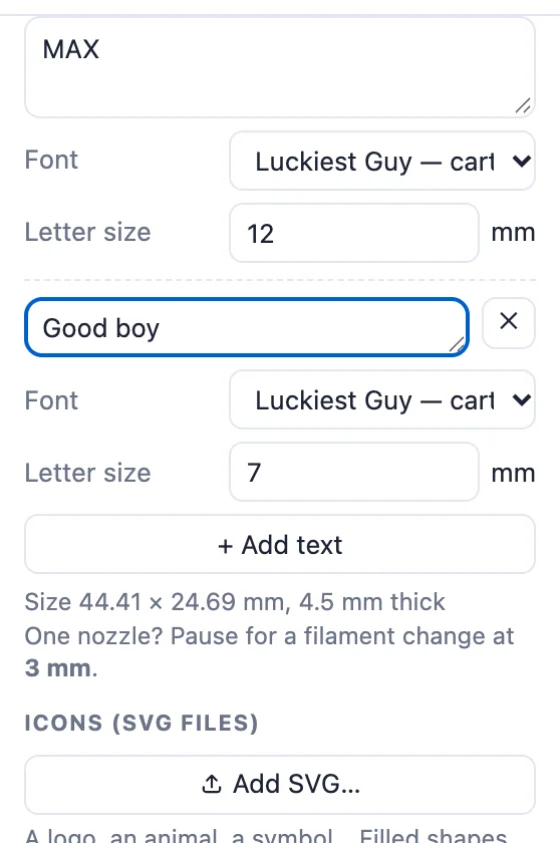
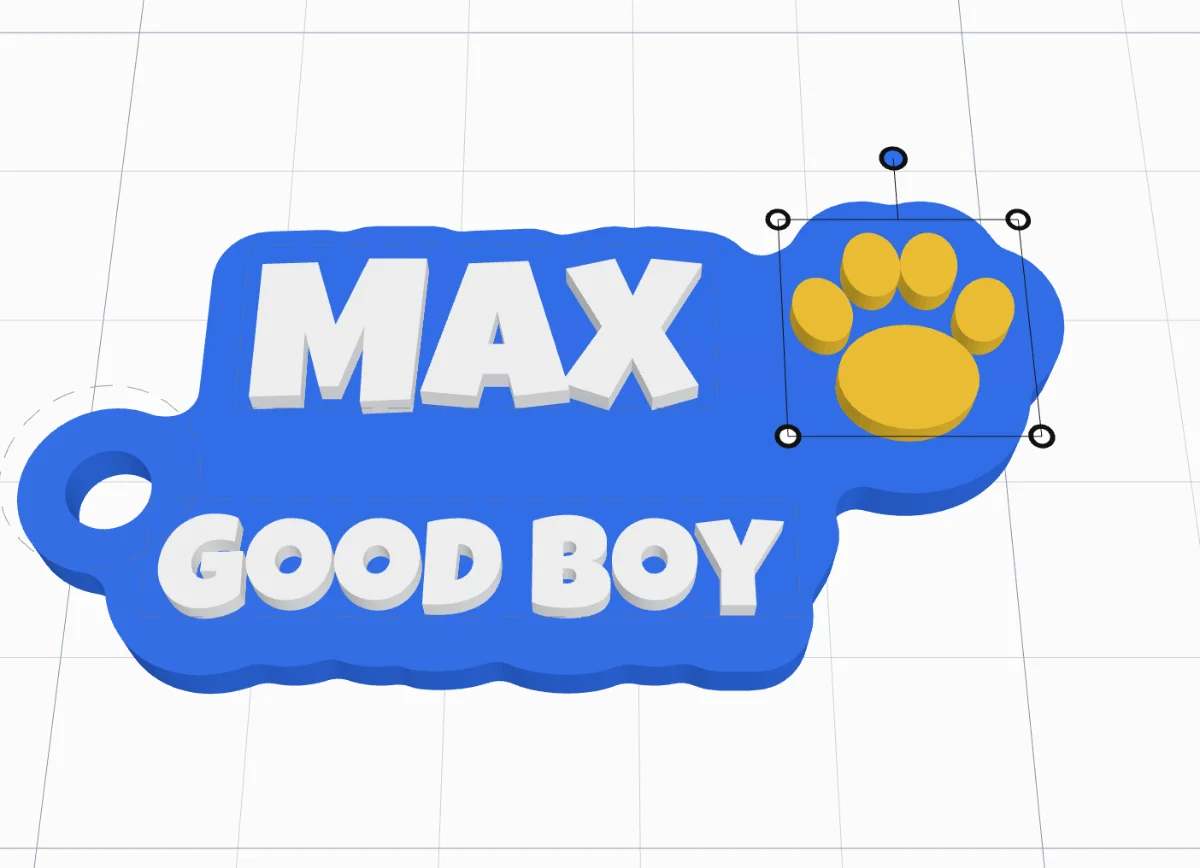
- + Add text: a second (or third) text, for example a phone number or "GOOD BOY", each with its own font and letter size.
3Add icons
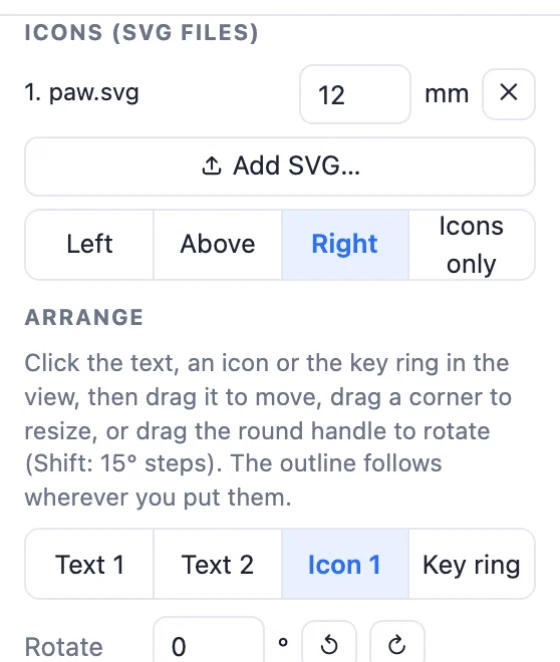
Click Add SVG… to add a logo, an animal or a symbol. Filled shapes and outlines both work, and you can add several icons at once. Set the height of each icon in mm.
Icons start left, above or right of the text. Icons only leaves the text out; with the Outline shape that gives a keychain in the shape of your SVG.
4Arrange everything in the view
Click the text, an icon or a key ring in the 3D view (or its button under Arrange) to select it, then:
- drag it to move it,
- drag a corner to make it bigger or smaller,
- drag the round handle to rotate it (hold Shift for 15° steps).
The panel shows the exact rotation, size and position, and Reset puts an item back. With the Outline shape the keychain follows wherever you put things; other shapes grow to fit.
5Pick a shape
Eight shapes for the plate behind the text. Margin sets how much plate there is around the text and icons; the Rounded shape also has a corner radius.
6Raised, flush or engraved
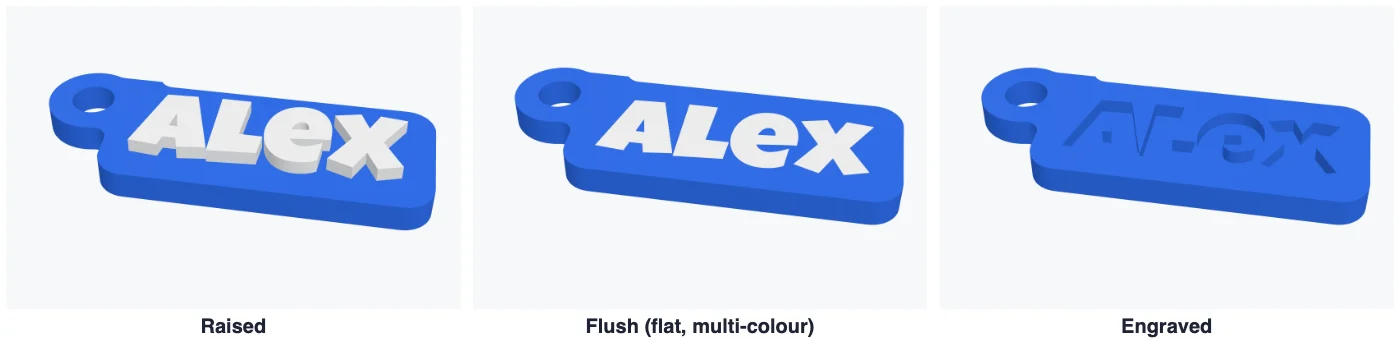
Under Thickness set the Base (3 mm by default) and the Text height (1.5 mm), then choose how the text sits on the plate:
- Raised: the text stands up from the plate. The classic look, easy to print in one or two colours.
- Flush: a completely flat top. Text and icons are inlays in their own colours, level with the plate, so it needs a multi-colour printer.
- Engraved: the text is cut into the plate.
7Key rings
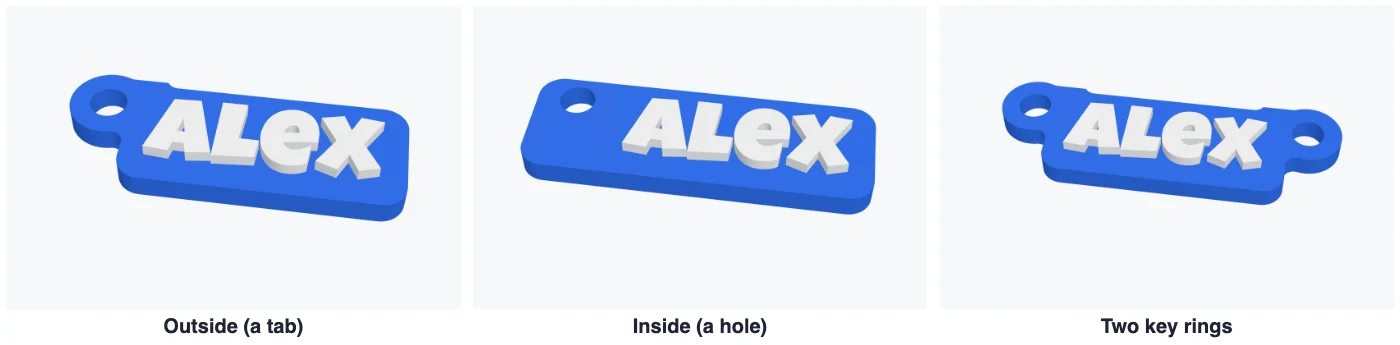
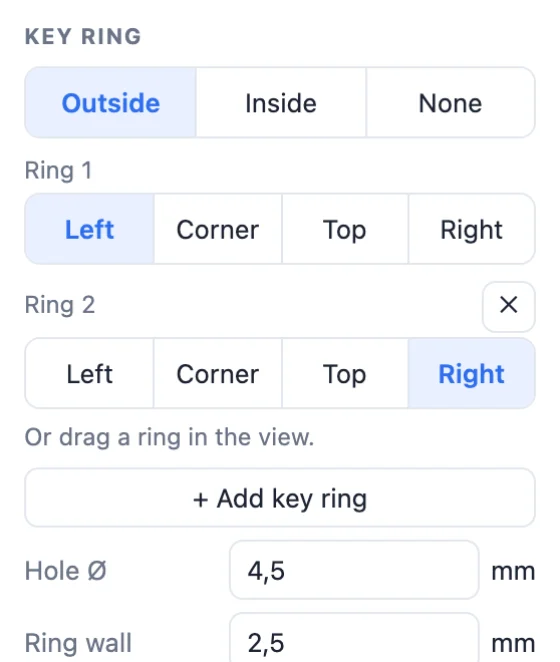
- Outside: a round tab with the hole, outside the plate. Inside: a hole in the plate itself (the plate grows to make room). None: no ring.
- Put the ring on the left, the corner, the top or the right, or drag it anywhere in the view. Dragged onto the plate it becomes a hole, and it is cut through the text too.
- + Add key ring adds more rings, for example one on each side for a bag strap.
- Hole Ø (4.5 mm by default) and Ring wall (2.5 mm) apply to all rings.
8Borders
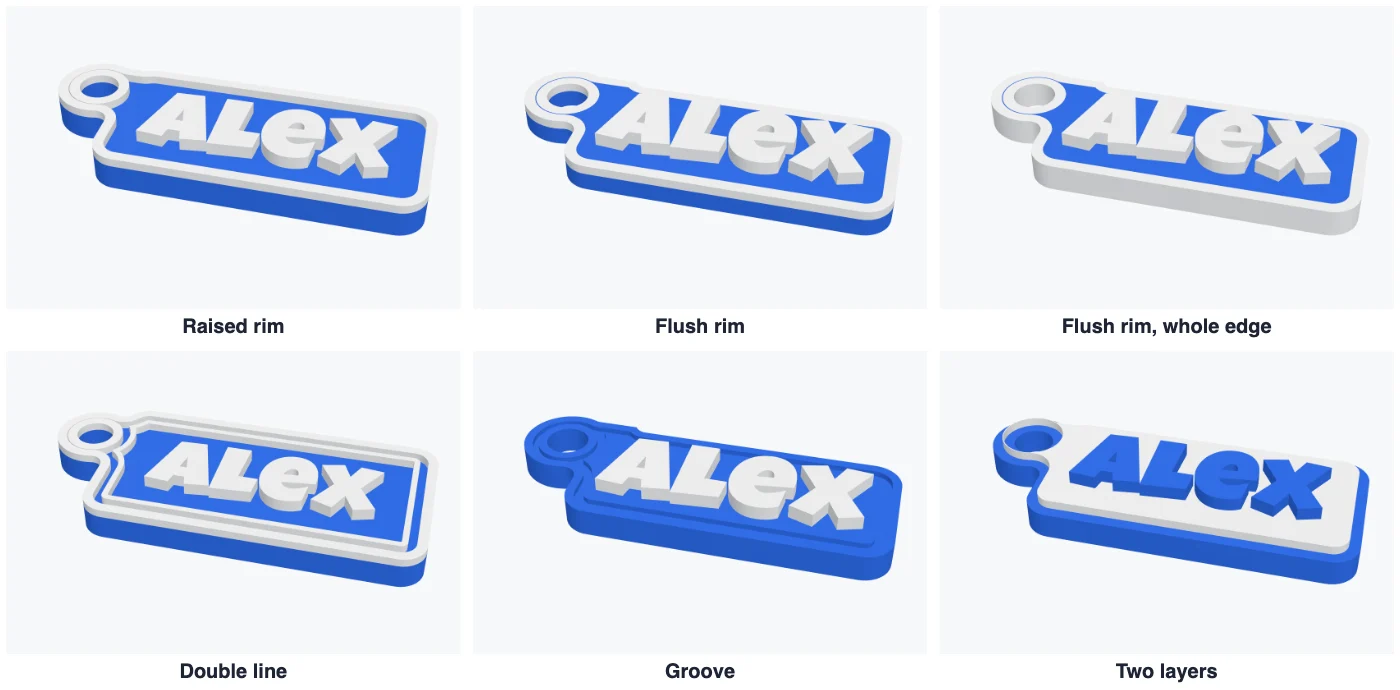
- Raised rim: a raised edge all around, also around the ring hole.
- Flush rim: the same edge, inlaid level with the top in its own colour.
- Whole edge (for both rims): the border runs down the whole side of the keychain, so the edge is the border colour from top to bottom.
- Double line: a raised edge plus a thin inner line.
- Groove: a line cut into the plate, just inside the edge.
- Two layers: a second, smaller plate on top in another colour, with the text on it.
9NFC chip
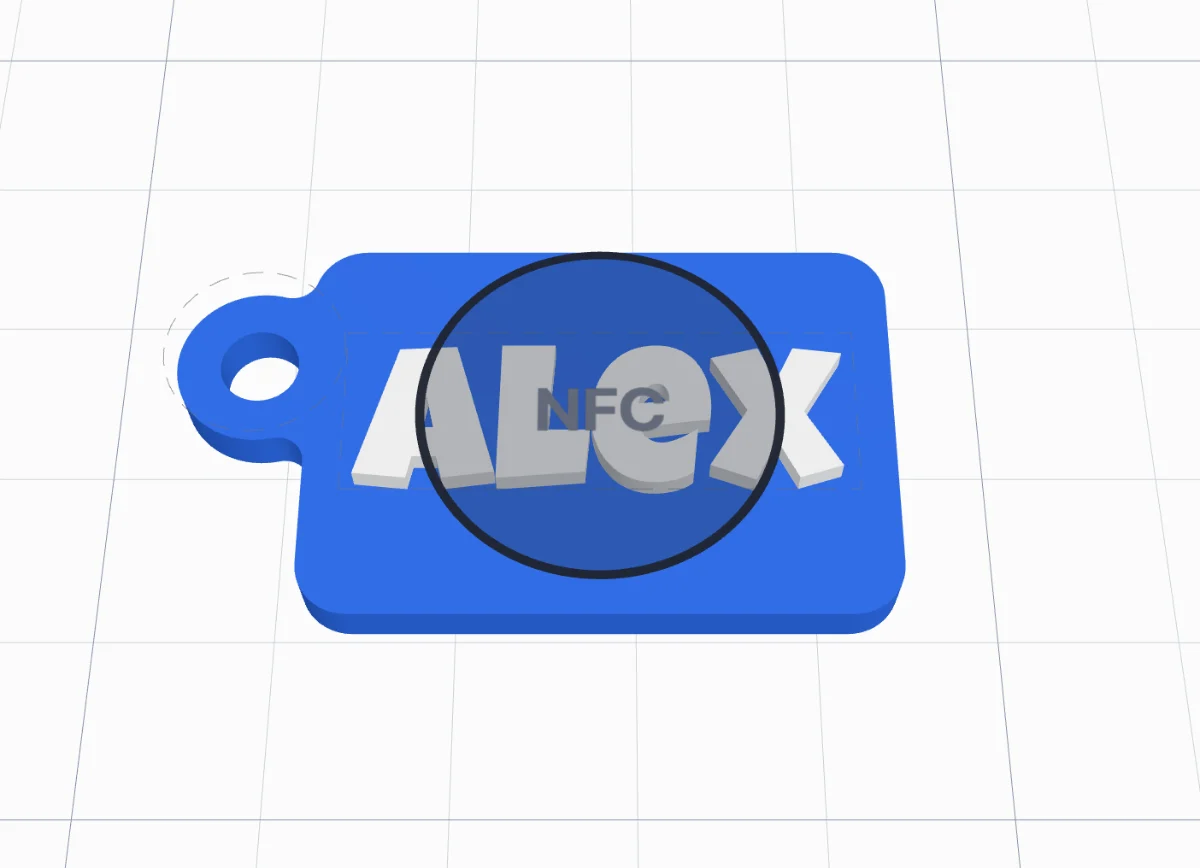
Tick NFC chip to add a pocket for an NFC tag, so a phone can tap the keychain to open a link or share your contact. Pick the tag: Ø12 or Ø15 mini, Ø20 or Ø25 sticker, Ø25 coin, or your own size. The plate grows to hold the chip.
- Sealed inside: the chip is closed in. The generator tells you the height at which to pause the print and drop the chip in.
- From the back: an open pocket underneath, to glue the chip in after printing.
Drag the NFC label in the view to move the chip.
10Colours and parts
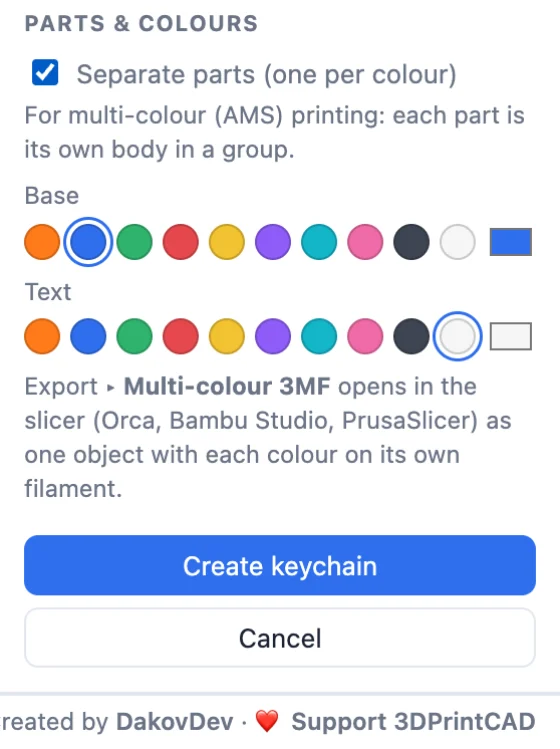
With Separate parts on (the default), the base, the text, the icons, the border and the top layer are separate parts, each with its own colour. A second text, or each icon when there are several, can have a colour of its own too. Then click Create keychain.
To change it later, double-click the keychain (or use Edit… in the right panel): all settings come back.
11Export and print
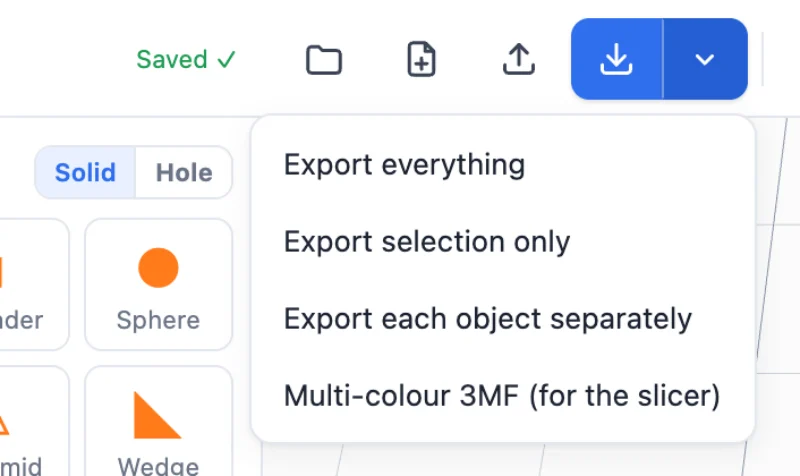
Open the menu next to the Export button:
- Multi-colour 3MF (for the slicer): for an AMS or any multi-material printer. OrcaSlicer, Bambu Studio and PrusaSlicer open it as one object, with every colour already on its own filament. Make sure your slicer has as many filaments as the message after saving lists.
- Export everything or Export selection only: one STL file.
- Export each object separately: one STL per part.
Printing in two colours on one nozzle
With raised text, the generator tells you where to change the filament: "One nozzle? Pause for a filament change at 3 mm" (the top of the base with the default settings). Add a filament change or a pause at that height in your slicer: the plate prints in the first colour, the text in the second.
Tips for a strong keychain
- Keep the base at 3 mm or more and the ring wall at 2.5 mm or more.
- PLA is fine for gifts; PETG is tougher for a keychain you carry every day.
- Print it flat, as it comes out of the generator, with 0.2 mm layers.
Questions
Do I need an account or to install anything?
No. 3DPrintCAD runs in your browser: there is no account and nothing to install, and your projects are saved in your browser.
Can I add my own logo or icon?
Yes, as an SVG file. Filled shapes and outlines both work, and you can add several icons. A PNG or JPG logo has to be converted to SVG first, for example with a vector tracing tool.
Can I use my own font?
Yes. Choose Upload a font at the end of any font list and pick a TTF, OTF or WOFF file. It is kept in your browser only.
Can I print it with a single-colour printer?
Yes. With raised text, change the filament at the top of the base, at the height the generator shows. The flush style needs a multi-colour printer.
How thick should a 3D printed keychain be?
A 3 mm base with 1.5 mm raised text (the defaults) is sturdy for daily use. Keep the ring wall at least 2.5 mm, and use PETG for a keychain that hangs on your keys every day.
Can I edit the keychain after creating it?
Yes. Double-click it, or select it and click Edit…. You can also combine it with other shapes in the editor.
Make your keychain now
In your browser, ready to print in a few minutes.
Open the keychain generatorAlso see: Image to 3D sticker & keychain for keychains from a sticker image, and QR code STL generator, which can make QR code keychains with a key ring and an NFC chip.