3DPrintCAD › Guides › QR code generator
QR code STL generator: make a 3D printable QR code
Turn a link, any text or your Wi-Fi login into a QR code you can 3D print: a plate for a table or a wall, a keychain, or a sign. Design it in your browser in a few minutes, then download an STL, or a multi-colour 3MF that opens in your slicer with every colour on its own filament.
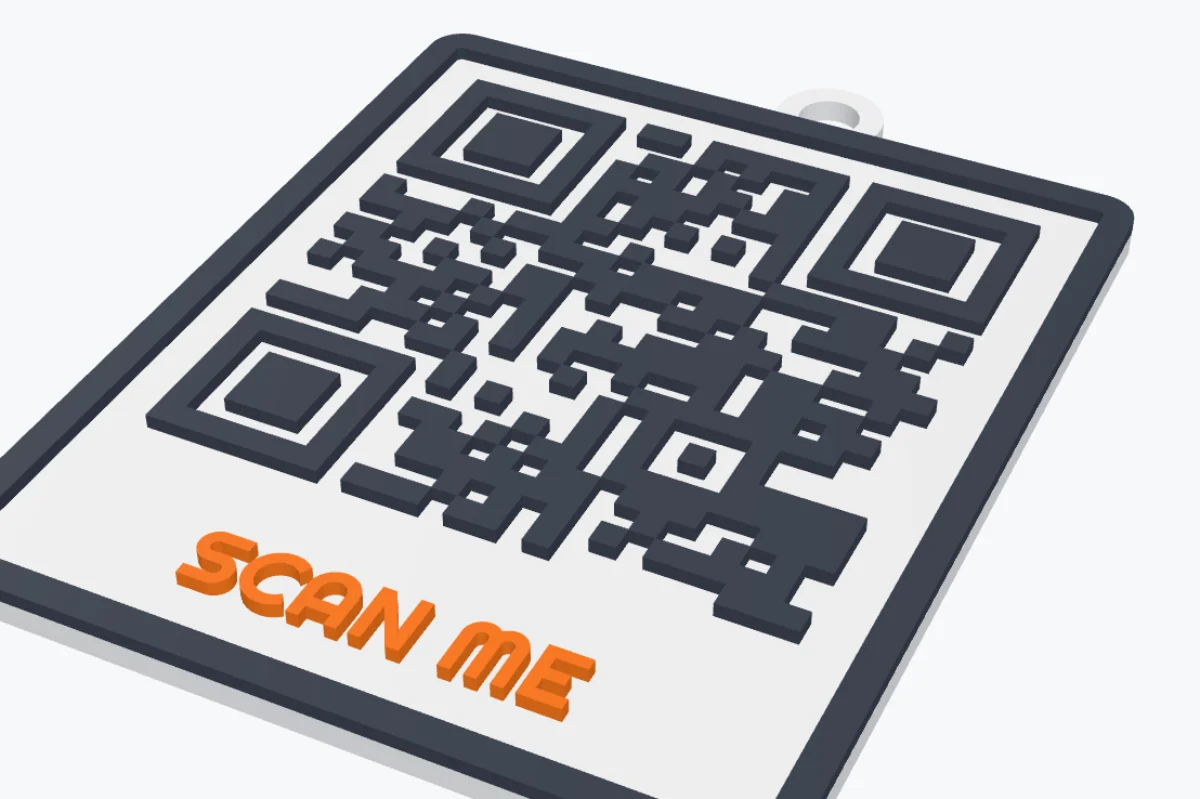
What you can make
- QR code plates and signs for a link, a menu, a review page, a portfolio or a Wi-Fi login.
- QR code keychains with a key ring you can drag anywhere.
- QR codes with your logo in the middle, from an SVG file.
- Eight styles, from classic squares to dots, liquid shapes and a skyline of different heights.
- Raised, flush or engraved codes, with a frame, a label and a coloured background.
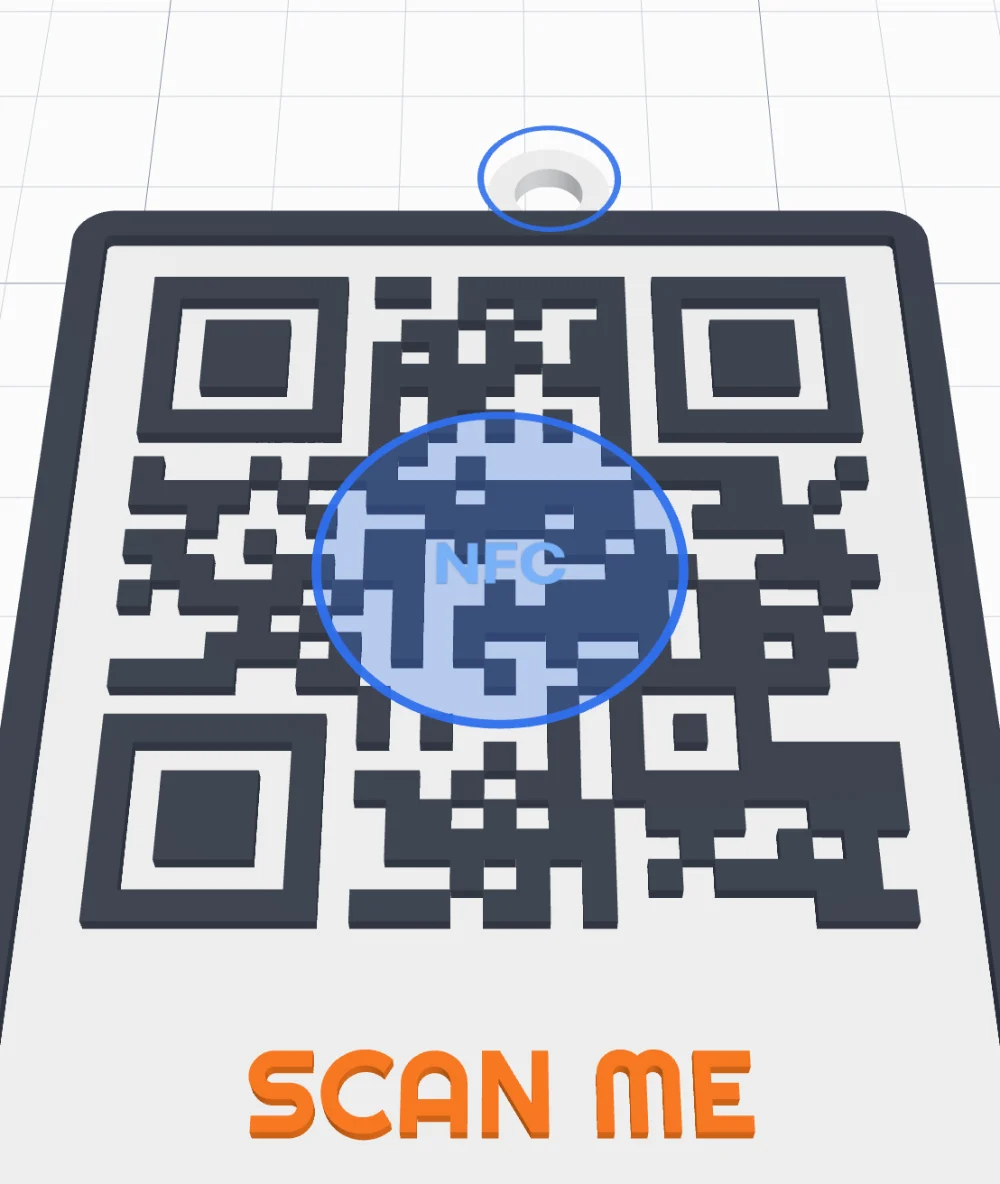
- NFC tags: a pocket for an NFC sticker or coin, so a phone can tap it as well as scan it.
- Single-colour or multi-colour prints: STL for any printer, 3MF with ready-made colour parts for an AMS or other multi-material printer.
Everything runs on your computer: your links and Wi-Fi passwords are never uploaded anywhere.
1Open the QR code generator
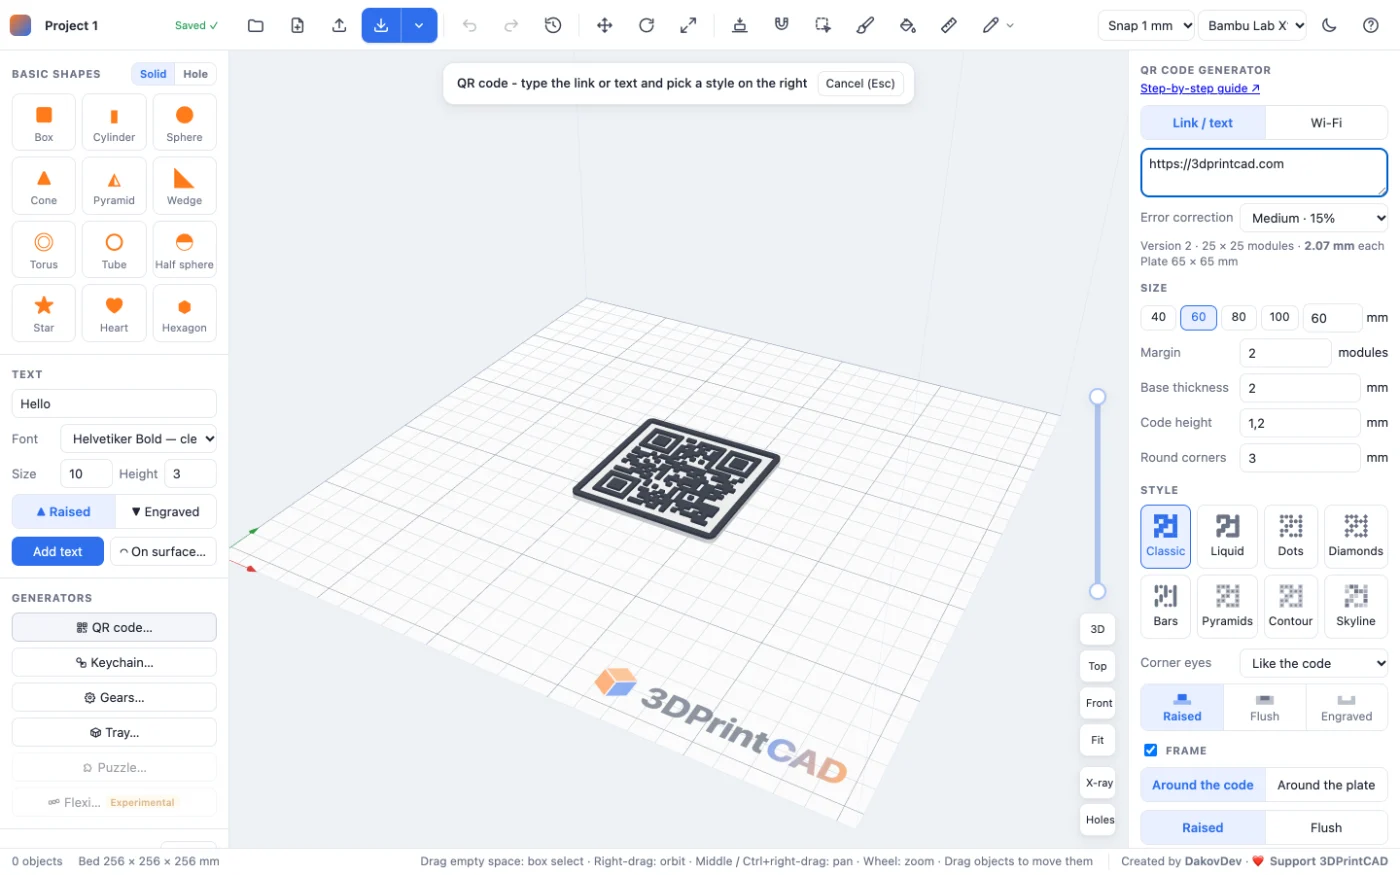
Open the QR code generator: it starts a new project with the generator ready. In the app you can also click QR code… under Generators in the left panel, or pick the QR code example on the start screen.
The settings are on the right; the code is built live in the 3D view while you change them.
2Enter the link, text or Wi-Fi login
Choose what the code holds:
- Link / text: paste a web address (it should start with
https://) or type any text. - Wi-Fi: enter the network name, the password and the security type (WPA, WEP or none). Phones that scan it join the network without typing the password.
Error correction decides how much of the code can be damaged or dirty and still scan:
| Level | Can be damaged | Use it for |
|---|---|---|
| Low | 7% | Very long text, where every module counts |
| Medium (default) | 15% | Most codes |
| High | 25% | Codes outdoors or touched a lot (keychains) |
| Highest | 30% | Rough surfaces, textures, a key ring hole in the code |
Higher error correction adds more modules, so each one gets smaller at the same size.
3Choose the size
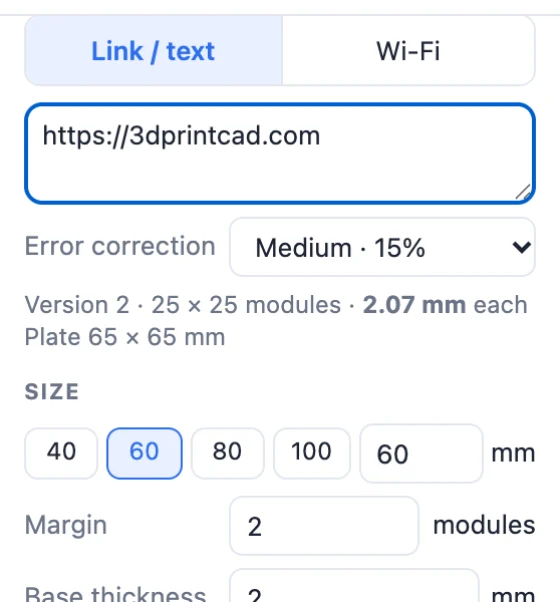
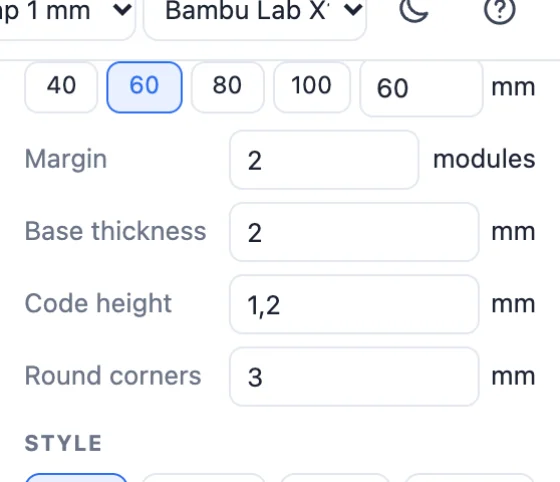
- Size: 40, 60, 80 or 100 mm, or any size you type. This is the code with its margin.
- Margin: the empty border around the code (the "quiet zone"), in modules. Keep at least 2 so phones find the code.
- Base thickness: the plate under the code (2 mm by default).
- Code height: how far the code stands up (or how deep it is cut in).
- Round corners: the corner radius of the plate.
4Pick a style
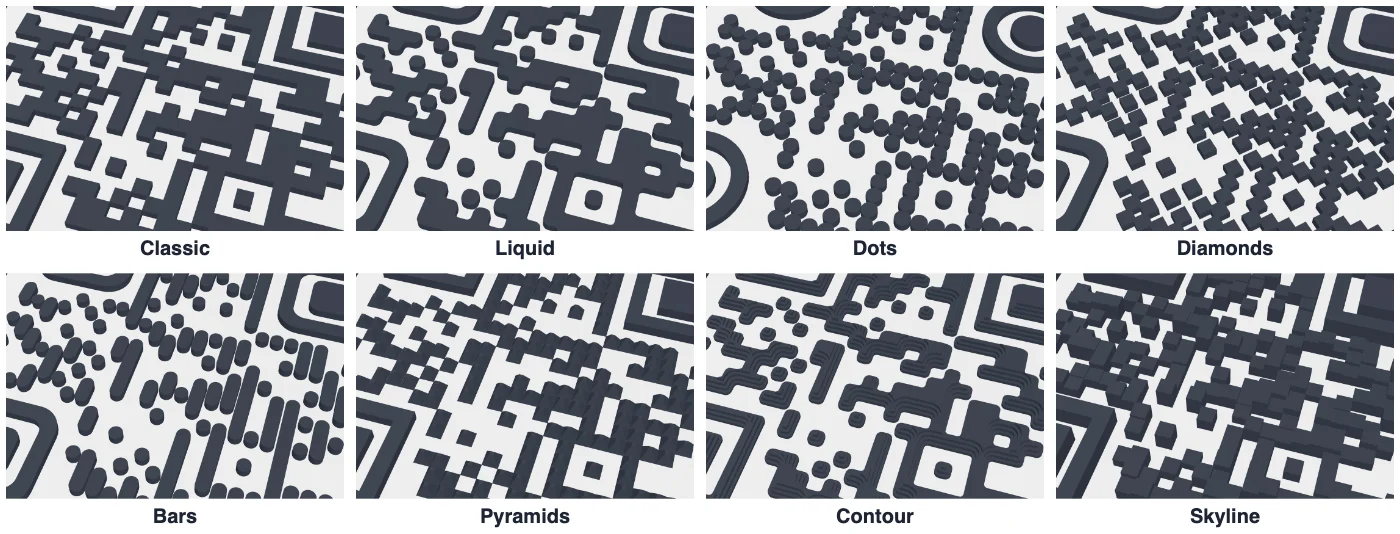
Eight styles change the shape of the modules. Some have extra sliders, such as roundness, dot size or the direction of the bars. Corner eyes (the three big squares) can follow the style or be square, rounded or round.
5Raised, flush or engraved
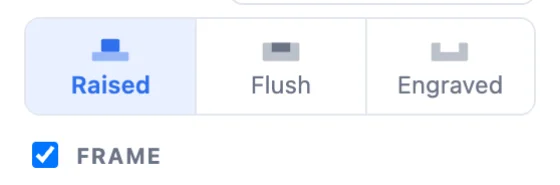
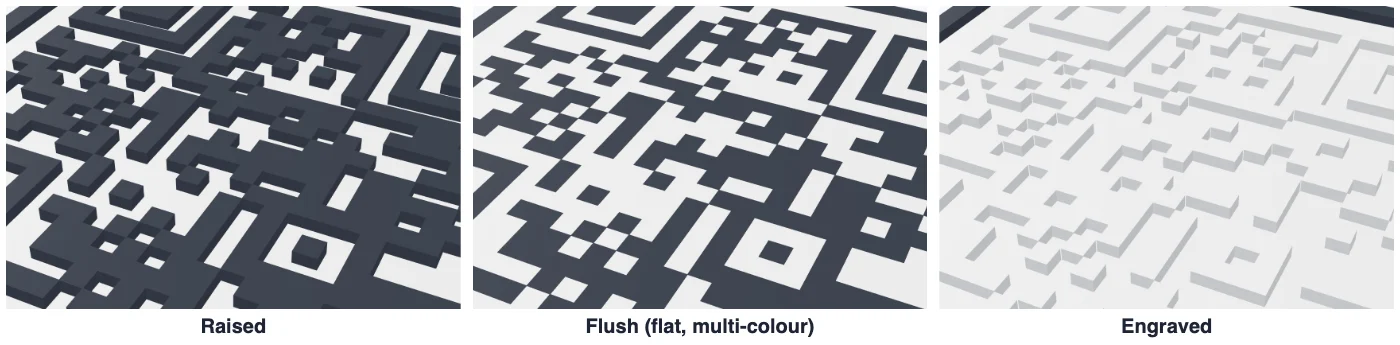
- Raised: the code stands up from the base. Easy to print in one or two colours.
- Flush: a completely flat top. The code is an inlay in its own colour, level with the base, so it needs a multi-colour printer. It looks like a printed sticker and is nice to touch.
- Engraved: the code is cut into the base. With a dark base and a light top layer, or with a filament change, it reads well too.
6Add a frame and a label
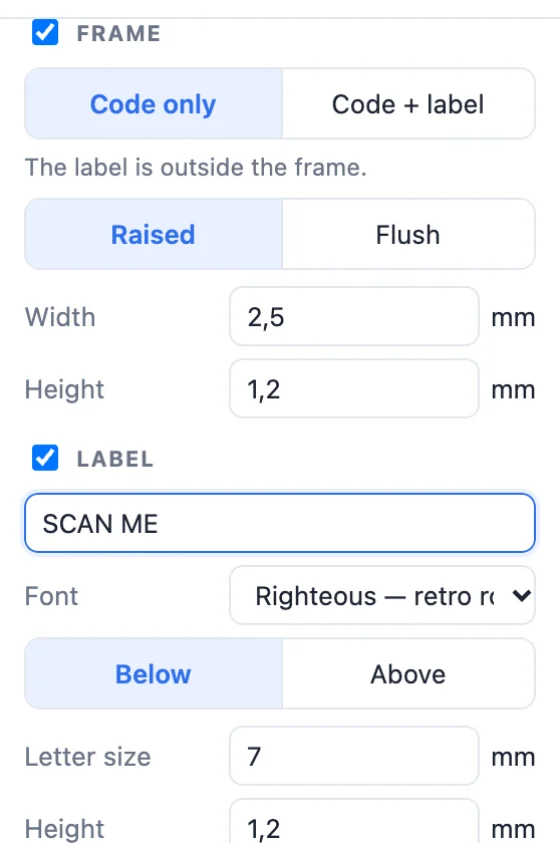
- Frame: a border around the code only, or around the whole plate. It can be raised or flush, and around the plate it can cover the whole edge from top to bottom.
- Label: a line of text such as "SCAN ME", "Wi-Fi" or your name, below or above the code, in any of the 26 fonts (or a font you upload). It can sit on a background strip or a rounded tag in its own colour.
7Key ring, NFC chip and more
- Key ring: a tab outside the plate, or a hole in the plate at the top, the corner, a side or in the label (the plate grows a little so the hole never cuts the code). Drag the blue circle in the view to put it anywhere; it snaps to the centre. Set the hole diameter and the ring wall.
- NFC chip: a pocket for an NFC tag (Ø25, Ø30 or Ø20 sticker, Ø25 coin or your own size). Choose sealed inside: the generator tells you the height at which to pause the print and drop the chip in. Or choose from the back and glue it in later. Drag the NFC marker to place it.
- Texture: a surface pattern on the base or on the code, added when you click Create.
- Logo in the middle: upload an SVG logo for the centre of the code, in its own colour, and turn it with the round knob above it in the view. The QR code is regenerated around the logo: it gets more modules when needed, so the logo never hides more data than error correction can repair. The panel tells you when a logo is too big; about 20-30% of the code's width works well.
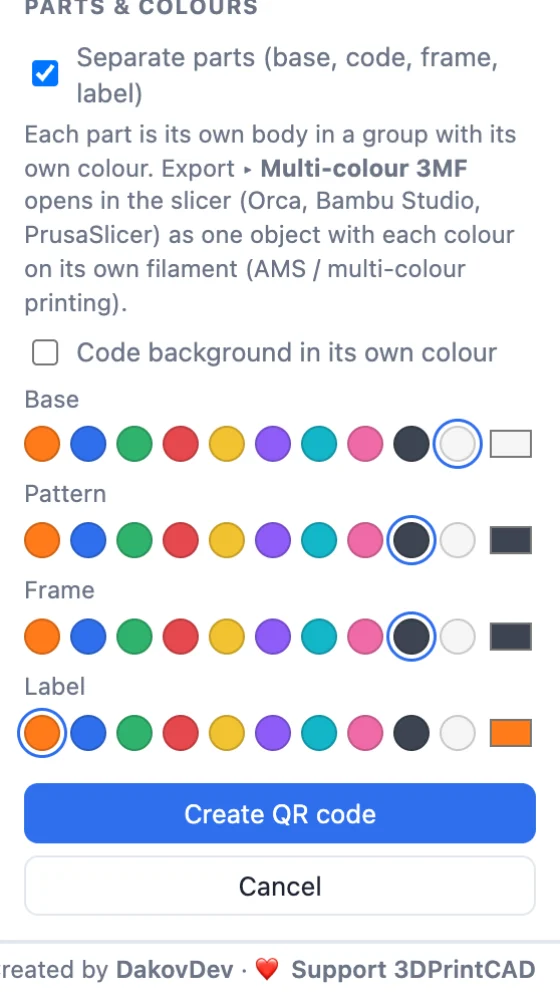
- Code background in its own colour: a square behind the code, for example a white square on a black plate, so a black code still scans.
8Colours and parts
With Separate parts on (the default), the base, the code, the frame, the label and its background are separate parts, each with its own colour. Pick the colours from the swatches or choose any colour. Then click Create QR code.
To change it later, double-click the QR code (or use Edit… in the right panel): all settings come back.
9Export and print
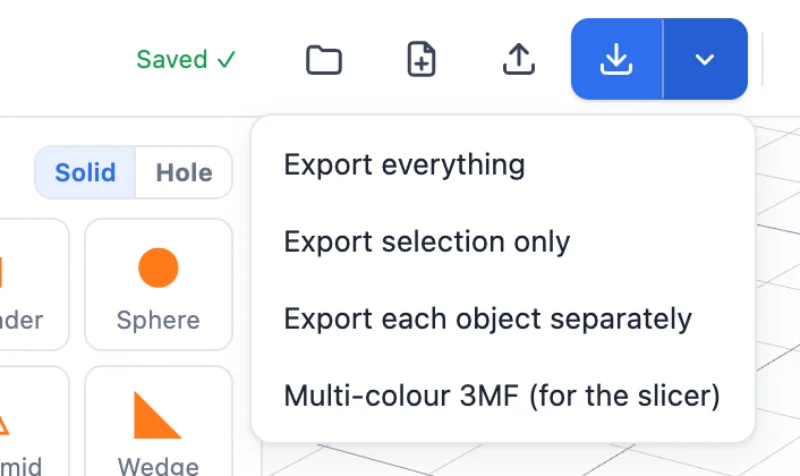
Open the menu next to the Export button:
- Multi-colour 3MF (for the slicer): for an AMS or any multi-material printer. OrcaSlicer, Bambu Studio and PrusaSlicer open it as one object, with every colour already on its own filament. Make sure your slicer has as many filaments as the message after saving lists.
- Export everything or Export selection only: one STL file.
- Export each object separately: one STL per part, if you want to assign the colours yourself.
Printing with one colour at a time
Print a raised code in two colours on any printer: add a filament change (or a pause) in your slicer at the first layer above the base, for example at 2.2 mm for a 2 mm base with 0.2 mm layers. Everything below is the base colour, everything above is the code colour.
Before you print
- Switch the view to Top and scan the screen with your phone. If it scans there, it will scan printed.
- Use 0.2 mm layers (or finer for small codes) and a clean first layer.
- For a sealed NFC chip, pause at the height the generator shows, put the chip in, and resume.
Questions
Do I need an account or to install anything?
No. 3DPrintCAD runs in your browser: there is no account and nothing to install, and your projects are saved in your browser.
Are my links and Wi-Fi passwords uploaded?
No. The code is made on your computer, and nothing you type is sent to a server.
What size should a 3D printed QR code be?
Each module should be at least about 1.2 mm for a 0.4 mm nozzle. For a short link that is about 40 to 60 mm; longer text needs a bigger code. The generator shows the module size while you design.
Can I print it with a single-colour printer?
Yes. Use the raised or engraved style and change the filament at the top of the base. The flush style needs a multi-colour printer.
Why does my printed QR code not scan?
Usually the modules are too small, the colours do not contrast enough, or the margin is too narrow. Make the code bigger, use a dark code on a light background, keep a margin of 2 modules or more, and try a higher error correction.
Can I edit the QR code after creating it?
Yes. Double-click it, or select it and click Edit…. You can also combine it with other shapes, add text or attach it to another model in the editor.
Make your QR code now
In your browser, ready to print in a few minutes.
Open the QR code generatorAlso see: Keychain generator, for name keychains with fonts, SVG icons, key rings and borders.