3DPrintCAD › Guides › Lithophane maker
Lithophane maker: photos that glow
A lithophane is a picture in relief that appears when light shines through it: bright parts are printed thin, dark parts thick. Make flat or shaped panels, curved panels, lamp shades with a stand, globe and moon lamps, night lights, lanterns and colour lithophanes from any photo - in your browser, ready to print.
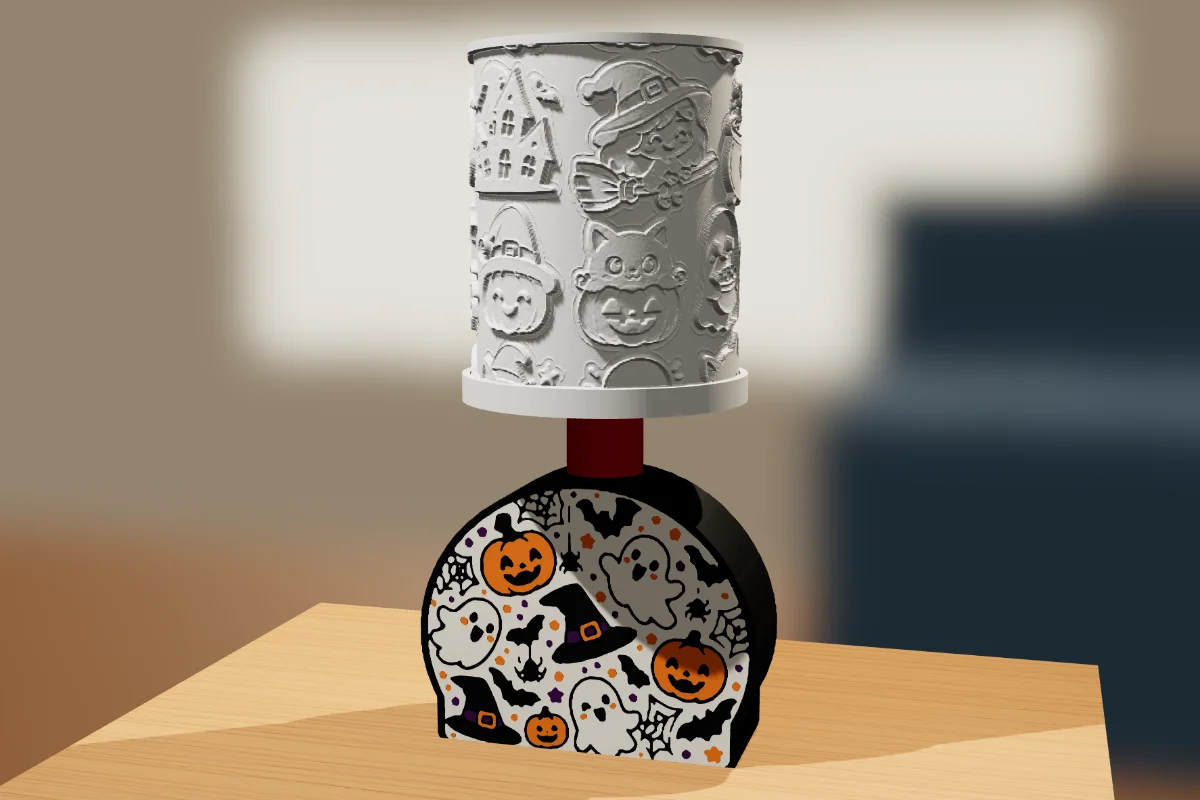
Watch the tutorial
Every option in under five minutes, with subtitles: the photo, the light preview, all the lithophane kinds, the tones, a lamp shade on a stand with a colour sign, and the room preview. Watch on YouTube ↗
1Choose a photo
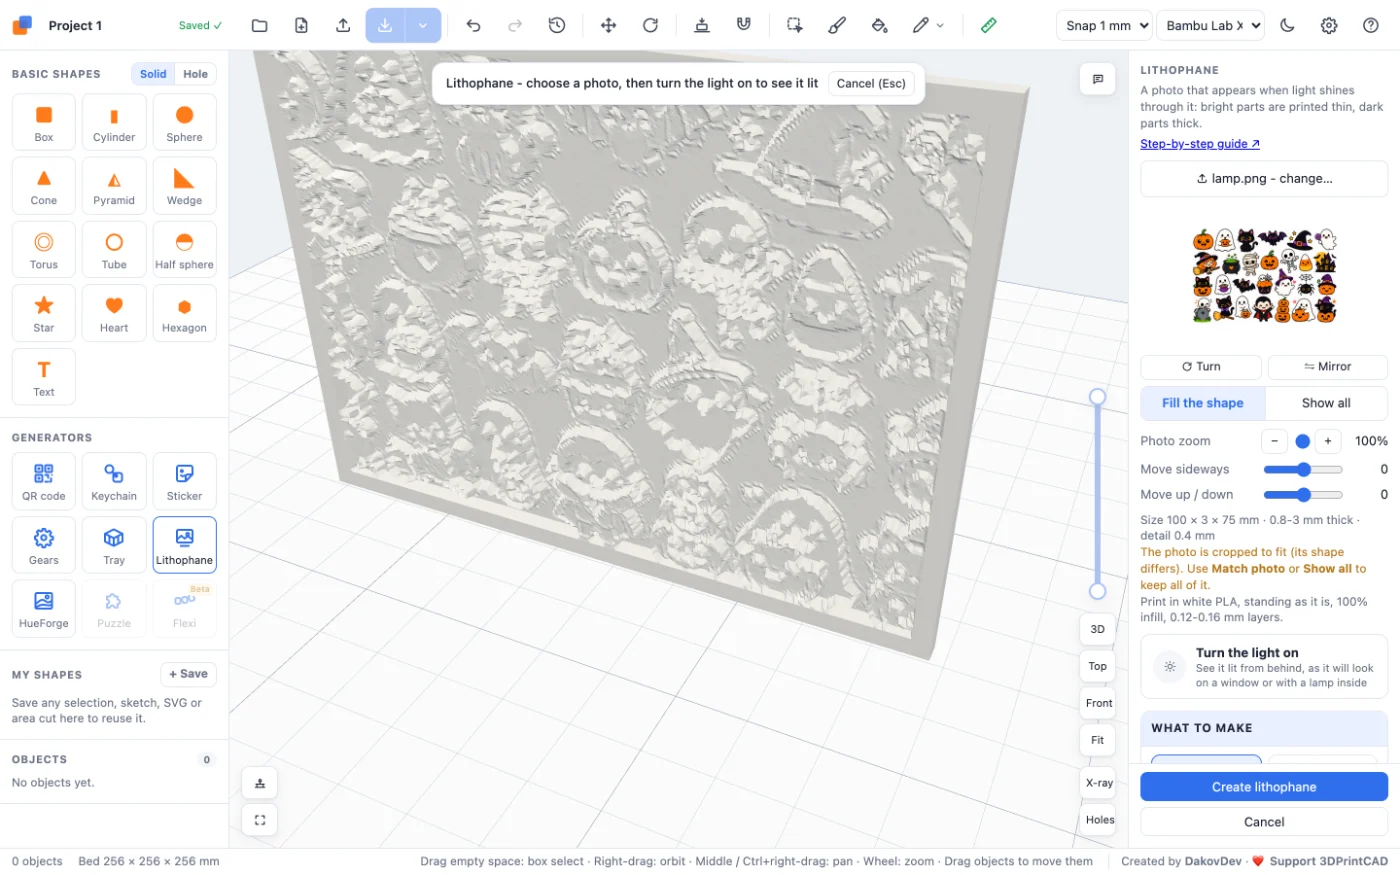
Open the app and click Lithophane under Generators. A window asks for a photo: drop a PNG, JPG or WebP on it, or click to choose one. A flat panel appears at once, and every setting on the right updates it.
- Turn and Mirror the photo.
- Fill the shape crops the photo to fill it; Show all shows the whole photo (the empty space glows).
- Photo zoom, Move sideways and Move up / down choose which part of the photo you see.
2Turn the light on
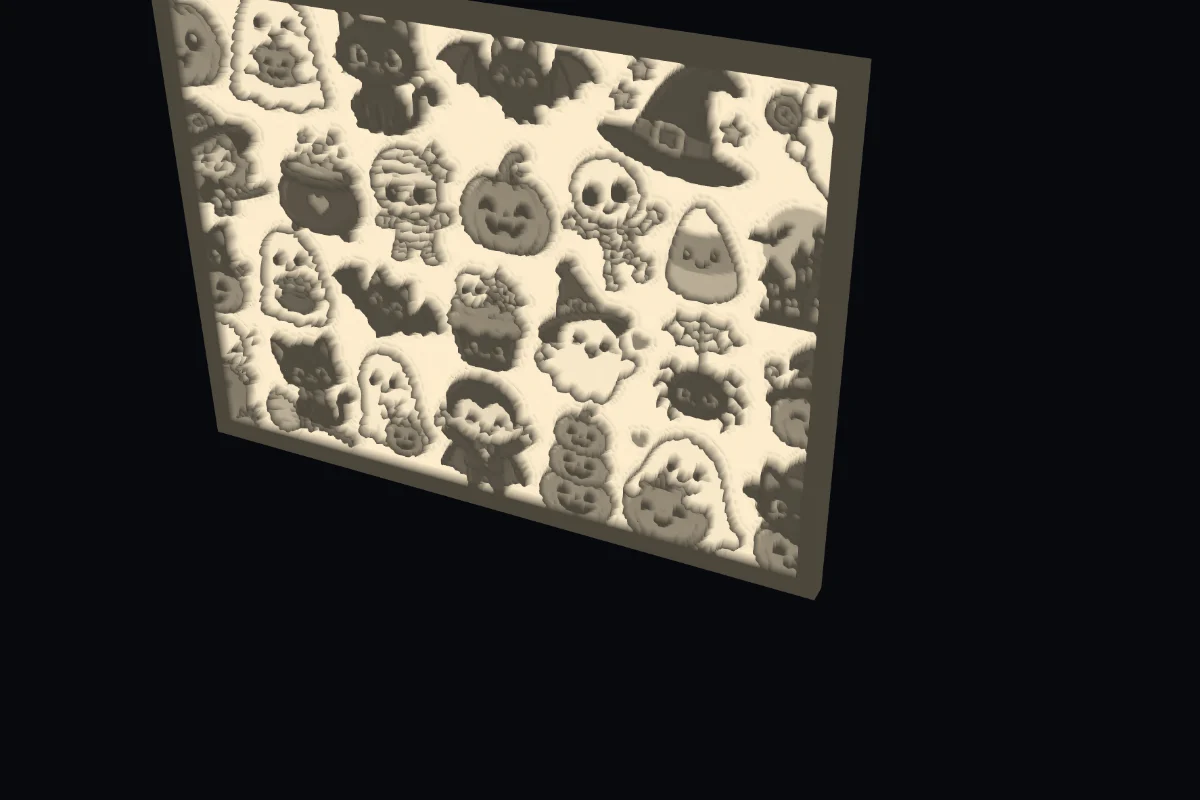
Click Turn the light on to see the lithophane lit from behind, as it will look on a window or with a lamp inside. Click again to go back to the white model.
3What to make
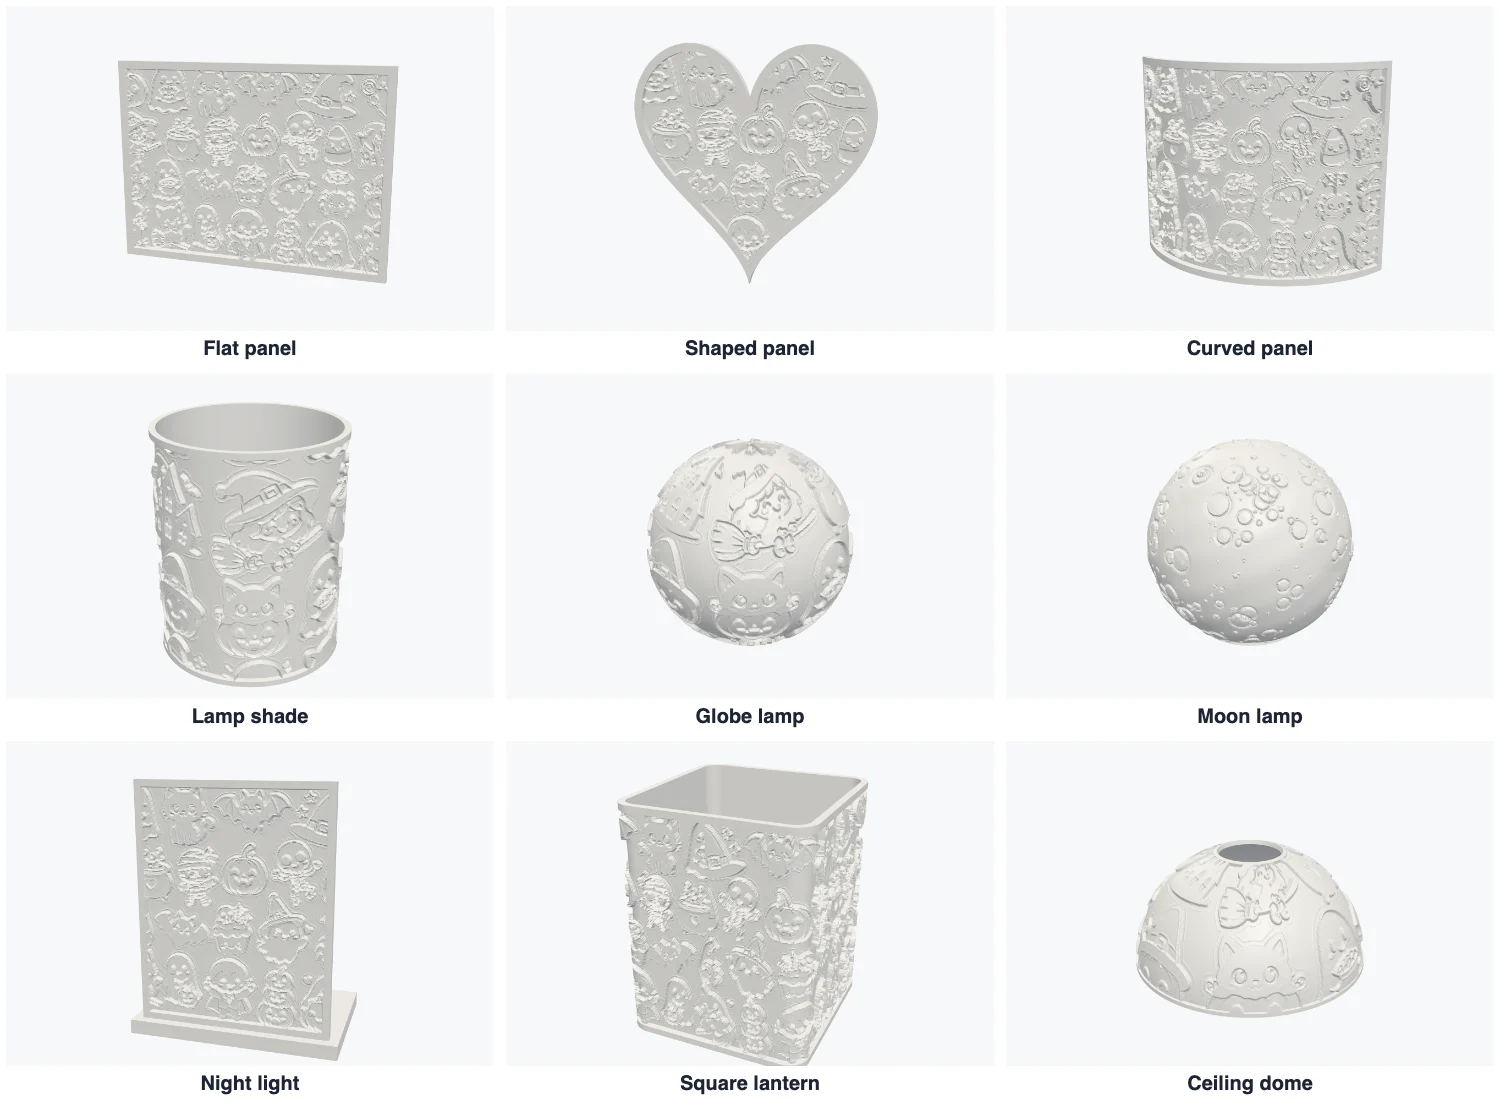
- Flat panel - a picture to stand or hang. Shaped panel - a circle, oval, heart, arch, star or hexagon.
- Curved panel - bends round a candle-style LED; How curved sets the angle.
- Lamp shade - 360° all round, straight or a cone (top and bottom diameter).
- Globe lamp - a glowing sphere with an opening at the bottom for the light. Moon lamp - craters, dark seas and a crater count built in (Another moon for a new one), or your own photo.
- Night light - a panel on a stand with a ring behind it for an LED tea light.
- Square lantern - four glowing sides, the same photo on each or one photo round it.
- Ceiling dome - a shade for a bulb, with a hole at the top for the bulb holder.
- Colour photo - the photo's main colours printed as a thin layer under the white lithophane, one filament per colour.
- Layer painting - front-lit: the relief is cut into bands of filament colours. For HueForge-style pictures there is a HueForge generator of its own.
4Size and border
Set the Width and Height (or the diameter for round types). Match photo proportions sets the height so the whole photo fits without cropping. Border adds a solid frame round the picture (top and bottom rims on a lamp). Flat and shaped panels print Standing (best quality: the layers follow the picture) or Lying flat (easier).
5Thickness, tones and detail
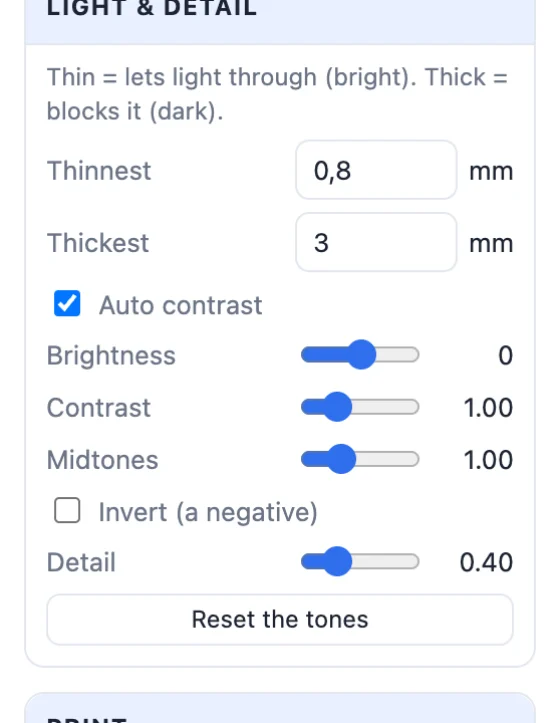
- Thinnest and Thickest - the brightest and the darkest parts. 0.8 and 3 mm suit white PLA.
- Auto contrast stretches the photo's tones from black to white - most photos look better with it.
- Brightness, Contrast and Midtones fine-tune the tones; Invert makes a negative; Reset the tones starts again.
- Detail is the distance between samples: smaller is finer, with a bigger file.
6A lamp with a base
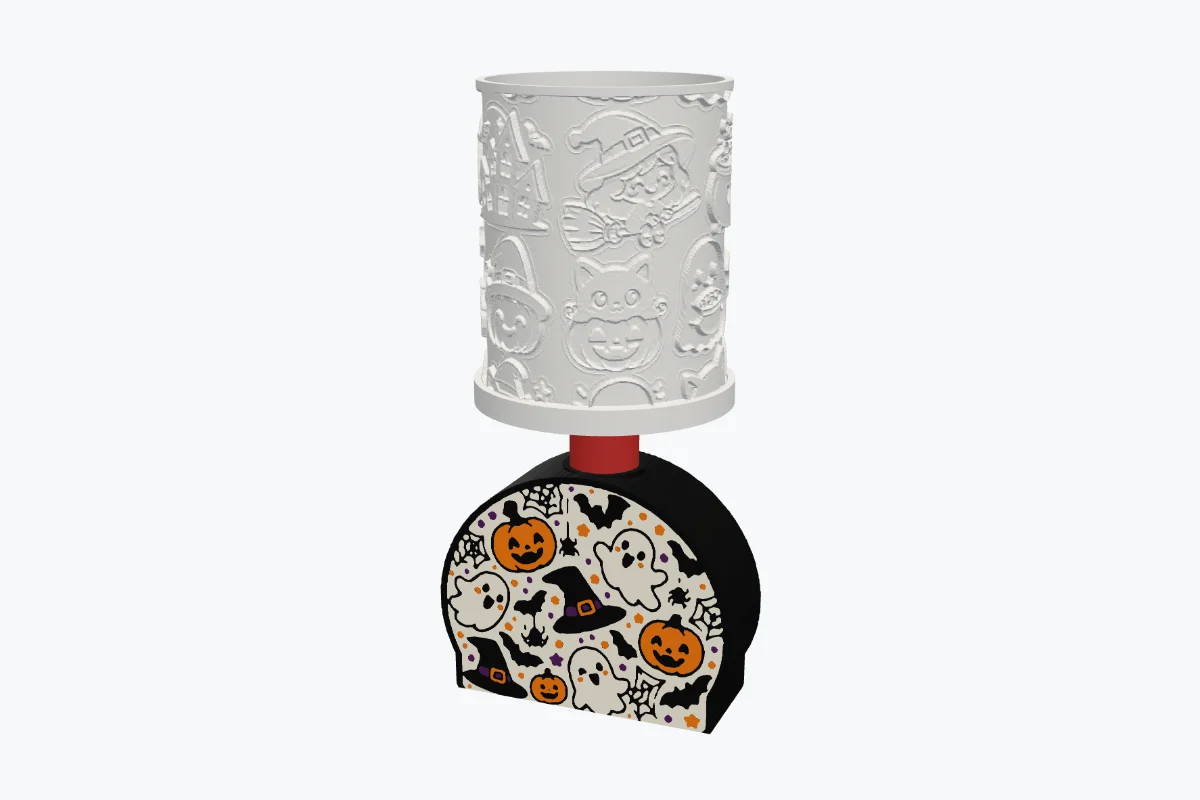
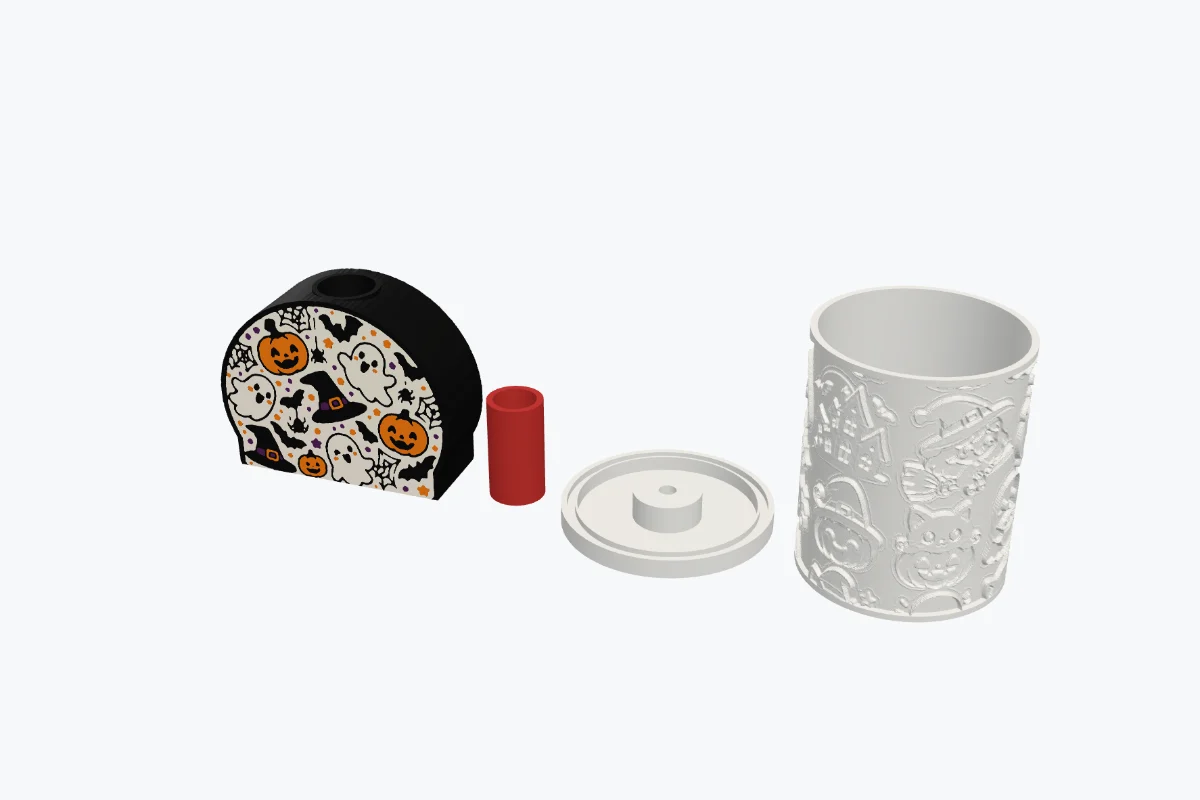
Choose Lamp shade, set its size, and tick Lamp base. A Round foot is a simple base the shade sits in, with room for an LED and a cable notch. A Stand is three parts that plug together and print without supports:
- The body - a Sign, a Cube, a Cylinder or a Sphere. Give the sign your own picture: it is printed in its colours (Colours sets how many). Whole sign takes the picture's shape; On the sign puts it on a plain arch, rounded or oval sign, where you drag, resize and turn it in the view. Set the sign's width, depth and a flat bottom.
- The neck - its height and diameter; the cable runs through it.
- The lamp holder - a Cup with room for an LED puck, a Plate, a Tea light pocket or an Open ring round a bulb holder (with a hole for its M10 thread).
- Fit - the gap per side where the parts plug together: 0.2-0.3 mm suits most printers.
- A cable hole, the back of the sign (plain, the image, or mirrored), sides in their own colour, a base plate underneath, texts and an SVG logo on the front, and a colour for each part.
- Lay the parts out for printing puts each part apart, standing the way it prints.
7Create and preview
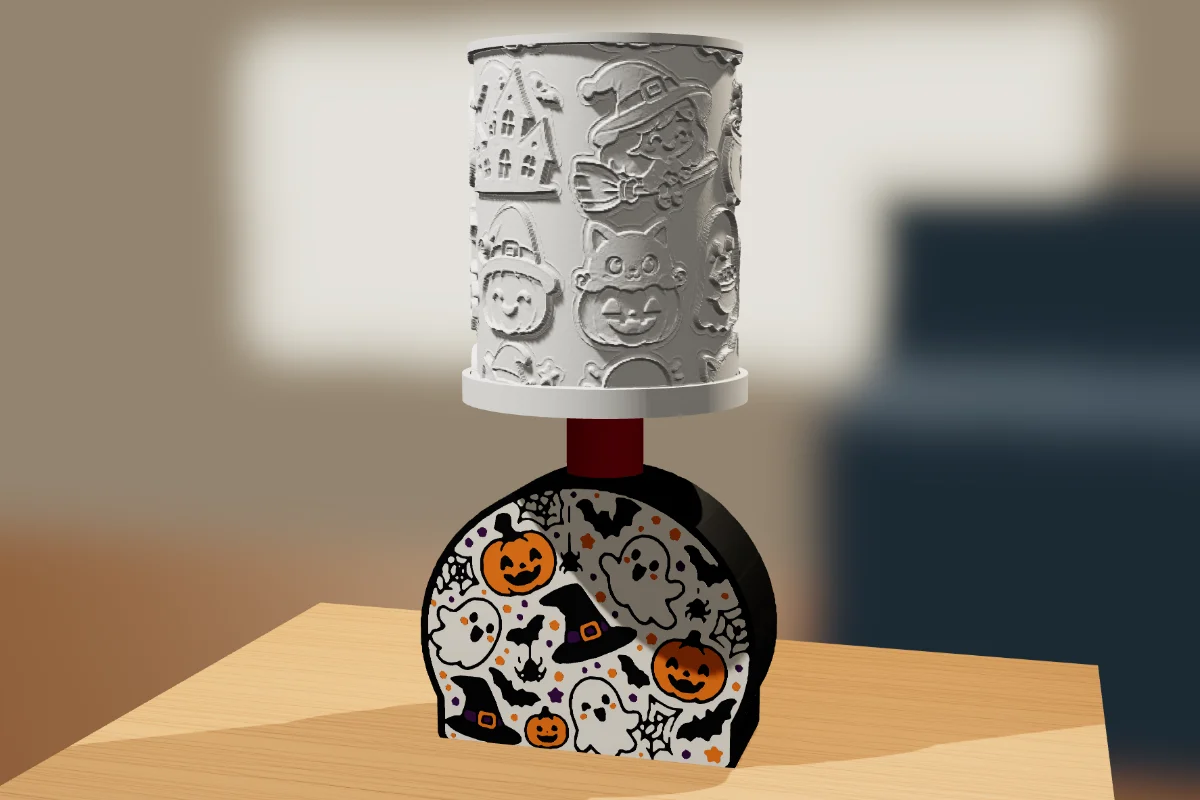
Click Create lithophane. Then click Preview (bottom left of the view) to see it in a room, on a wooden table lit by four lamps. The small table in the panel switches each lamp on or off; drag to look around and use the wheel to zoom. Esc or Close goes back to editing. To change the lithophane later, double-click it.
8Print it
- Print the lithophane in white PLA, 100% infill, 0.12-0.16 mm layers, standing as it lies in the app.
- Use Export STL, or Multi-colour 3MF for the colour sign and the parts in their own filaments.
- Light it with an LED - an LED puck, tea light, strip or bulb. Never a candle.
Questions
What are the best settings to print a lithophane?
White PLA, 100% infill, 0.12-0.16 mm layers, printed standing up as it lies in the app. A thinnest part of 0.8 mm and a thickest of 3 mm suit white PLA.
Which photos make good lithophanes?
Photos with clear light and dark areas, faces close up and simple backgrounds. Auto contrast stretches the tones; brightness, contrast and midtones fine-tune them. Turn the light on in the app to see how it will look.
What light should I use in a lithophane lamp?
An LED: an LED puck or tea light, an LED strip or an LED bulb. Never a candle - the plastic softens and burns. The lamp holder can take an LED puck, a tea light or a standard E14 / E27 bulb holder.
Can a lithophane have colours?
Yes. Colour photo prints the photo's main colours as a thin layer under the white lithophane, one filament per colour. The lamp base's sign is printed in the colours of its picture.
Can I change the lithophane after creating it?
Yes. Double-click it (or select it and click Edit generator) and the generator opens with its settings.
Make your lithophane now
Open the app, click Lithophane and choose a photo.
Make a lithophane nowAlso see: Image to 3D sticker, Tray generator, Gear generator and Keychain generator.