3DPrintCAD › Guides › Resize an STL file
How to resize an STL file online
Need a model bigger, smaller, thinner or just a few millimetres off so it fits? Open the STL in 3DPrintCAD, type the size you want in millimetres - or a percentage - and export a new STL for your slicer. It takes under a minute, and the file never leaves your computer.
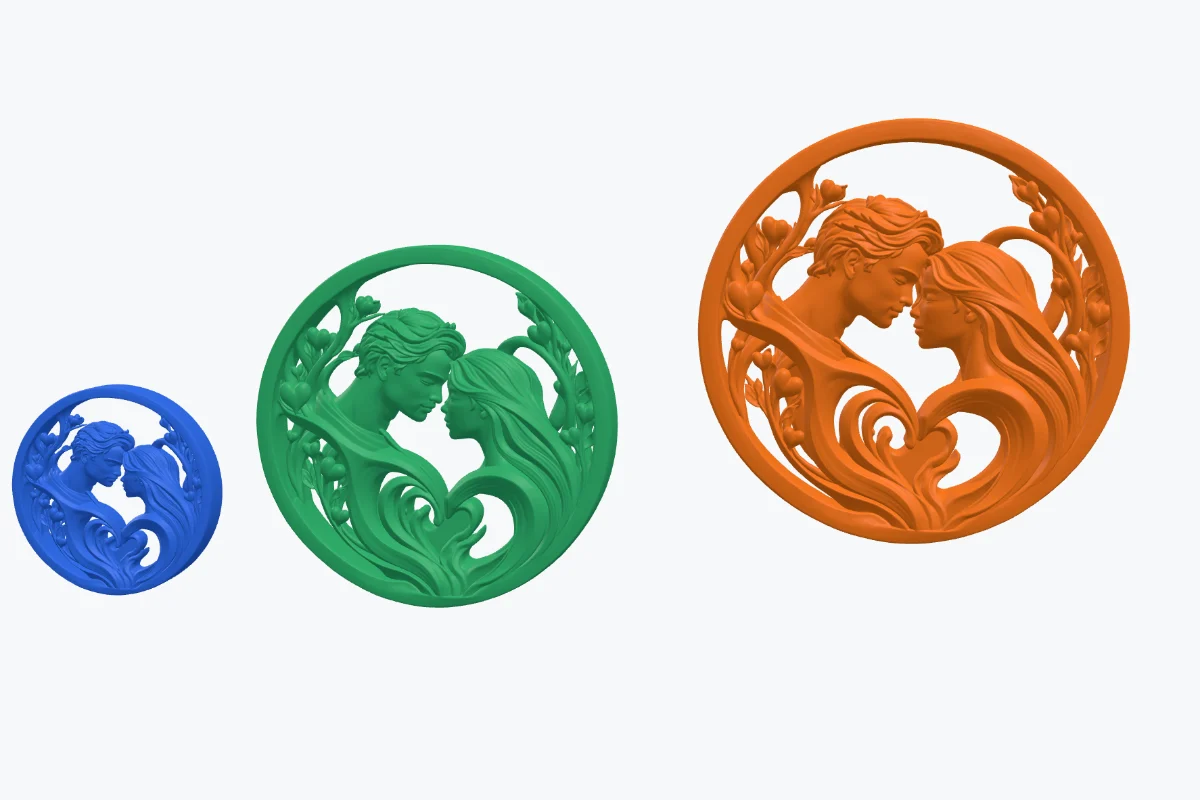
The short version
- Click Import and choose your STL (or drop it on the bed).
- In the Size card, click the chain button to keep the proportions.
- Type the new width, depth or height in mm and press Enter - or pick a percentage.
- Click Export STL.
1Import the STL and read its size
Open 3dprintcad.com and start a new project. Click Import in the toolbar and choose your .stl file (a .3mf works too), or simply drag the file onto the bed. Even large files with a million triangles open in seconds.
The model is selected, and its size shows in two places: the bar at the bottom of the window (size_test - 100 × 16.91 × 100 mm) and the Size card on the right. If it is larger than your printer's bed, a message tells you right away.
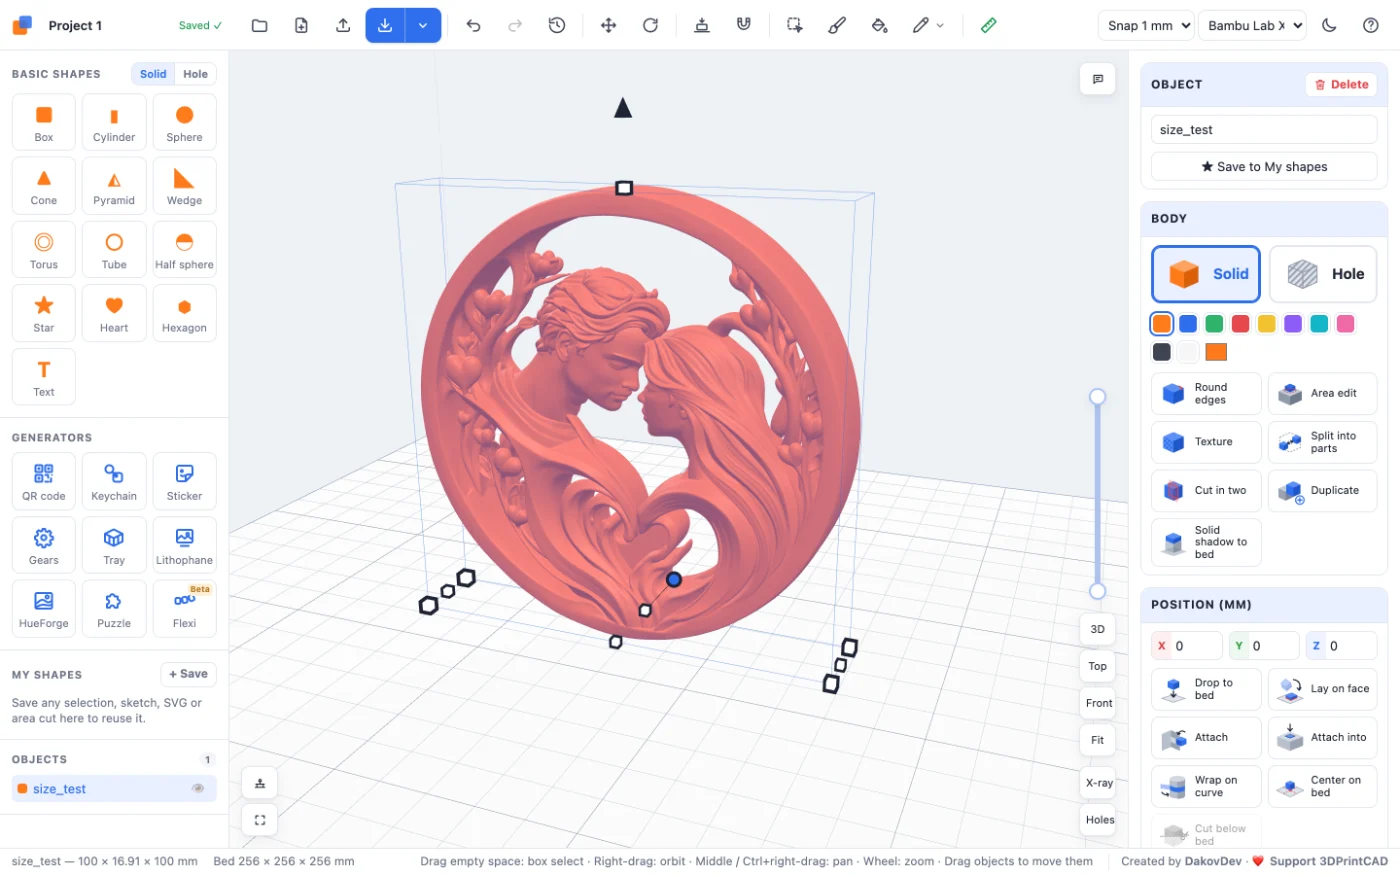
2Resize to an exact size
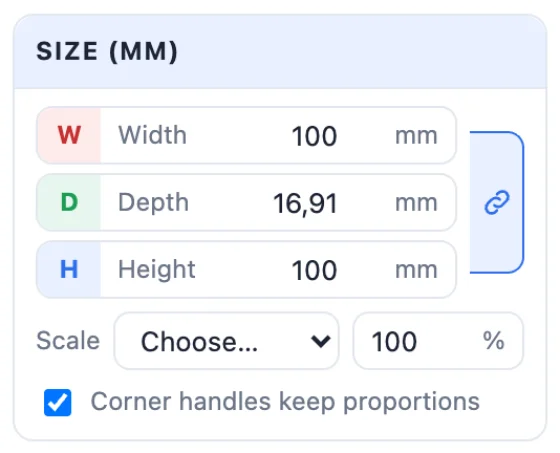
The Size card has three fields, all in millimetres:
- W - Width: left to right (the printer's X).
- D - Depth: front to back (the printer's Y).
- H - Height: bottom to top (the printer's Z).
Click the chain button beside them so it turns blue: the proportions are now locked. Type a new value in any field and press Enter - the other two follow. Set the height to 60 mm, for example, and a 100 × 16.91 × 100 mm model becomes 60 × 10.15 × 60 mm.
3Scale by percent (and fix inch models)
Under the sizes, the Scale list has the common steps - 25, 50, 75, 90, 110, 125, 150, 200 and 300 %. For anything else, type a percentage in the field next to it and press Enter. Percent scaling always keeps the proportions.
Model came in tiny? An STL file has no units, and slicers read its numbers as millimetres. A model drawn in inches is then 25.4 times too small - scale it by 2540 %. One drawn in centimetres needs 1000 %.
4Change one side only
Click the chain again to unlock it. Now each field changes only its own side: make a relief thinner by typing a smaller depth, a box taller by changing only the height, or a part a little wider so it fits a gap.
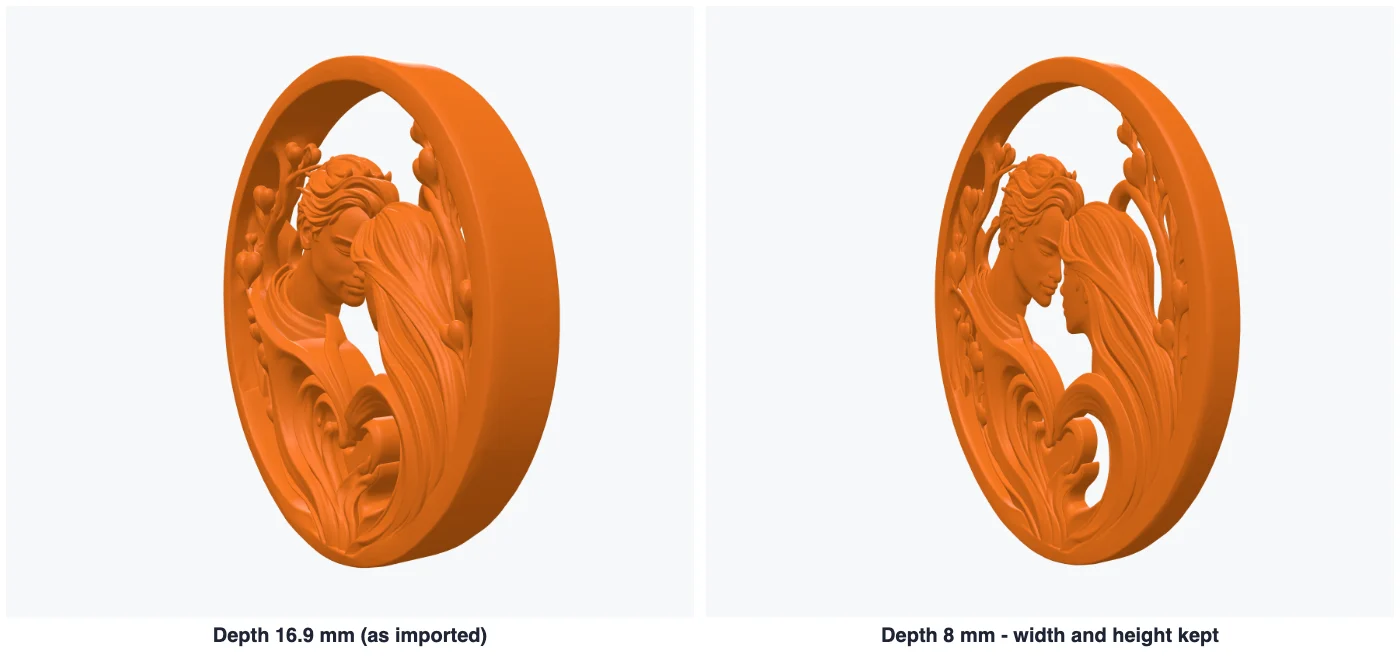
When the model floats above the bed, Height grows chooses whether a new height grows up (the bottom stays) or down (the top stays).
5Resize with the handles
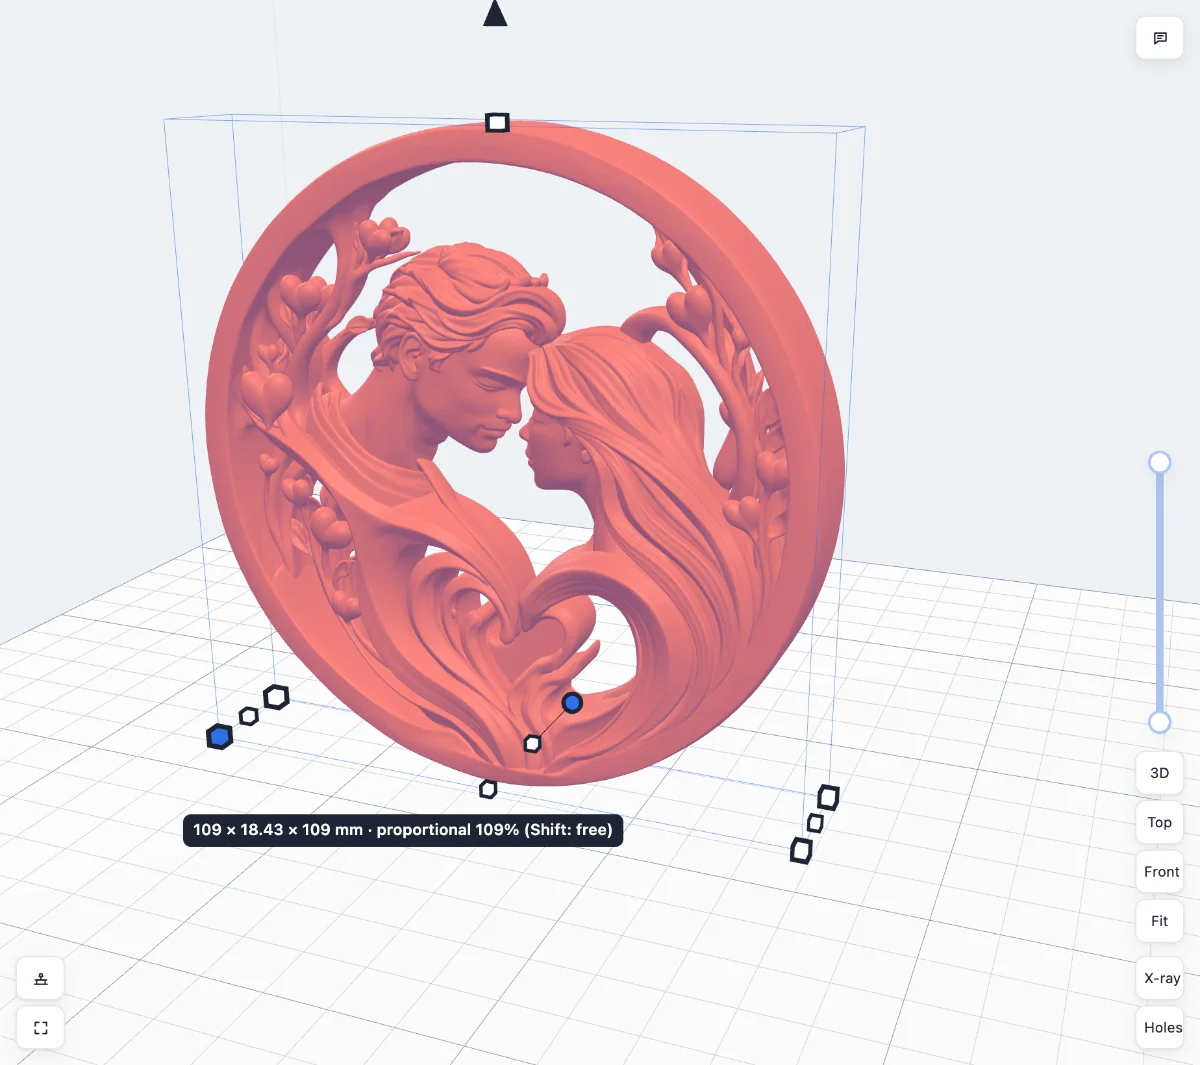
A selected body shows small handles in the 3D view. Drag them for a quick resize; a label shows the new size while you drag.
- Corner handles (on the bed) scale the whole model evenly. Hold Shift to stretch only the width and depth. Untick Corner handles keep proportions to swap the two.
- Edge handles (in the middle of each side) stretch one side; Shift keeps the proportions.
- The top handle changes only the height.
Sizes snap to the Snap step in the toolbar (1 mm by default). For exact values, type them in the Size card.
Changed your mind? Undo (Ctrl+Z / ⌘Z) steps back one change, and the History button lists every change so you can jump back to any of them.
6Make it fit your printer
Choose your printer in the menu at the top right: the bed in the view and its size in the bottom bar change to match. If a model is too big even at the size you need, cut it with Cut in two (in the Body card) - with optional pegs or dowels so the halves line up when you glue them.
Very large files print the same but slow down slicers. Reduce file size in the Mesh health card keeps the shape with far fewer triangles (see how to reduce STL file size); it needs a closed (watertight) mesh, so for an open mesh run Make solid first.
7Export the resized STL
Click Export STL (Ctrl+E): with the model selected you get just that model, with nothing selected everything on the bed. The menu next to it also saves a 3MF. Open the file in your slicer - it has exactly the size you set.
Tips
- Holes scale too: at 200 % a 3 mm screw hole becomes 6 mm. Check them with Measure (key M) before you print parts that must fit hardware.
- Thin walls get thinner when you scale down. Below about 0.8 mm (two lines of a 0.4 mm nozzle) they may not print.
- The model stays in your project, kept in your browser - come back later and resize it again.
Questions
Does resizing an STL lower its quality?
No. Resizing moves every point of the mesh by the same factor, so the shape and its detail stay exactly as they were - only the size changes. Very small prints can still lose fine detail on the printer itself.
Why is my STL tiny (or huge) after importing?
An STL file has no units. Slicers and 3DPrintCAD read its numbers as millimetres, so a model made in inches comes in 25.4 times too small and one made in centimetres 10 times too small. Scale it by 2540 % or 1000 %.
How do I resize without keeping the proportions?
Unlock the chain button in the Size card, then type a new width, depth or height: only that side changes. With the handles, an edge handle stretches one side, and a corner handle with Shift held stretches width and depth only.
Is my STL file uploaded anywhere?
No. 3DPrintCAD runs entirely in your browser: the file is opened on your computer and your projects are kept in your browser.
Will holes for screws and magnets still fit?
Holes scale with the model, so a 3 mm screw hole becomes a 6 mm hole at 200 %. If the model must fit hardware, measure the holes with the Measure tool after resizing.
Resize your STL now
Import it, type the size, export. Nothing to install.
Open 3DPrintCADAlso see: How to reduce STL file size, Jigsaw puzzle generator to cut a model into puzzle pieces, Image to 3D sticker, Keychain generator and QR code STL generator.