3DPrintCAD › Guides › Flexi generator
Flexi generator: make any model bendable
Flexi cuts a flat model into slices and joins them with hinges that print in place - one print, no assembly, and it bends. Choose from seven hinge types, place the cuts in a row or along a path, and even design your very own hinge in the Hinge workbench.
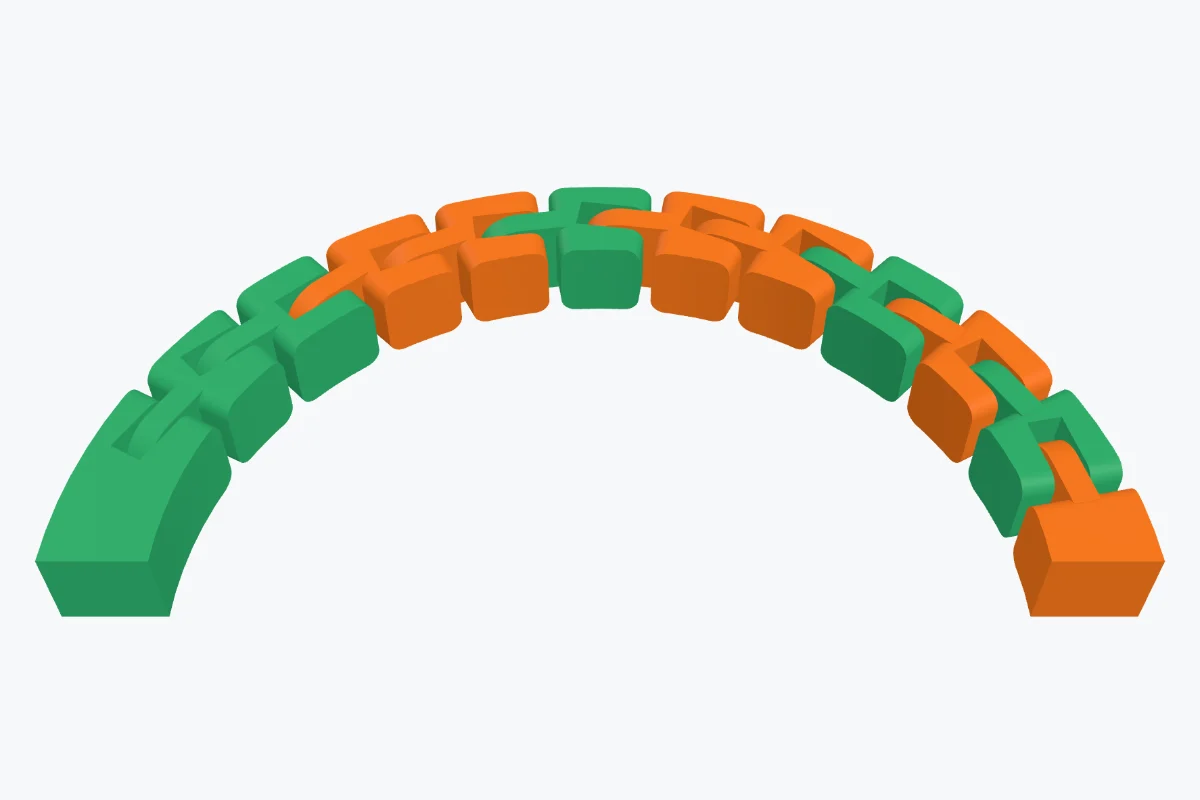
Watch the full tutorial
Every option in under eight minutes, with subtitles: cuts, the seven hinge types, cuts along a path, designing your own hinge in the Hinge workbench and a bendable sticker keychain. Watch on YouTube ↗
What you can make
- Flexi toys and keychains from any flat body: bars, letters, animals, stickers, imported STL files.
- Bendable bands along a curve - draw a path and the cuts follow it.
- Multi-colour flexis: stickers and coloured models keep their colours in every slice.
- Your own hinge, built from shapes and holes, tested and saved for every flexi you make.
1Open Flexi
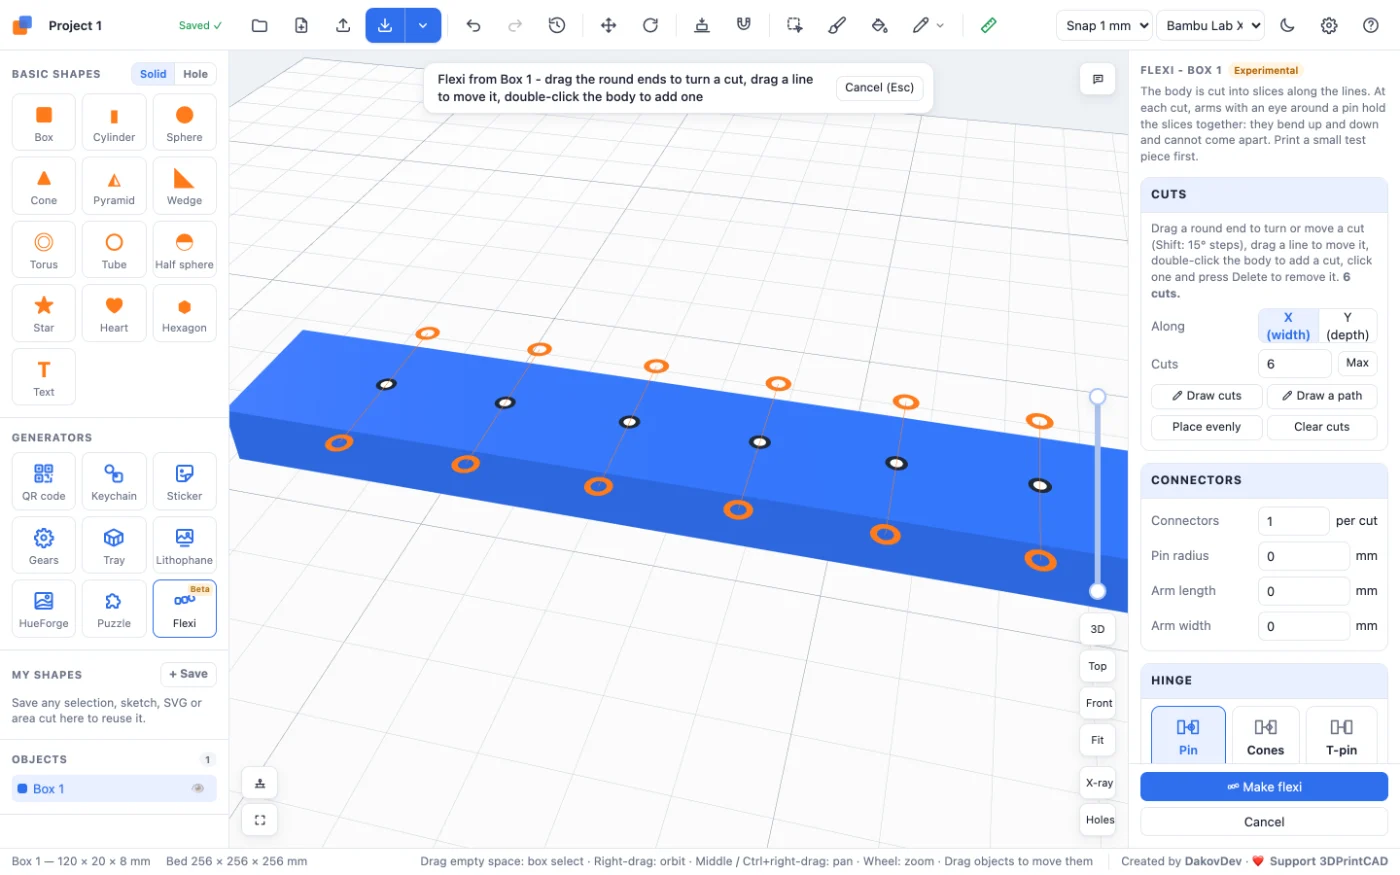
Start with a solid body at least about 5 mm thick: a Box from Basic shapes (here 120 × 20 × 8 mm), a sticker, a keychain or an imported STL. Click Flexi under Generators. With one body it starts right away; with several, click the one you want. The red lines are the cuts: the body is sliced along them, and every cut gets hinges.
2The cuts
- Along X (width) or Y (depth), and Cuts: how many, spread evenly.
- Max finds the most cuts that all still get a working hinge.
- In the view: drag a round end to turn a cut (Shift: 15° steps), drag the line to move it, double-click the body to add one.
- Click a cut to select it: give it its own number of connectors, drag its connectors (the ringed dots) along it, or remove it (or press Delete).
- Draw cuts: click where a cut starts and where it ends - it is extended across the body. Right-click when you are done.
- Place evenly puts the cuts back in a row; Clear cuts removes them all.
3Curved bodies: draw a path
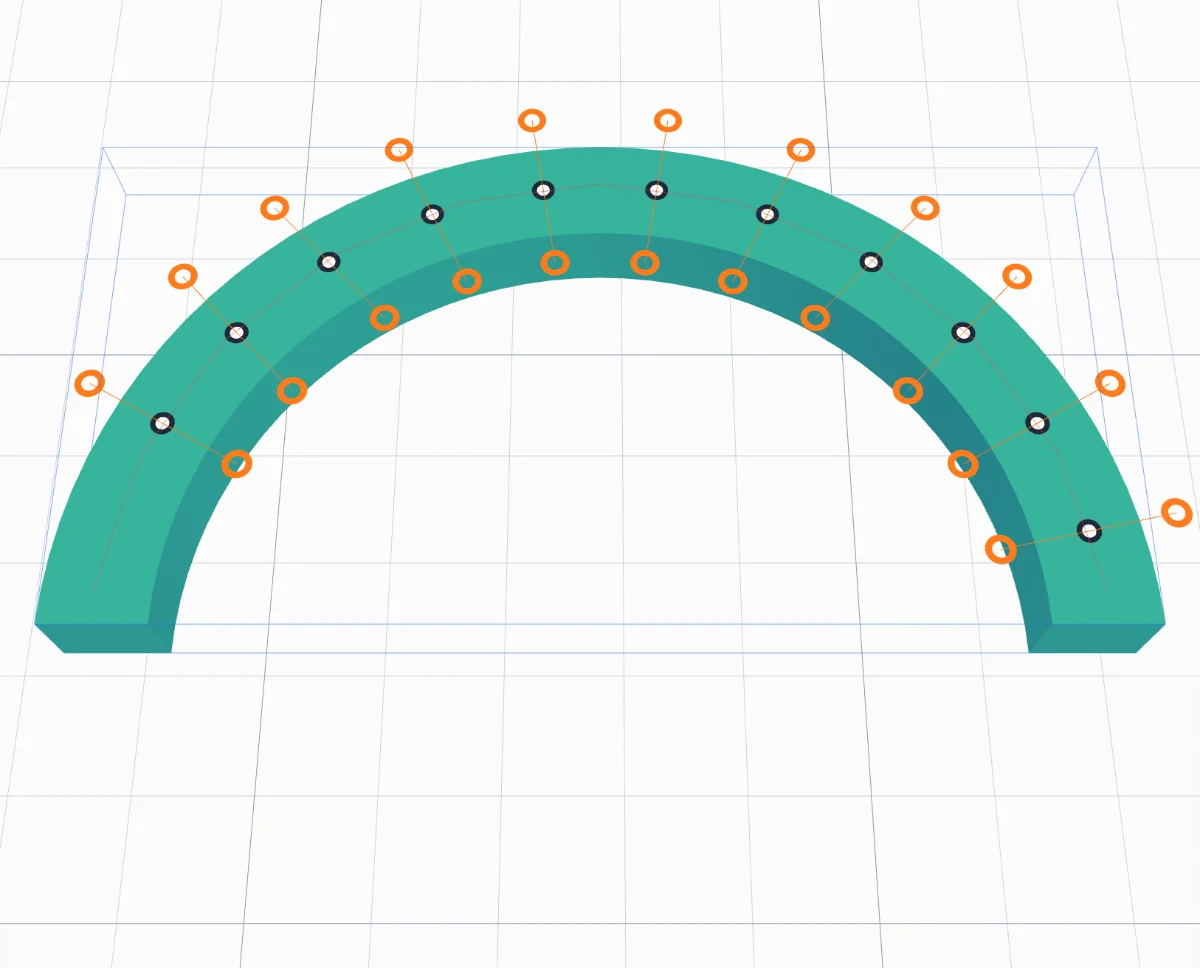
For a curved body, click Draw a path and click points along it; right-click (or double-click, or Enter) to finish. The cuts are placed across the path, evenly spread - set how many with Cuts on path, or press Max.
A cut line runs on across the whole body, so on a closed ring each cut would also cross the far side. Use an open curve - here a ring with half of it cut away by a Hole box and Union.
4Connectors
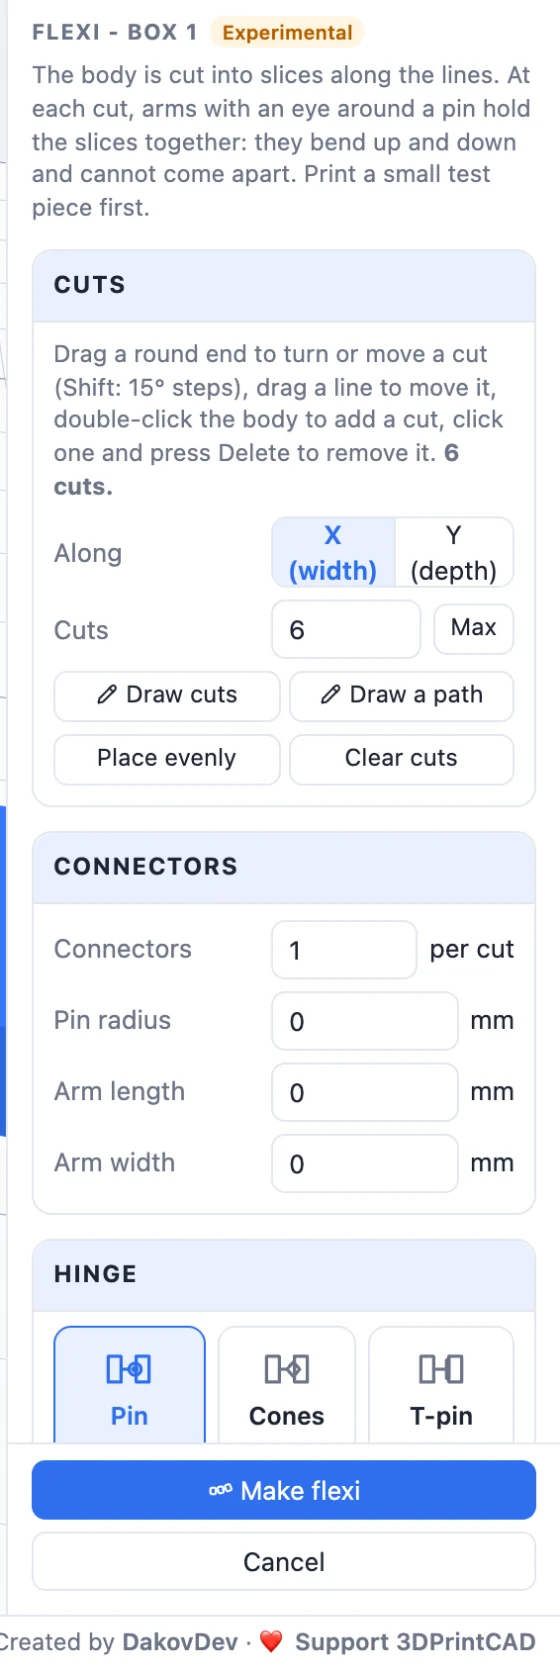
- Connectors: how many hinges on each cut, spread along it. A selected cut can have its own count.
- Pin radius, Arm length and Arm width: 0 means automatic, sized from the body's thickness and the room to the next cut.
5The hinge types
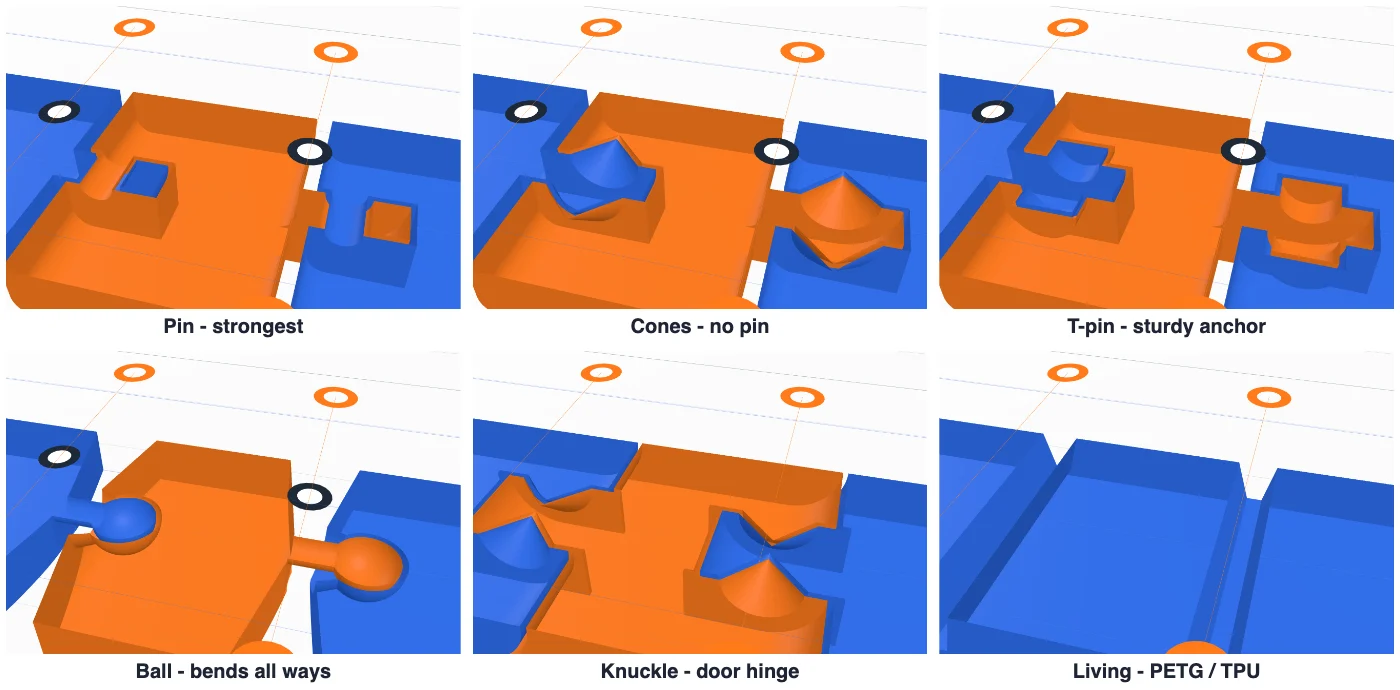
- Pin - a round pin through the arm's eye. The strongest all-round choice.
- Cones - no pin: a 45° cone on each side of the arm in matching sockets; prints without supports.
- T-pin - a crossbar through the arm into teardrop pockets: a sturdy anchor.
- Ball - a ball on a neck in a socket: bends up and down and a little to the sides.
- Knuckle - like a door hinge: knuckles of both slices take turns across the whole cut.
- Living - no parts: a thin flexible web (Web, 0.6 mm) holds the slices. Print it in PETG, TPU or PP.
- Custom - your own hinge (see Design your own hinge).
For Pin and Cones, Bend chooses Up and down or Side to side. Arm height is Around the pin or Full height (stronger). The panel draws each type from above and cut through the arm.
6Fillet, clearance and segments
- Fillet rounds the top and bottom edges of the slice ends, so they do not touch when they bend.
- Clearance is the gap between the moving parts: 0.3 tight, 0.4 normal, 0.5 loose.
- Separate segments makes a group with one body per slice (for colouring them, for example); off, it is one body.
7Preview and make it
Preview hinges builds the real result over the body, the slices in turn blue and orange; Cut open slices it at mid-height so you see the hinges inside. Click Make flexi: a message tells you how many cuts were checked, how far it bends, the gap between the moving parts and that every joint is captive. Print it flat, as it is, in one go.
8Design your own hinge
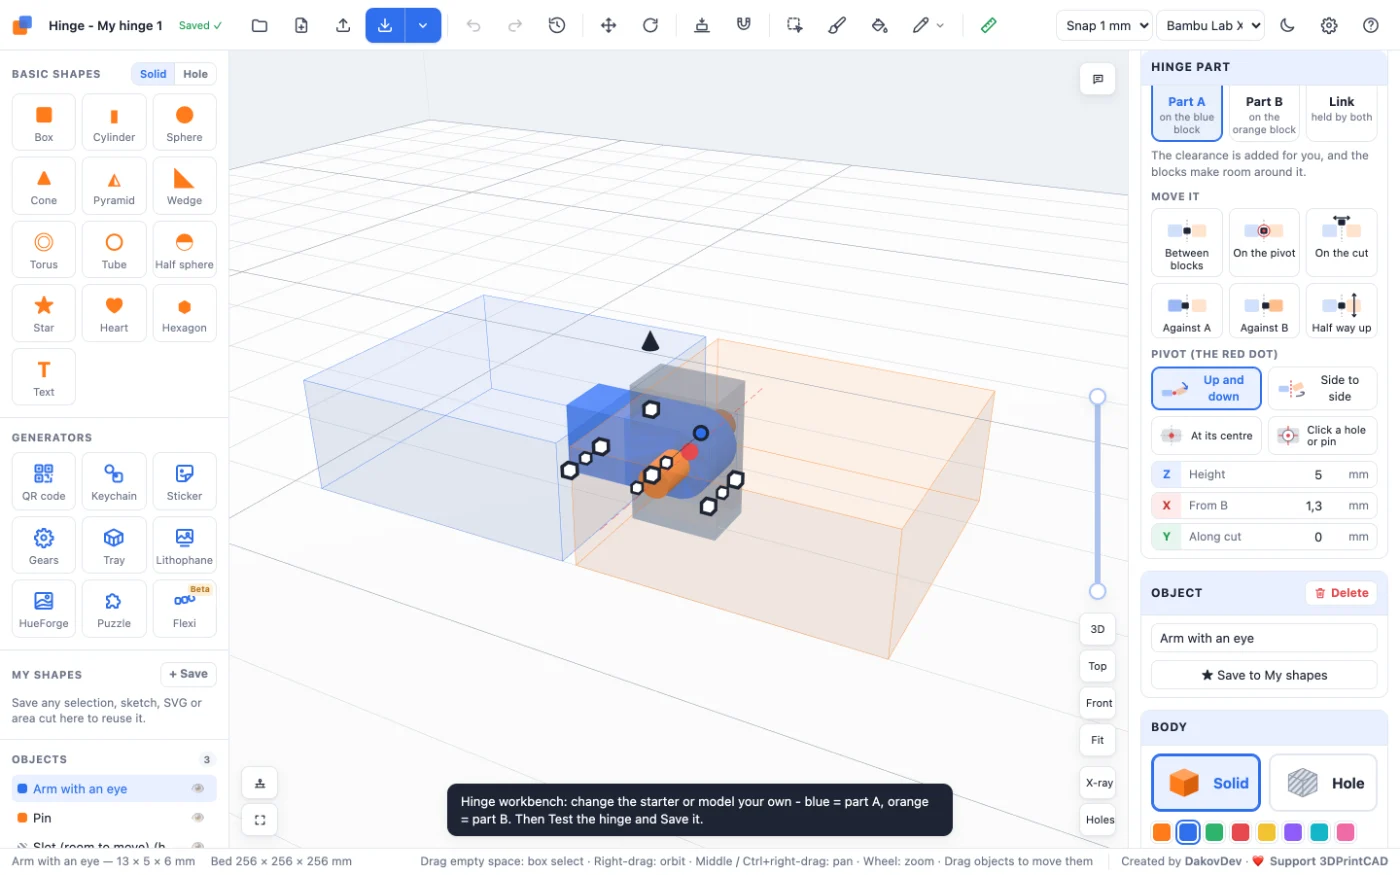
Choose the hinge type Custom and click New hinge. The Hinge workbench opens - a project of its own - with two test blocks, 10 mm thick: the blue one is part A's side, the orange one part B's. It starts with a pin hinge to change: an arm with an eye (A), a pin (B) and a slot (a hole: room to move).
Parts
- Build with the normal tools: shapes, holes, groups, Union, sketches.
- Every solid is part A (joined to the blue block), part B (joined to the orange block) or a link (a separate piece held by both - a dog-bone, a chain link). Select a body to switch it; its colour follows.
- A hole cuts All (both blocks and every part), only A, only B, or only the Blocks (room to move).
- Move it puts the selected body between the blocks, on the pivot, on the cut, half way up, or against block A or B.
The pivot
The red dot is the axis it turns on: Up and down (across the cut) or Side to side (upright). Drag it in the view, type its Height, distance From B and place Along cut, or let the app find it: select the pin and click At its centre, or click Click a hole or pin and then the round side of a hole or a pin - the pivot goes onto its axis.
Fit
- Clearance for the test, and the Gap between blocks (the cut).
- Slice and spread: instead of cutting the gap out of the body, slice it and move the slices apart - nothing is lost.
- Swing room (± degrees): the blocks and part B make room for the motion by themselves.
- Size it with the body's thickness (drawn for 10 mm) or keep its size; Parts may stick out keeps a hinge mounted on top of the body whole.
Test, save and share
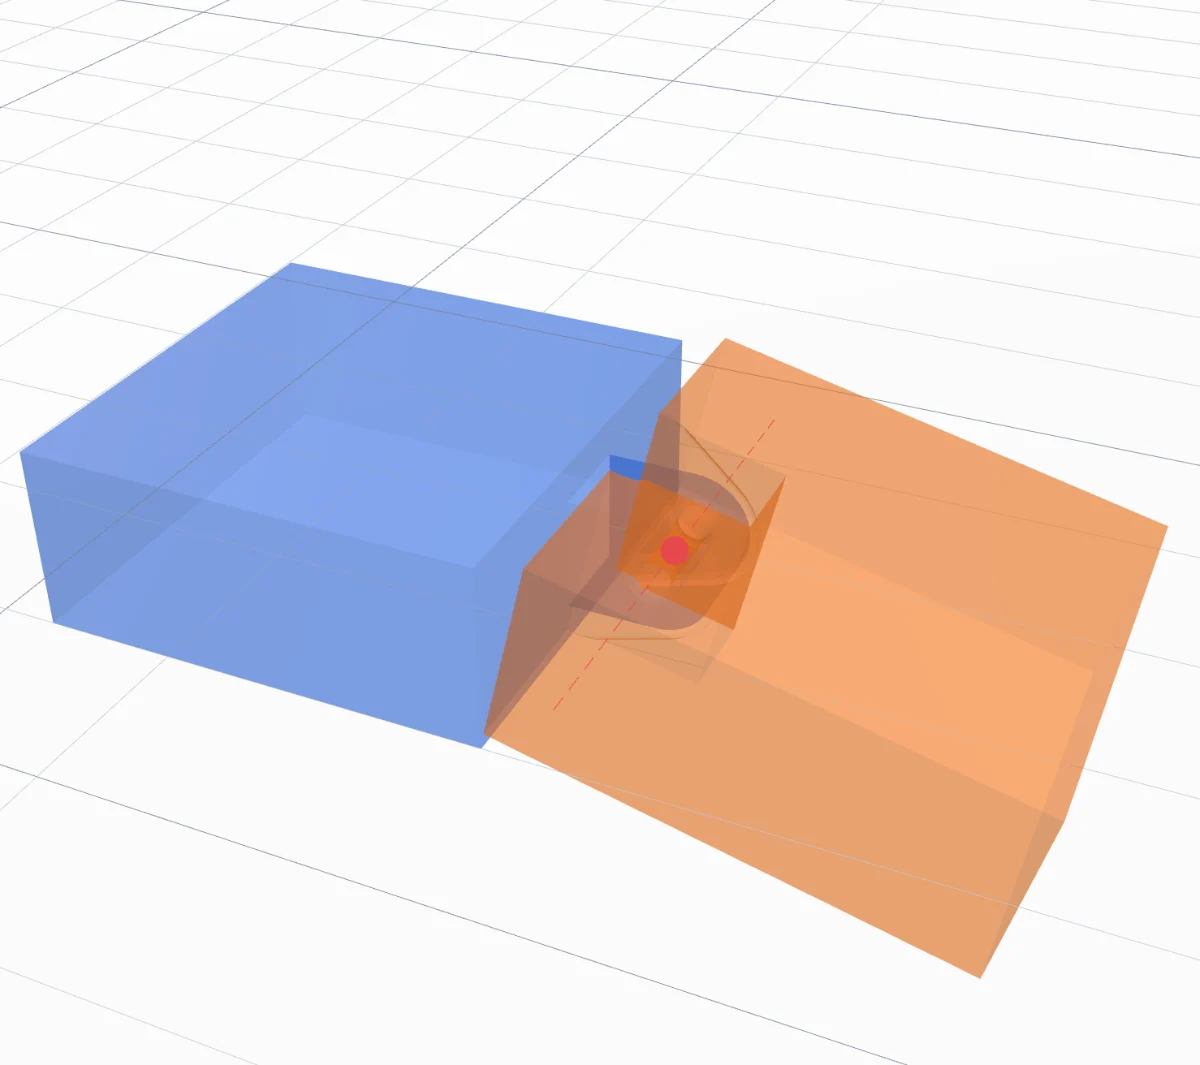
Test the hinge shows the two halves as they print, part B swinging to its limits (turn on X-ray to see inside), and reports how far it turns each way, the smallest gap and whether it stays captive. Name it, click Save hinge and Close workbench to go back to your project. Your hinge is in My hinges under Custom: pick it, preview, Make flexi. Edit reopens it, Export saves a small .hinge file to share and Import loads one.
9A sticker keychain that bends
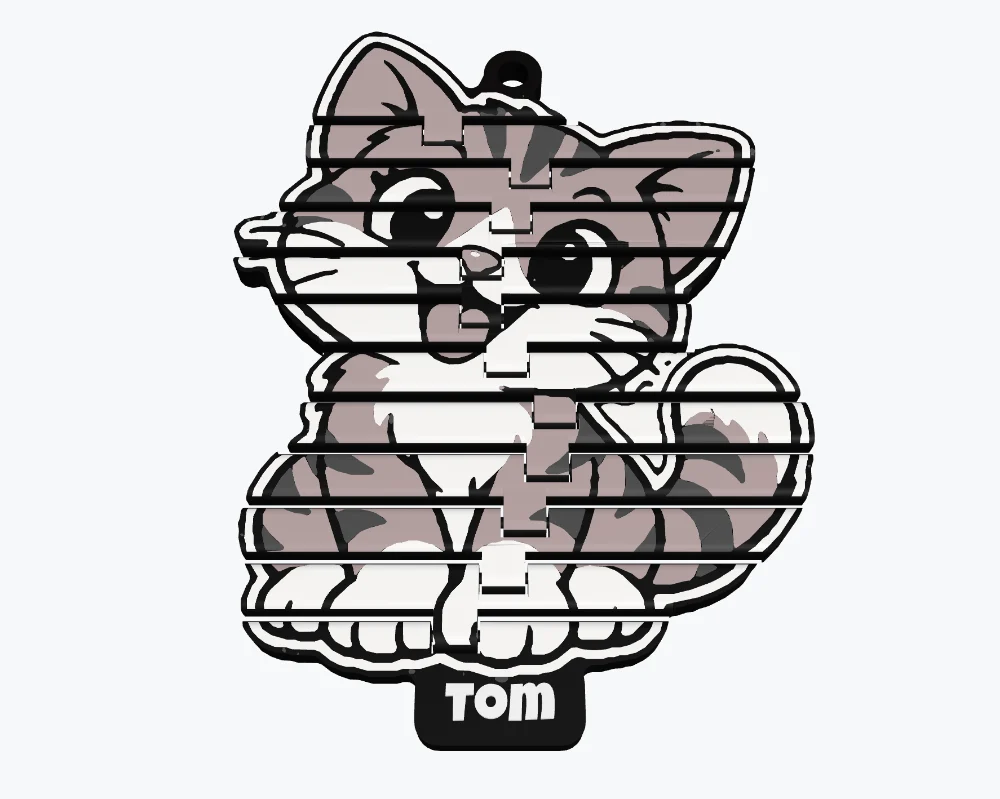
Make a sticker with the sticker generator - here a cat, 110 mm tall, with a 5 mm backing (room for the hinges), a key ring and a name - then open Flexi on it, cut along Y and press Max. Every slice keeps the sticker's colours.
10Printing tips
- Print a small test piece first (two or three slices) to check the clearance on your printer.
- Print it flat, as it comes out, with 0.2 mm layers; a clean first layer matters - elephant's foot can fuse the joints.
- After printing, bend each joint gently a few times to loosen it.
- PLA works for every type but Living, which needs PETG, TPU or PP.
Questions
Which hinge should I use?
Pin is the strongest all-round choice. Cones need no pin and print without supports, T-pin is a sturdy anchor, Ball bends a little in every direction, Knuckle works like a door hinge, and Living is a thin flexible web for PETG, TPU or PP.
What clearance should I use?
0.4 mm is a normal print-in-place gap. Use 0.3 mm for a tighter, stiffer flexi on a well-tuned printer and 0.5 mm if the joints fuse. Print a small test piece first.
How thick must the body be?
About 5 mm and more works well; the hinges are sized from the thickness. A 10 mm thick body takes cuts down to about 7.5 mm apart. On thin stickers, make the backing thicker.
Can I design my own hinge?
Yes. Choose Hinge ▸ Custom ▸ New hinge: the Hinge workbench opens with two test blocks. Build the parts with the normal tools, set the pivot, test it, save it and use it on any flexi. Export it as a .hinge file to share.
Does a multi-colour model keep its colours?
Yes. A sticker, keychain or any body with coloured parts or paint keeps its colours in every slice, ready for a multi-colour 3MF.
Make your flexi now
Start with the sample bar, or turn your own model into a flexi.
Open the Flexi generatorAlso see: Image to 3D sticker for keychains to make bendable, Jigsaw puzzle generator, Keychain generator, How to resize an STL file and How to reduce STL file size.