3DPrintCAD › Guides › Sculpt tool
Sculpt tool: carve, add and fix scan surfaces
Carve grooves and details into any model, build material up, and clean up 3D scans: Fix surface smooths away bumps and artefacts inside a few dots you place. Everything happens in your browser, on any STL - even scans with a million triangles.
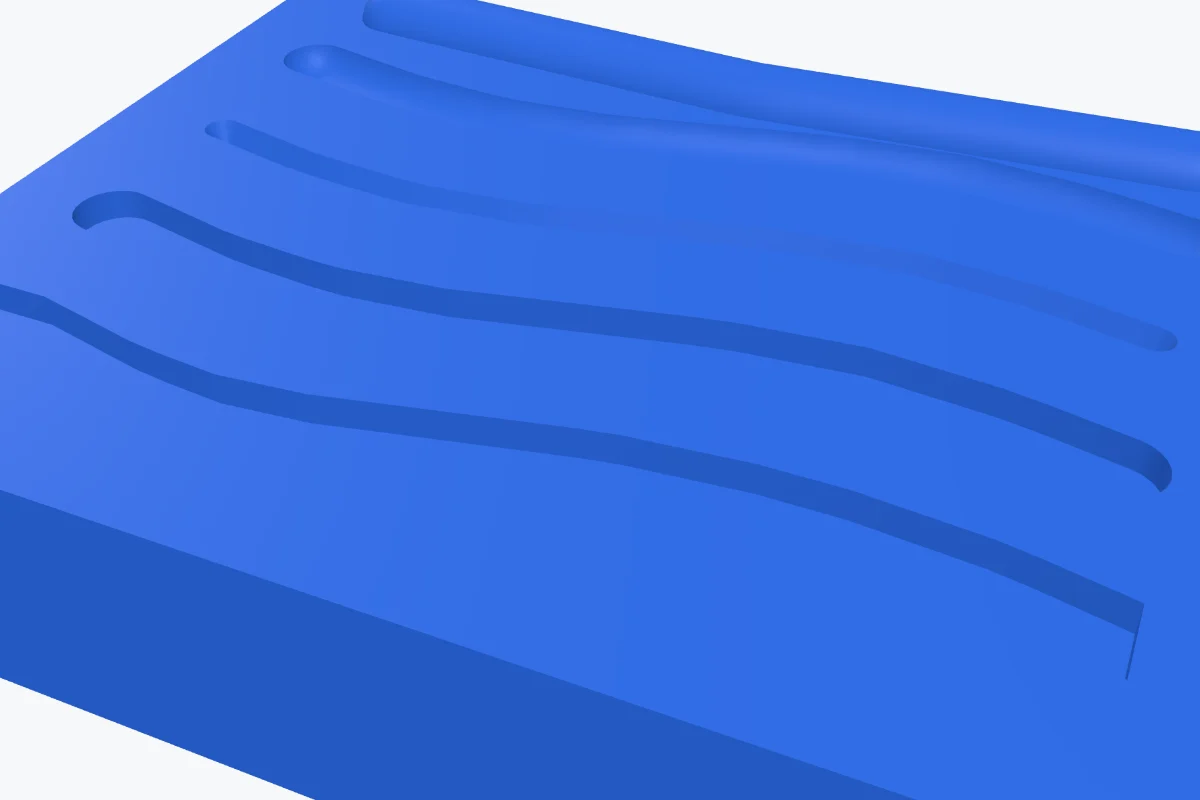
Watch the tutorial
Every option in under five minutes, with subtitles: the four brushes, Carve and Add, the keys, Fix surface step by step and cleaning up a real 3D scan. Watch on YouTube ↗
1Open Sculpt
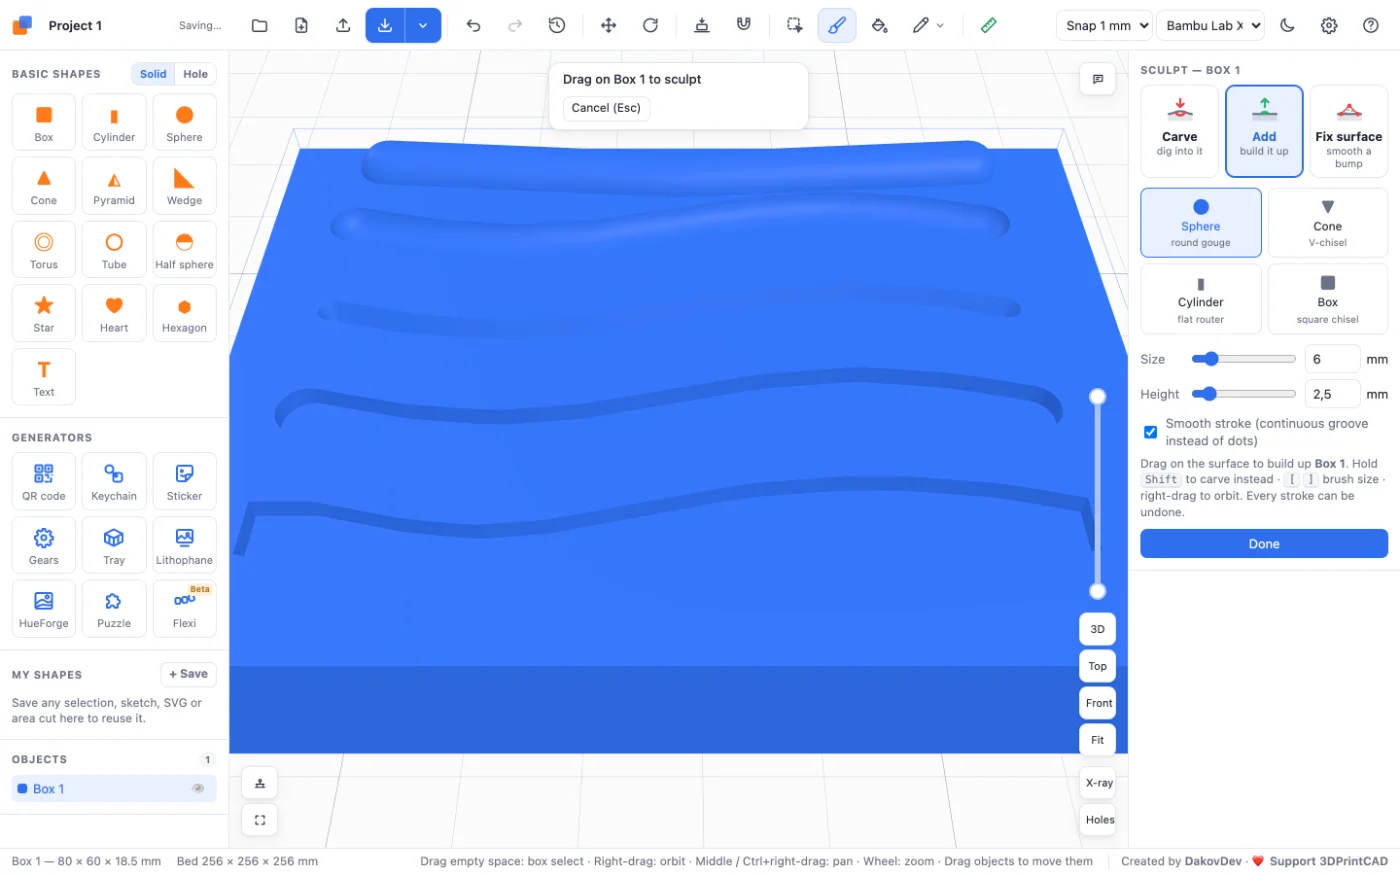
Select a body - a shape you made or an imported STL - and click Sculpt in the toolbar (or press B). With nothing selected, the first body you drag on becomes the one you sculpt. The panel on the right has three modes: Carve digs into the surface, Add builds it up, and Fix surface smooths a bump away.
2Carve and Add
Choose Carve or Add and drag on the surface. A see-through brush follows the mouse; when you let go, the stroke is cut in (Carve) or added on (Add). Each stroke is one solid change, and the model stays watertight and ready to print.
3Brushes, size and depth
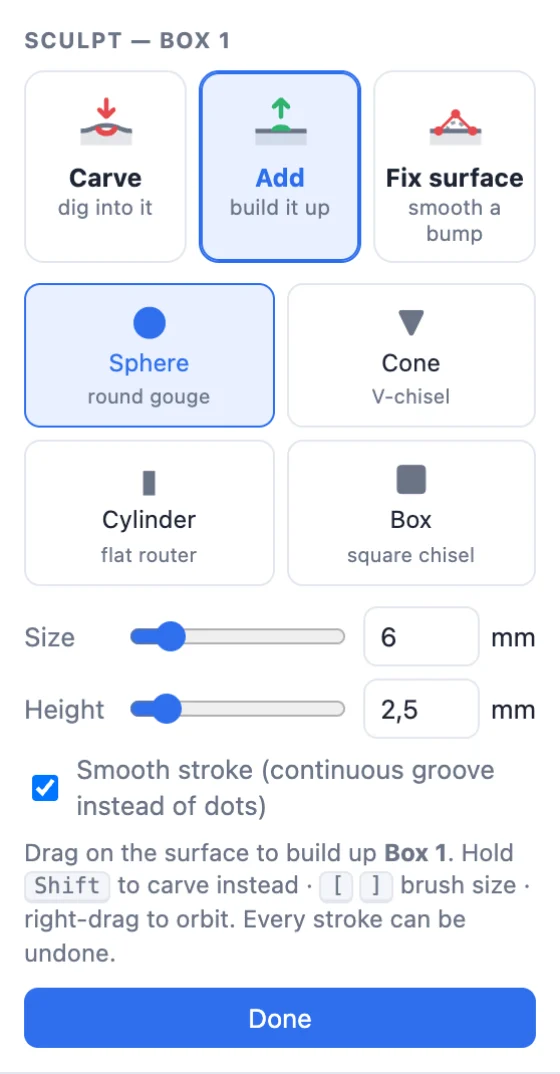
- Sphere - a round gouge, soft rounded grooves.
- Cone - a V-chisel for sharp, narrow grooves.
- Cylinder - a flat router: a flat bottom with straight walls.
- Box - a square chisel for crisp, square grooves.
- Size is the brush width (2 mm to start with), Depth (or Height for Add) how far it goes in or out.
- Smooth stroke makes one continuous groove; untick it for a row of separate dots.
4Keys, undo and the view
- Hold Shift while dragging to do the opposite: add while Carve is on, or carve while Add is on.
- [ and ] make the brush smaller and bigger.
- Every stroke is one undo step (Ctrl+Z / ⌘Z) - the tool stays open.
- Right-drag turns the view while you sculpt; the wheel zooms.
- Carve and Add need a closed mesh: on an imported model that is not watertight, click Make solid in the Mesh health card first.
5Fix surface
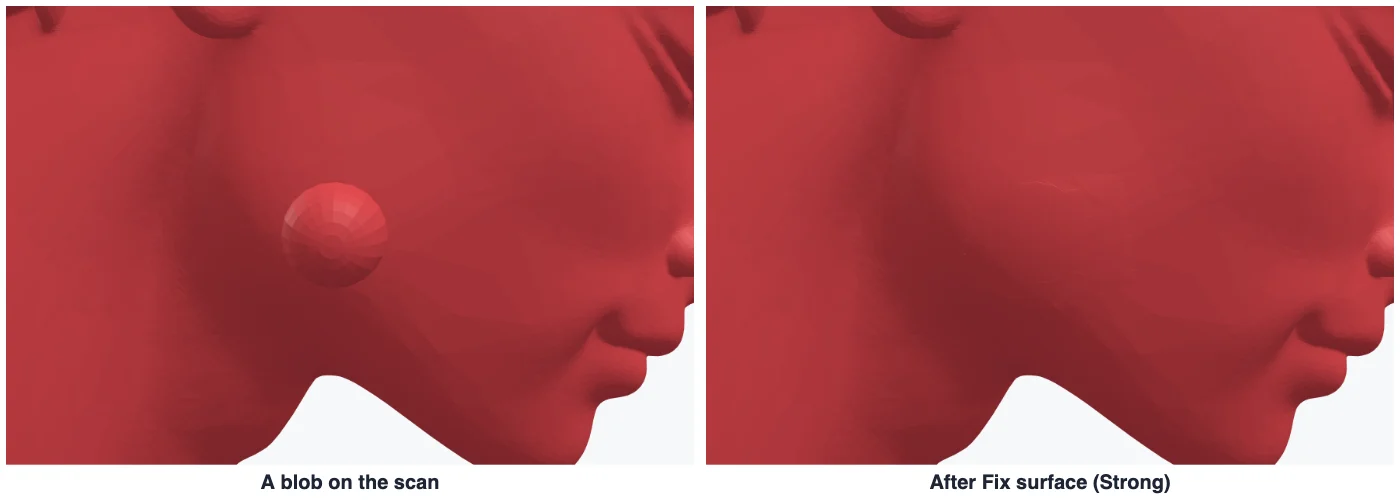
Fix surface removes a bump, a blob or a scan artefact and leaves a smooth surface that follows the shape around it.
- Choose Fix surface. A red dot follows the mouse on the surface - it shows where the next dot goes and how big it is.
- Click at least 3 dots around the bump. Use more to follow its shape. They are always joined round their middle, so the outline never crosses itself, whatever order you click them in. The area that will change is shaded.
- Drag a dot to move it, right-click a dot to remove it, or press Backspace to remove the last one. Dot size makes the dots bigger or smaller.
- Click a strength - again and again until the surface is smooth:
- Strong - all the way in one click (or press Enter).
- Medium - about a third of the way each click.
- Small - a tenth of the way each click.
- Custom - your own percentage per click.
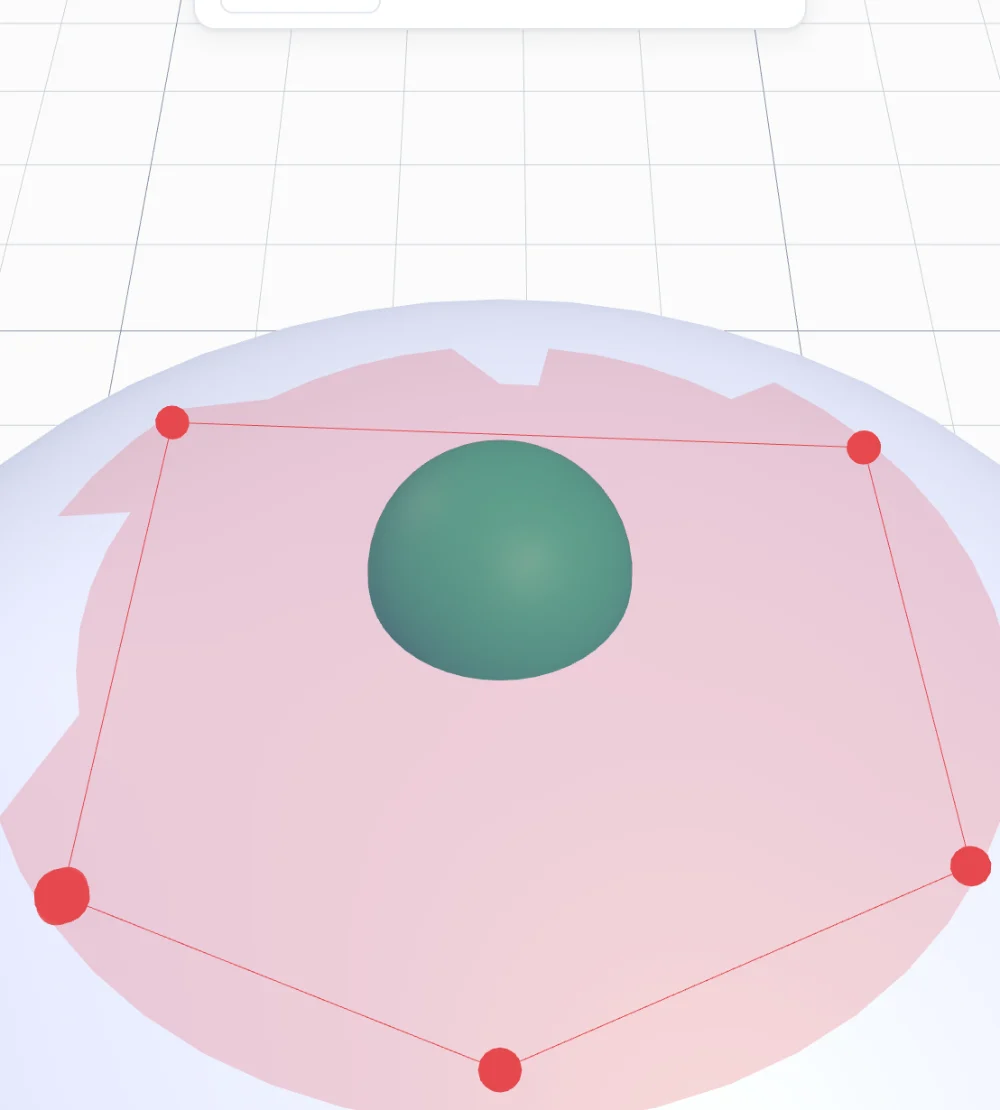
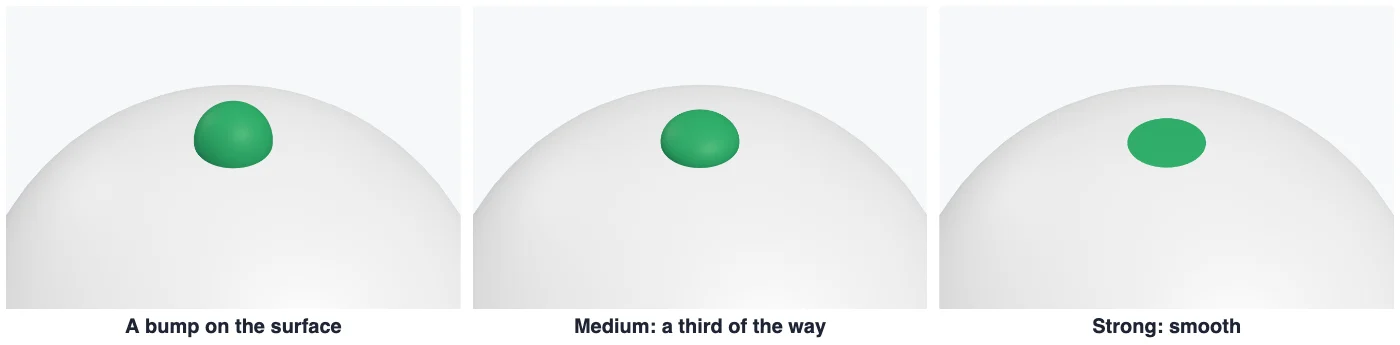
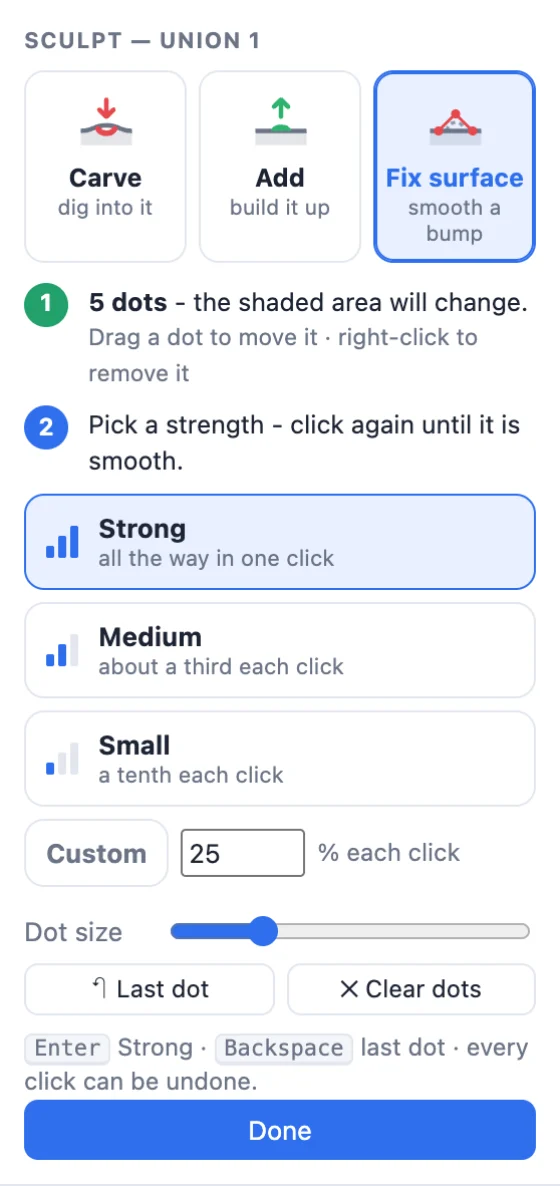
Each click is one undo step and the dots stay where they are, so you can undo and try a gentler strength. Painted colours are kept.
6Clean up a 3D scan
Import the scan with Import (STL or 3MF), zoom in on the artefact, open Sculpt ▸ Fix surface, put the dots round it and click Strong. It works on meshes with a million triangles in well under a second. Afterwards you can reduce the file size and export a new STL.
Questions
How do I remove a bump or artefact from a 3D scan?
Open Sculpt, choose Fix surface, click at least 3 dots on the surface around the bump and click Strong. The area inside the dots becomes a smooth surface that follows the shape around it. Medium and Small do it step by step.
Why can't I carve or add on my scan?
Carve and Add need a closed (watertight) mesh. Select the model and click Make solid in the Mesh health card first. Fix surface works on open meshes too.
Can I undo a sculpt stroke?
Yes. Every stroke and every Fix surface click is one undo step (Ctrl+Z / ⌘Z), and the tool stays open. In Fix surface the dots are kept, so you can try a gentler strength.
Does sculpting keep painted colours?
Fix surface keeps them. Carve and Add rebuild the mesh, so paint the model after sculpting.
Sculpt your model now
Open the app, import an STL or start from a shape, and press B.
Open 3DPrintCADAlso see: How to reduce STL file size, How to resize an STL file, Flexi generator and Jigsaw puzzle generator.