3DPrintCAD › Guides › Business card generator
Business card generator: 3D printed cards with QR codes, NFC and several colours
Make a business card you print yourself: pick a template, type your details, and get a card with your name, contact lines with icons, a QR code that opens your website or saves your contact, your logo and pictures - raised for a single nozzle, or inlaid flush in several colours, even on both sides. Name badges, tags and round cards work the same way. Everything happens in your browser and the card is ready for the slicer.
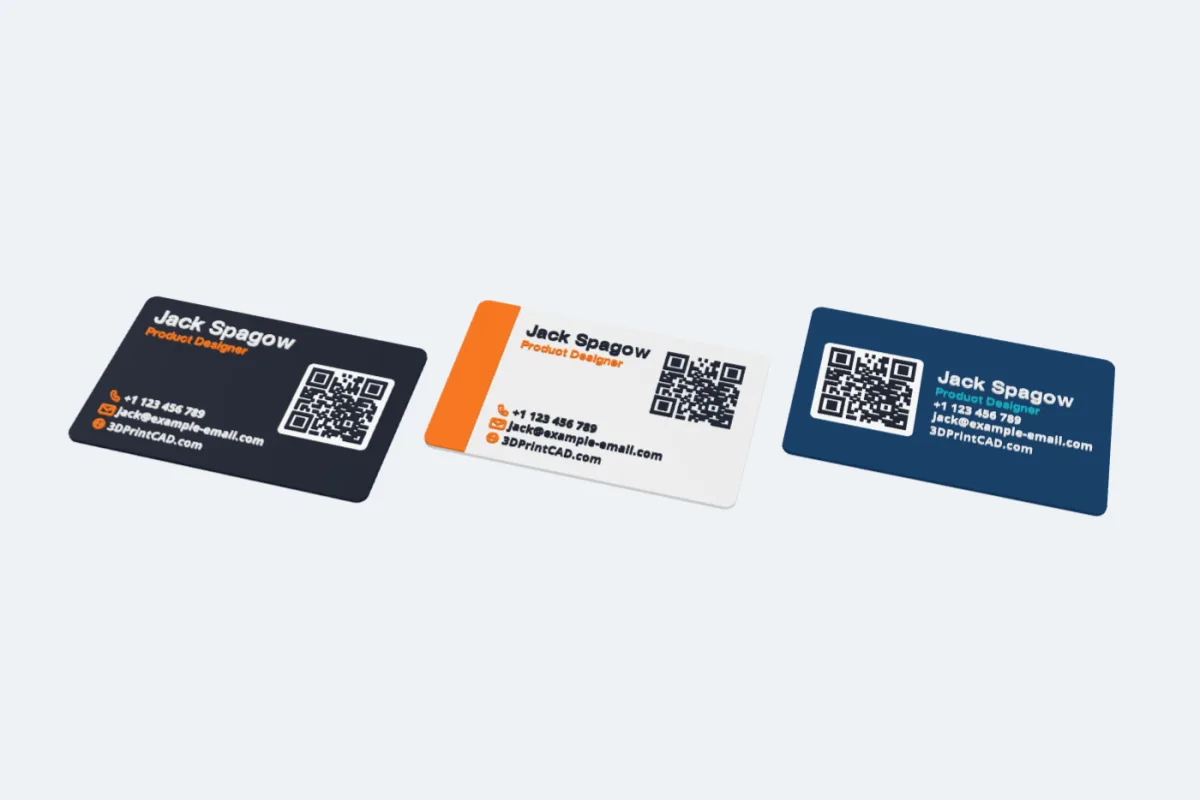
Watch the tutorial
The whole generator in under three minutes, with subtitles: templates, colours, your details, QR codes, shapes and edges, raised, flush or engraved, both sides, border, key ring and NFC. Watch on YouTube ↗
1Open the card generator
Open the app and click Card under Generators on the left (or use this link, which starts a new project with the card generator open). A card with a sample name, contact lines and a QR code appears. Every change on the right updates the preview, and the line at the top of the panel gives the card's size and thickness, the dot size of each QR code and where to change filament.
Anything on the card can be moved straight in the 3D view: click an item to select it, drag it to move it (it snaps to the middle lines; hold Alt to move it freely), drag a corner to resize it and the round knob to turn it (Shift for 15° steps).
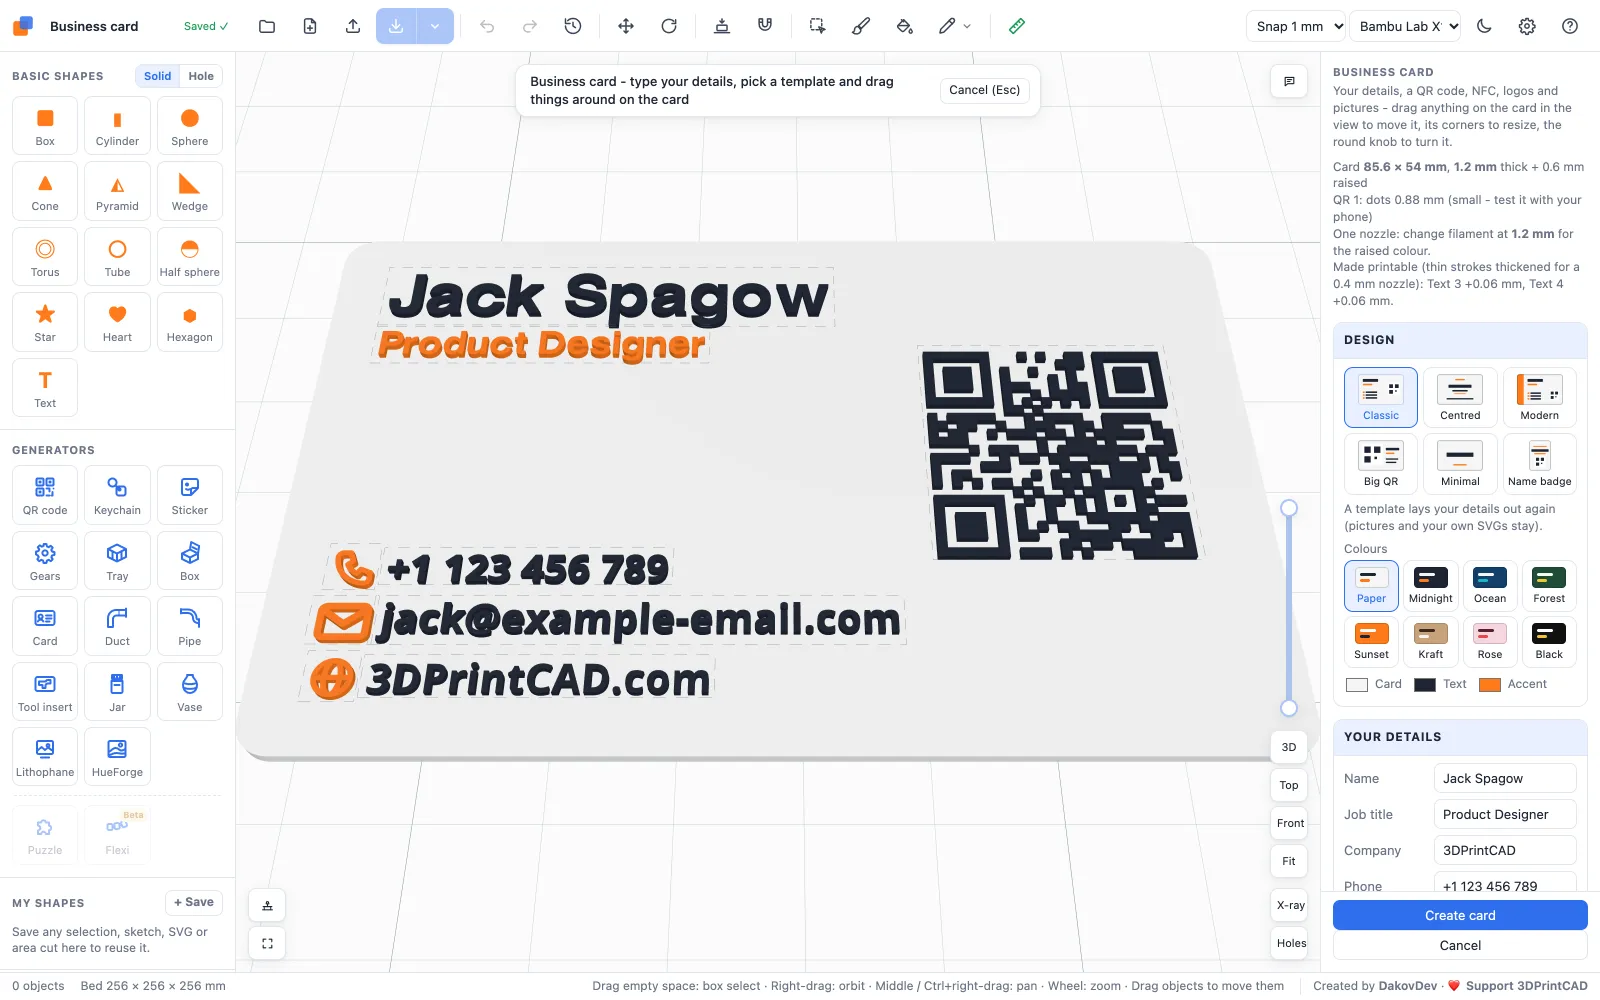
2Templates and colours
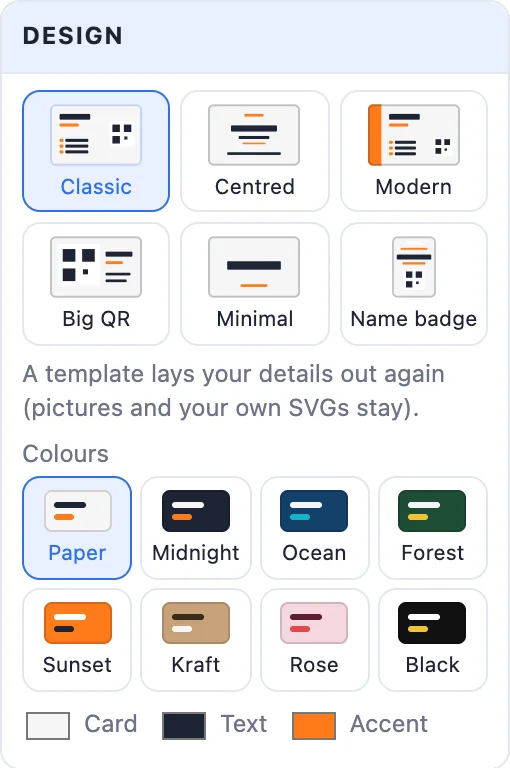
A template lays your details out for you. Picking one lays the texts, icons and QR codes out again; your pictures and your own SVG logos stay where they are.
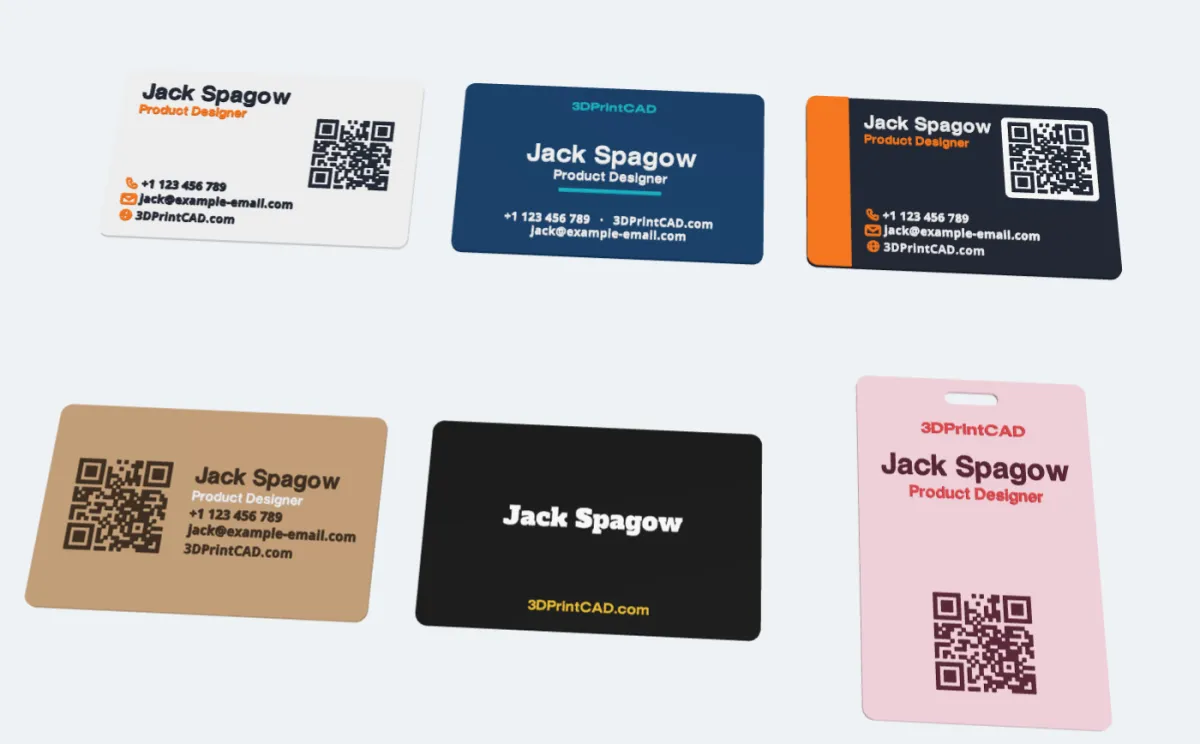
- Classic - name and job top left, the contact lines with icons, a QR code on the right.
- Centred - everything in the middle, with a line under the job title.
- Modern - an accent band down the left side, the QR code top right.
- Big QR - a large QR code on the left, your details beside it.
- Minimal - just the name and the website.
- Name badge - an upright card with a slot for a clip or a lanyard.
Colours are themes of three colours - the card, the text and the accent (icons, the job title, lines): Paper, Midnight, Ocean, Forest, Sunset, Kraft, Rose and Black. Click a swatch below them to pick any colour of your own.
3Your details
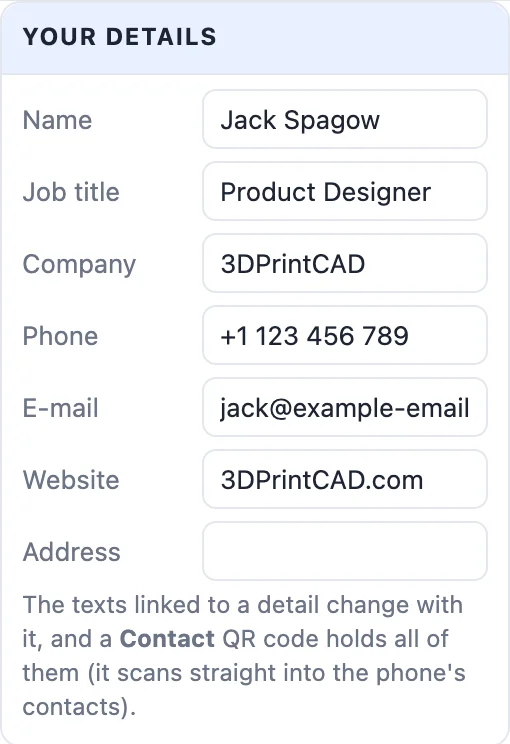
Type your name, job title, company, phone, e-mail, website and address. The texts of the template are linked to these fields, so the card follows as you type, and the QR code uses them too: a link QR code with no text of its own opens your website, and a contact QR code holds all of them. Leave a field empty and its line goes away when you pick a template.
4Texts, icons and logos
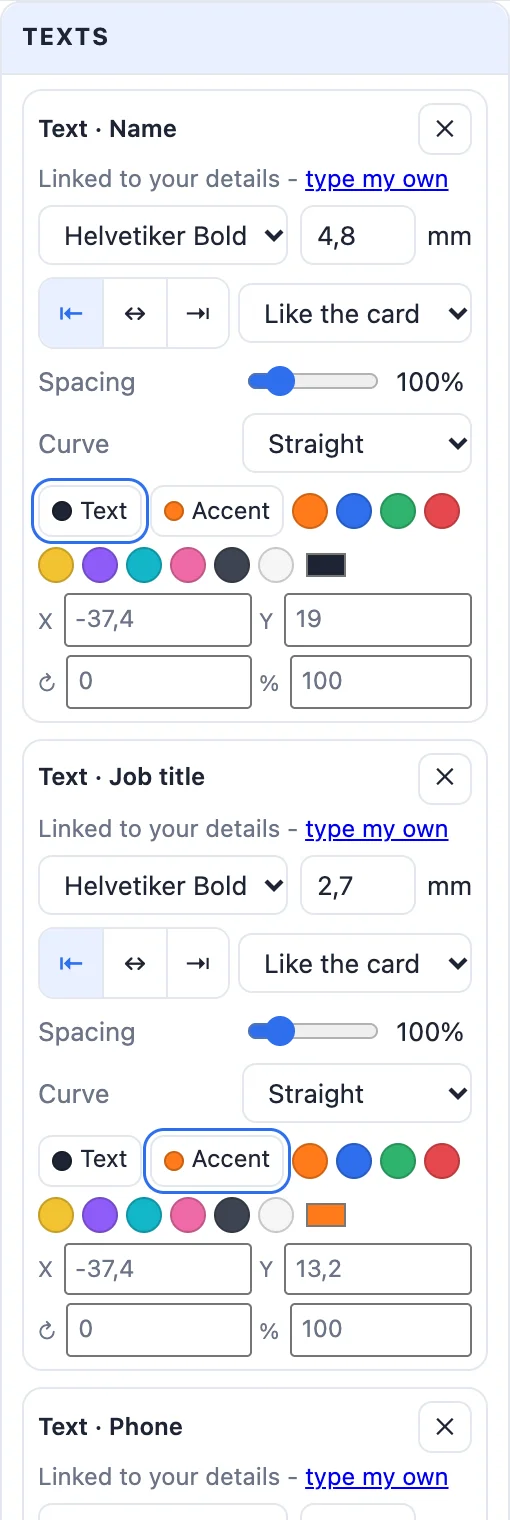
Every text has its own card in Texts:
- Linked to your details - type my own: click it to type a different text for that line only.
- The font and the letter height in mm. Your own fonts (TTF, OTF, WOFF) can be added from the font menu.
- Align left, centre or right - the text grows from that side as you type.
- The style of that item alone: like the card, raised, flush or engraved.
- Spacing between the letters, and Curve to bend the text along an arc.
- The colour: Text or Accent follow the theme, a swatch makes it any colour.
- X, Y, turn and size, the same as dragging it in the view. Texts can have several lines.
+ Add text adds another one. Icons & logos adds the built-in icons (phone, e-mail, website, address, person, work, chat, social, tap for NFC, star, heart), a line to divide the card, or your own logo as an SVG file.
5QR codes and NFC
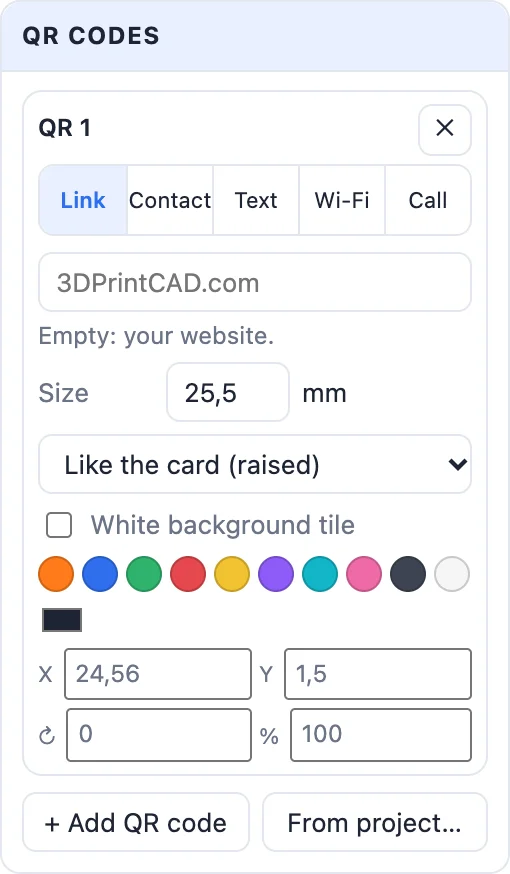
Each QR code has a kind:
- Link - a web address (empty = your website).
- Contact - your details as a contact card (vCard): a phone offers to save you as a contact.
- Text - any text.
- Wi-Fi - a network name and password: a phone joins the network.
- Call - your phone number.
Set its size and its style, and turn on White background tile to put a light square behind the code, so it scans on a dark card. The panel gives the size of the dots; below 1 mm, test it with your phone. + Add QR code adds another one, and From project… brings in QR codes and stickers already made with their own generators.
NFC chip, further down, makes a pocket inside the card for an NFC tag (20, 25 or 30 mm round, a coin tag or your own size), so a tap with a phone opens your link or contact. The panel gives the height at which to pause the print and drop the tag in; the card gets thicker if the tag needs it. Drag the marker in the view to move the pocket. Write the tag with a phone app such as NFC Tools.
6Pictures
Pictures (stickers) puts an image on the card in its own colours, the same way as the sticker generator: pick a picture, set how many colours it gets and its size. The picture's outline colour can be left out, so the card shows there. A logo with flat colours works best.
7Size, shape and edge
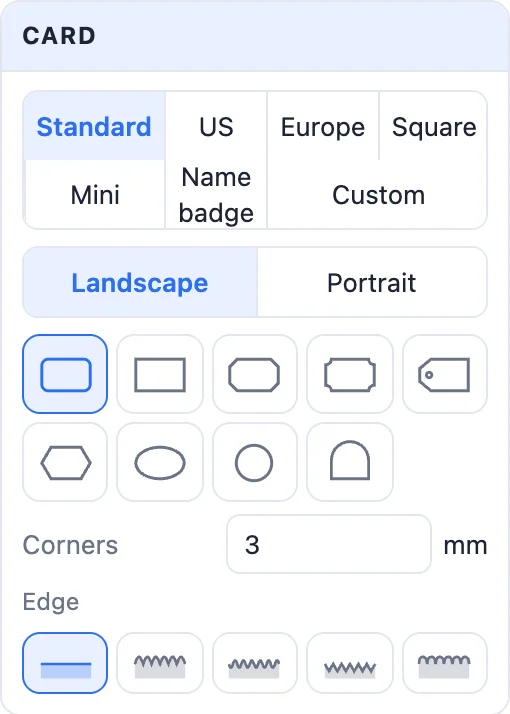
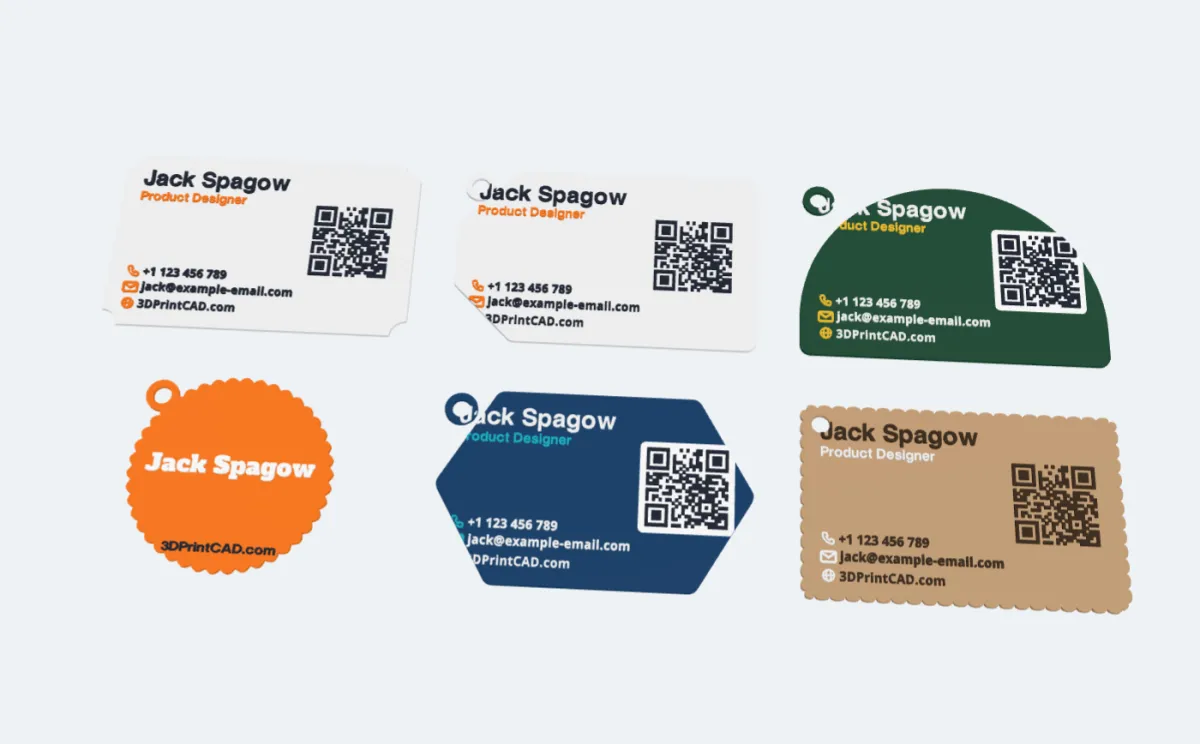
- Size: Standard (85.6 × 54 mm, a credit card), US (88.9 × 50.8), Europe (85 × 55), Square (55 × 55), Mini (70 × 28), Name badge (90 × 60) or Custom, and Landscape or Portrait.
- Shape: rounded, sharp, cut corners, ticket, tag, hexagon, oval, circle or arch, with the Corners radius.
- Edge: plain, scallop, wave, zigzag or stamp, with the size and the spacing of the waves.
8Raised, flush or engraved - and printable strokes
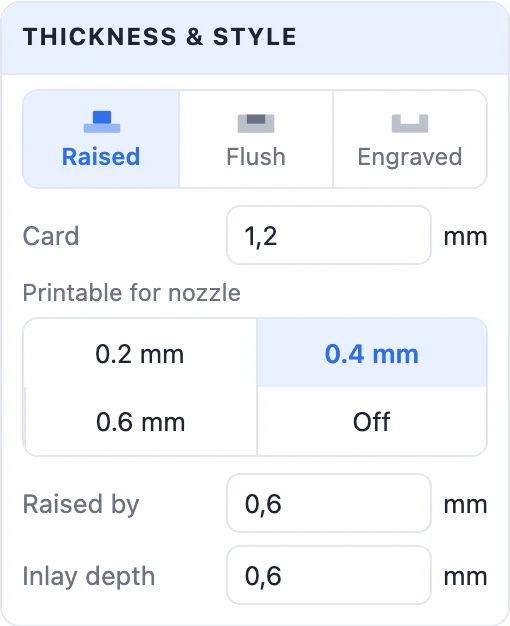
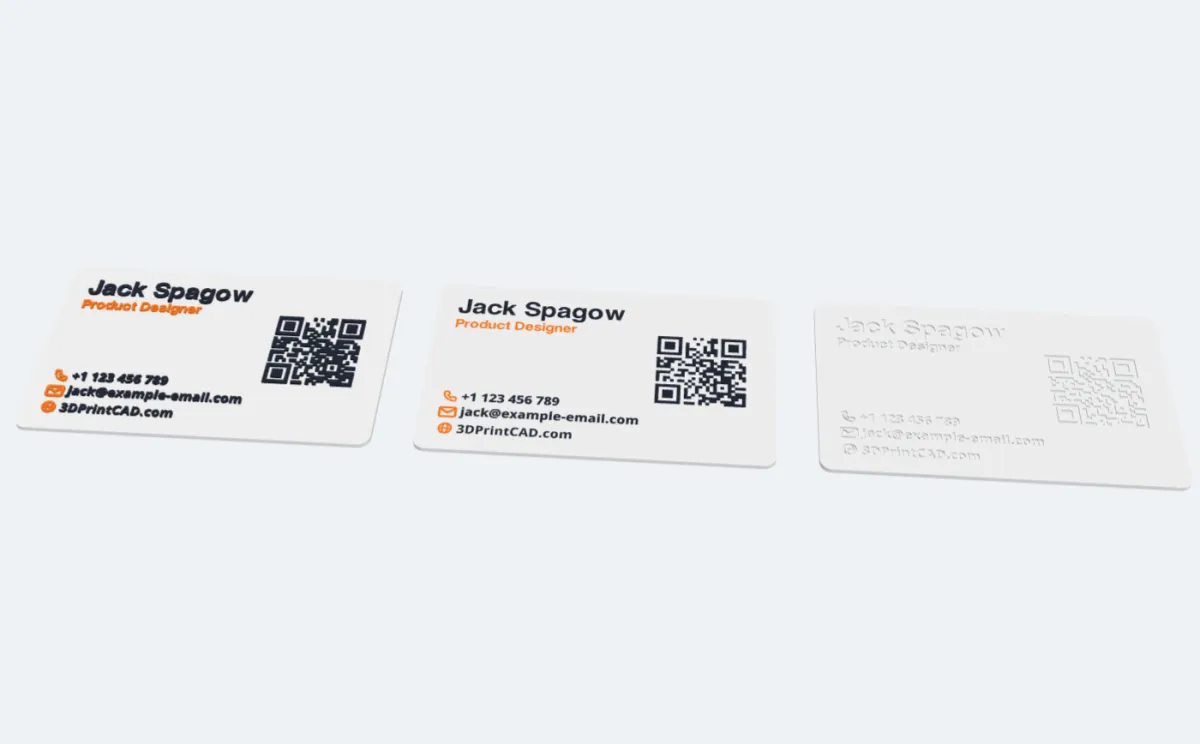
- Raised - the items stand on the card (Raised by 0.6 mm). Prints with one nozzle: change filament at the height the panel gives.
- Flush - the items are inlaid level with the card, in their own colours: a smooth card for a multi-colour printer.
- Engraved - the items are cut into the card (Inlay depth), in one colour.
Card is the thickness of the card itself (1.2 mm by default). Each text, icon or QR code can also have a style of its own.
Printable for nozzle (0.2, 0.4 or 0.6 mm, or Off) makes sure small letters really print: a stroke thinner than one printed line would be left out by the slicer, so such strokes are thickened a little - only as far as the gaps between the letters stay open. When a text is still too fine, the panel names it and Make printable makes it bigger and bold. The templates are laid out so that a new card needs none of this.
9Both sides, border, pattern and key ring
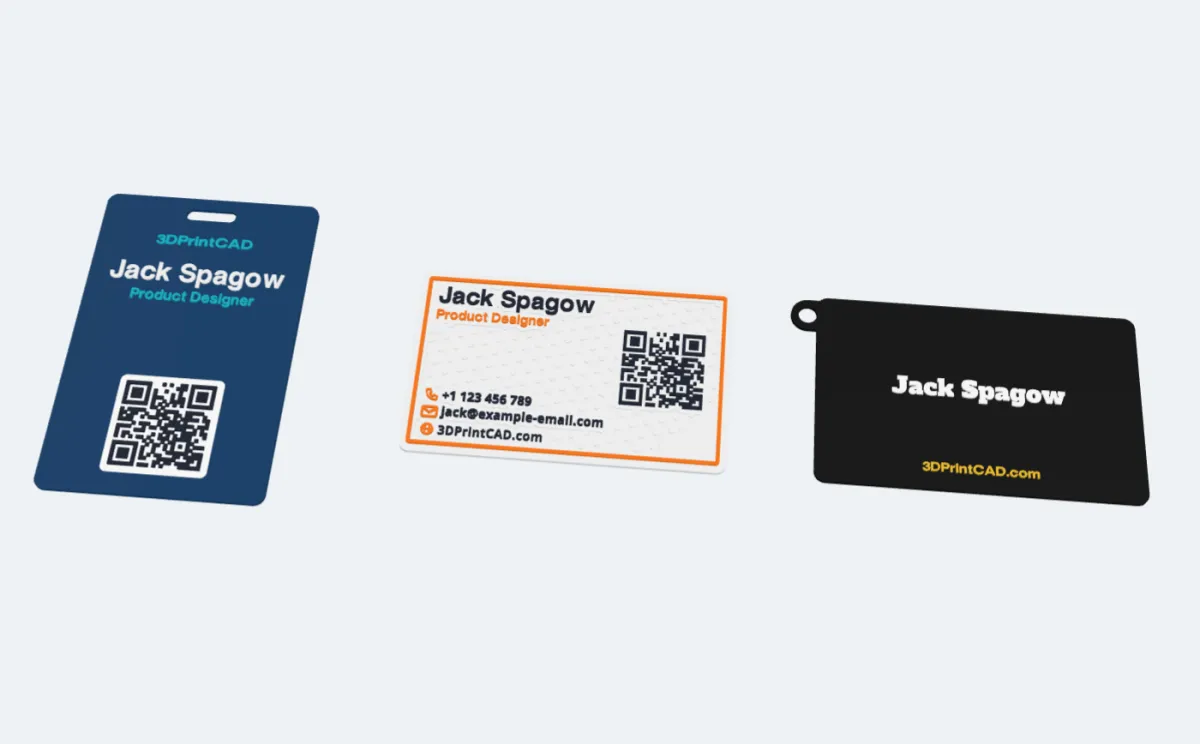
- Both sides - everything on the top is copied to the bottom, mirrored so it reads the right way when you turn the card over: Sideways like a business card, or Top to bottom like a hanging badge. The bottom stays flat, every item inlaid in its own colour; print it with the back on a smooth plate.
- Border - a ring round the card, raised or flush, with its width and its distance from the edge.
- Background pattern - lines, dots, grid, waves, hexagons or circles over the card, engraved or flush in the accent colour, kept clear of your texts and codes.
- Key ring / hole - a Hole in the card, a round Tab outside it, or a Slot for a badge clip or a lanyard. Drag it in the view to move it; the card grows round it.
10Create and print
Click Create card. The card becomes a body in your project: one coloured part for every text, icon, code and picture.
- One nozzle (raised): export an STL and add a filament change in the slicer at the height the panel gave - everything above it prints in the second colour.
- Several colours (flush, both sides or coloured items): Export ▸ Multi-colour 3MF. OrcaSlicer, Bambu Studio and PrusaSlicer open it with every part on its own filament.
- Print the card flat on the bed. A smooth or textured plate gives the bottom its look.
To change a card later, double-click it: the generator opens with all its settings.
Questions
Can I 3D print a business card with one nozzle?
Yes. Leave the style on Raised: the card is one colour and the texts, icons and QR code stand on it. The panel gives the height at which to change filament (1.2 mm for the default card), so everything raised prints in the second colour. Flush, engraved inlays and Both sides need a multi-colour printer.
Will the small text print?
Printable for nozzle (0.4 mm by default) checks every text and icon: strokes thinner than one printed line are thickened a little, as long as the gaps between the letters stay open. When a text is still too fine, the panel says which one and Make printable makes it bigger and bold. The templates are laid out so that none of them needs it.
Does the 3D printed QR code scan?
Yes, when its dots are big enough and the colours contrast. The panel shows the dot size of every code; below 1 mm it asks you to test it with your phone. A short link, a bigger code or the white background tile on a dark card all help.
Can the QR code save my contact details?
Yes. Choose Contact for the QR code: it holds your name, job, company, phone, e-mail, website and address as a vCard, so a phone offers to save the contact. Link, Text, Wi-Fi and Call are the other kinds.
How do I add an NFC chip?
Turn on NFC chip and pick the tag (20, 25 or 30 mm round, a coin tag or your own size). The card gets a pocket inside and the panel gives the height at which to pause the print and drop the tag in. Write the tag with a phone app such as NFC Tools.
Can the card be read from both sides?
Yes. Turn on Both sides: everything on the top is copied to the bottom, mirrored so it reads the right way when you turn the card over (sideways like a business card, or top to bottom like a hanging badge). The bottom stays flat, with every item inlaid in its own colour.
Can I change the card after creating it?
Yes. Double-click the card (or select it and click Edit generator) and the generator opens with all its settings.
Make your card now
Open the card generator, pick a template, type your details and print.
Make a card nowAlso see: QR code generator, Keychain generator, Image to 3D sticker, Lithophane maker and all guides.