3DPrintCAD › Guides › Board in a box tool
Board in a box tool: fit a Raspberry Pi, ESP32 or Arduino into your own box
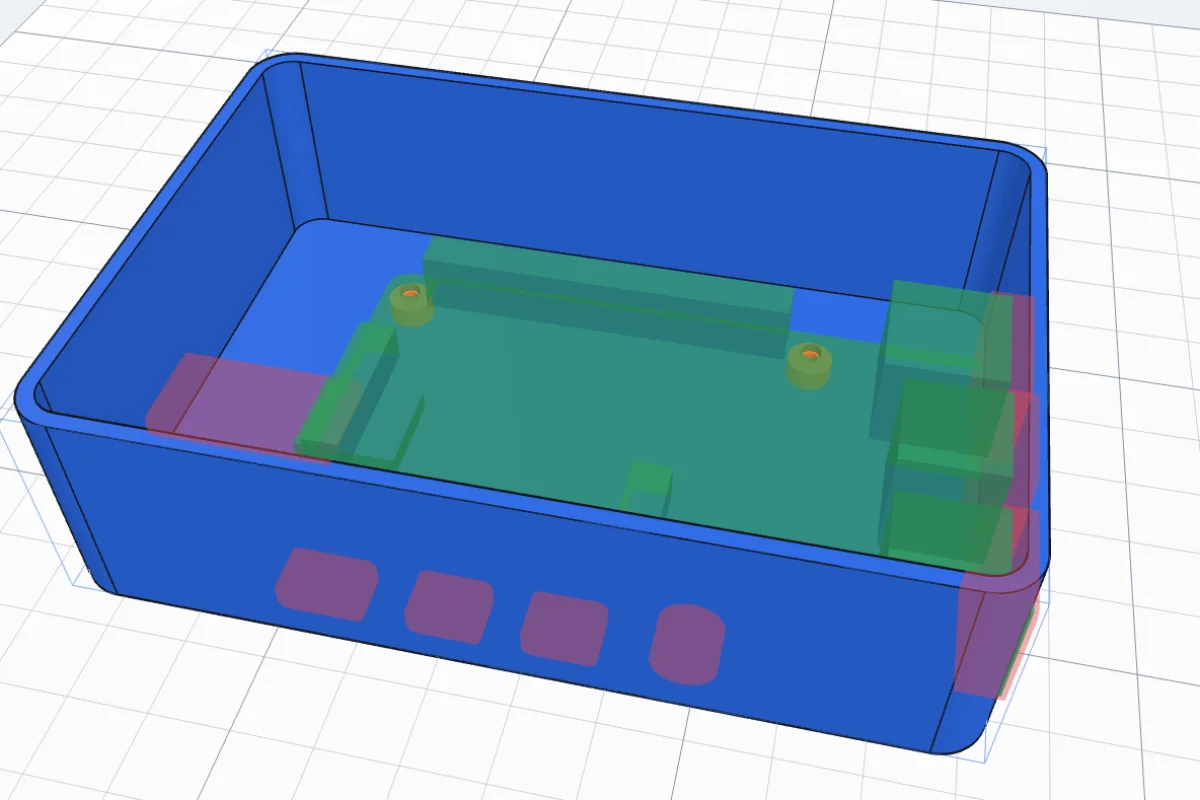
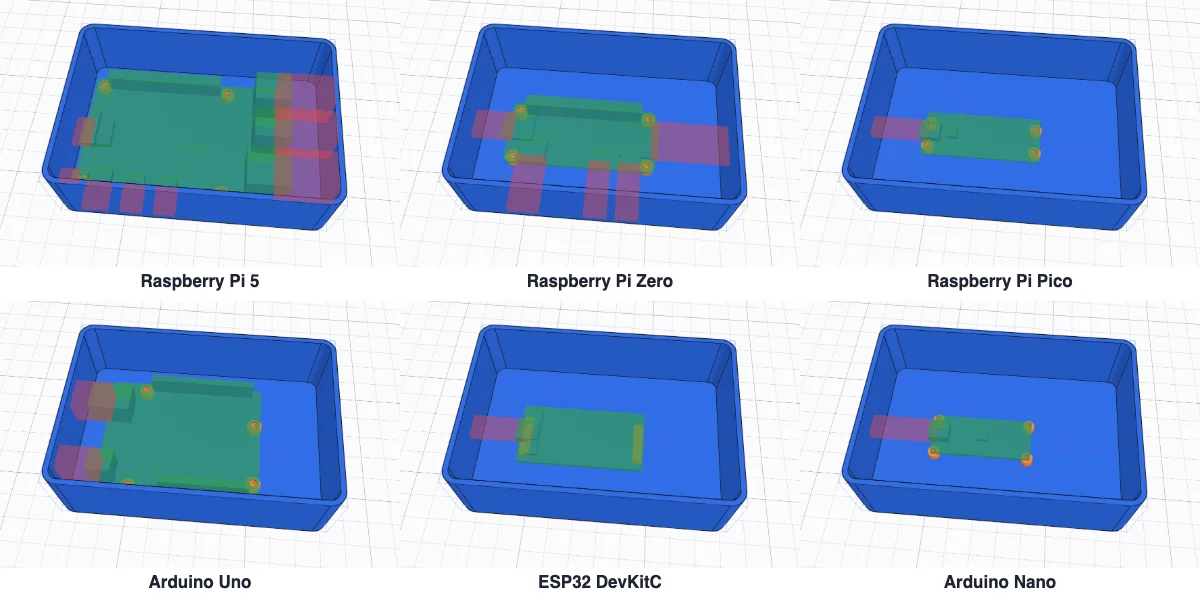
You designed your own enclosure - a box from the Box generator, a shape you hollowed with Thickness, an imported case - and now a board has to go into it. Measuring where every connector sits and how high it is takes a calliper and a lot of patience. The Board in a box tool does it for you: click the floor inside the box, and the board appears there, see-through. Drag it, turn it, push it to a wall. The tool then adds the holders under the board's own mounting holes and cuts an opening for every port through the wall in front of it - at the right place and the right height, because both come from the same board.
Watch the tutorial
Every step in about three minutes, narrated with subtitles: the board, its place, the holders, the port openings and adding them to the box. Watch on YouTube ↗
1Click the floor inside your box
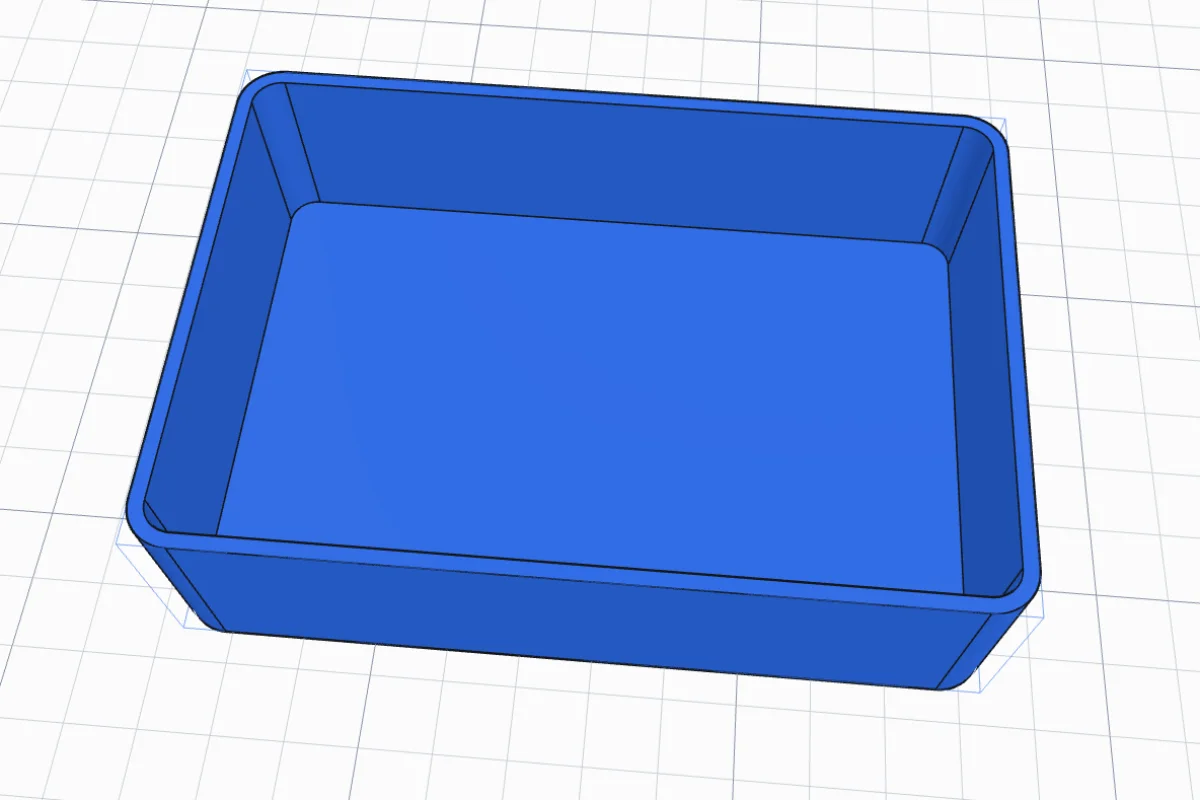
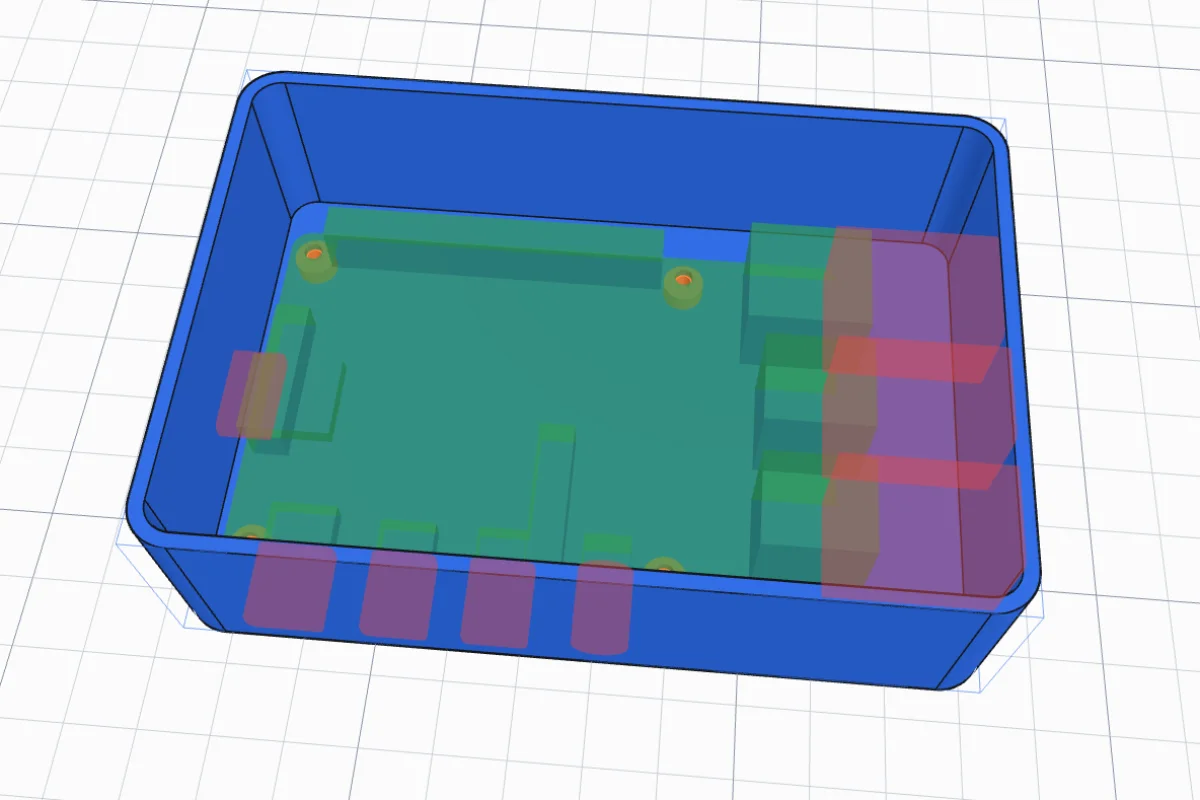
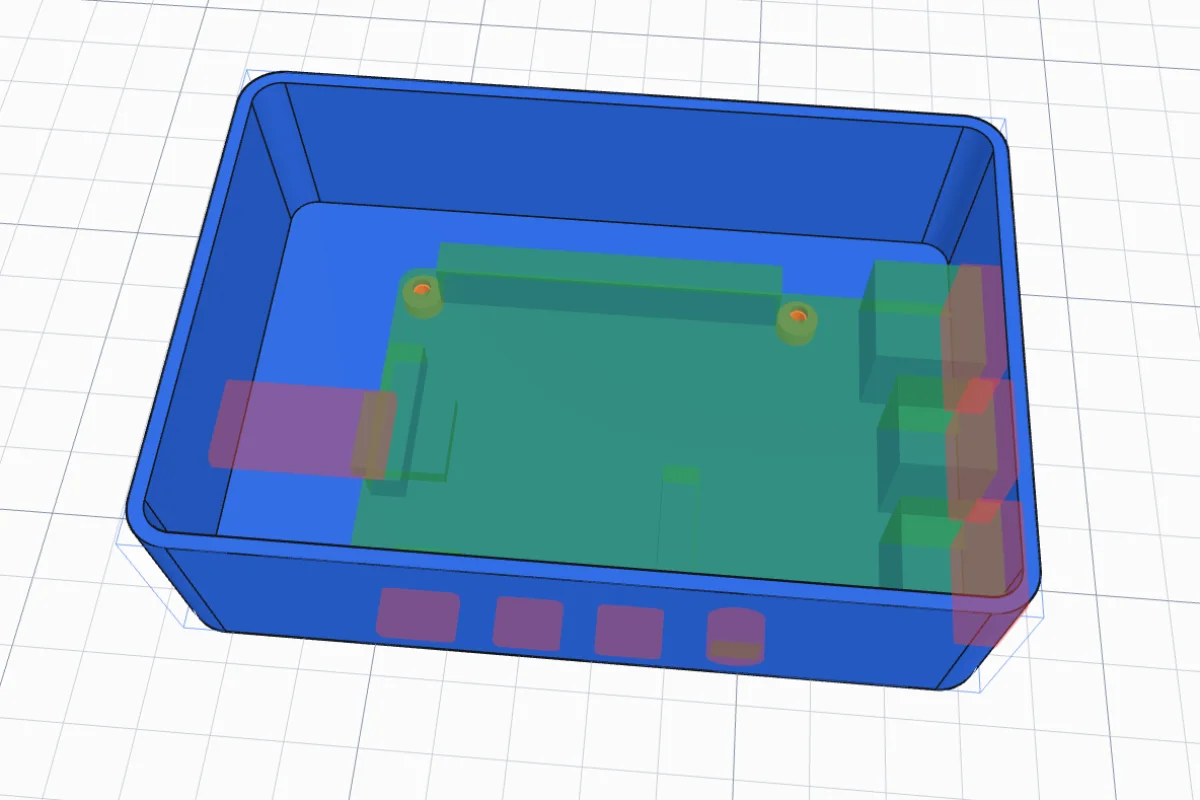
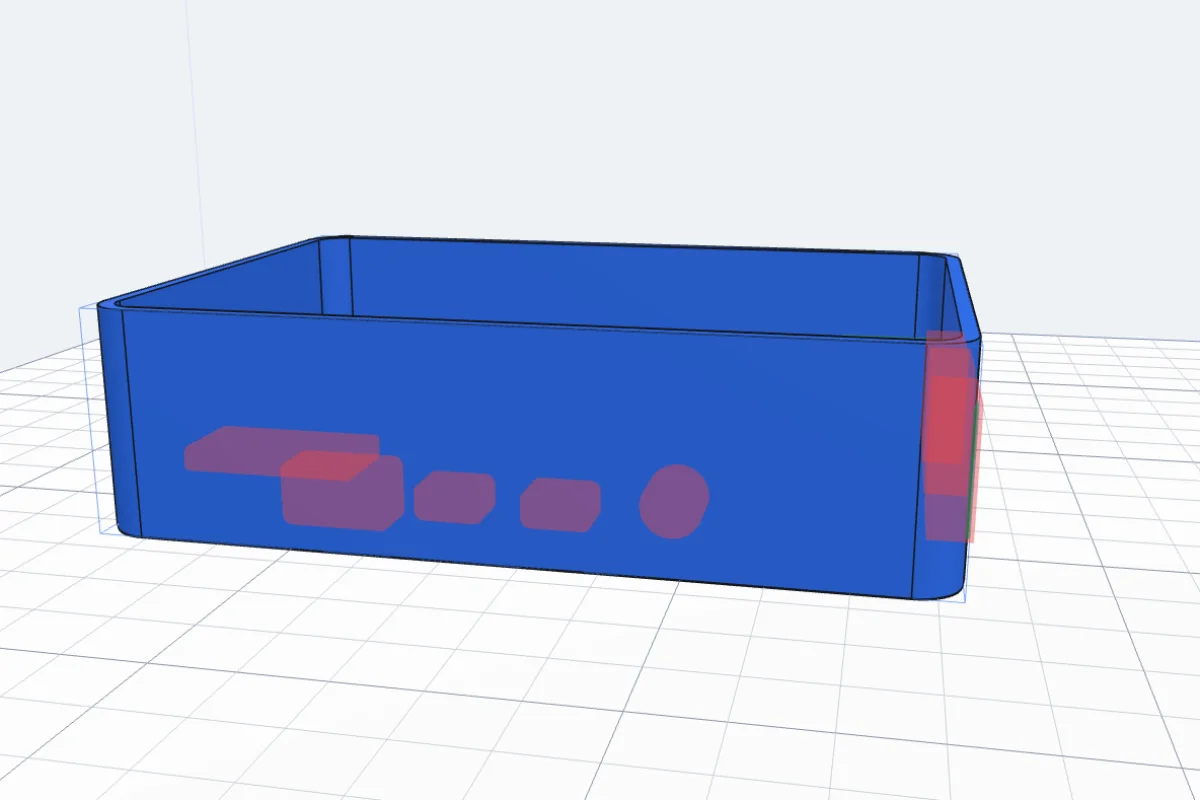
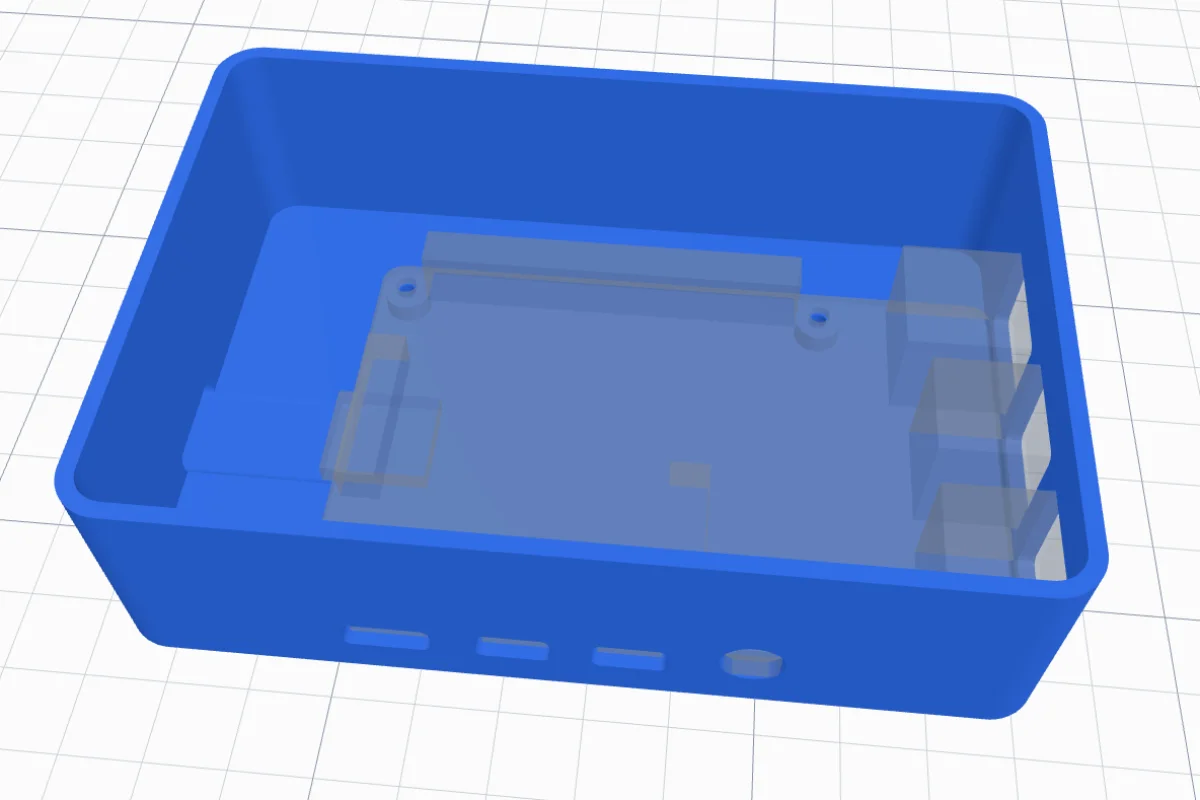
Select your box and click Board in a box in the Body card. Then click the floor inside the box, about where the board should sit. The board appears there in see-through green, its holders in orange and the openings for its ports in red.
2Pick the board
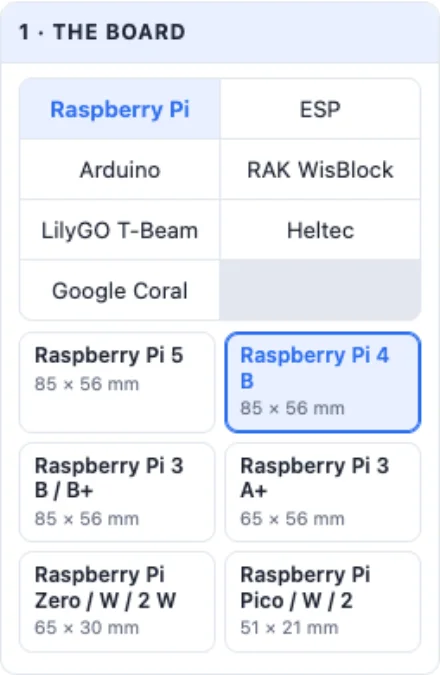
Choose the group - Raspberry Pi, ESP, Arduino, RAK WisBlock, LilyGO T-Beam, Heltec, Google Coral - and the board. Each tile gives its size. The info box at the top says how much height the board needs inside the box, so you know your walls are tall enough.
3Put it in its place
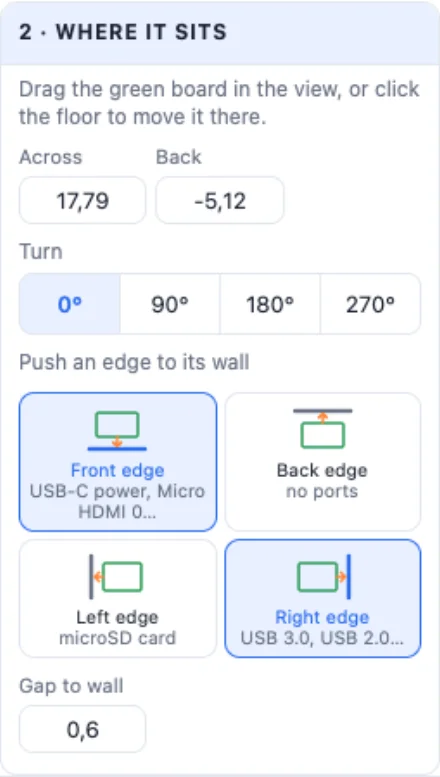
Drag the green board in the view (0.5 mm steps, Shift for 0.1 mm), click the floor anywhere to move it there, or type Across and Back. Turn it 0°, 90°, 180° or 270°.
Connectors must reach the wall, so the quickest way is Push an edge to its wall: each button names the ports on that edge - click Right edge (USB and Ethernet on a Pi 4) and Front edge (power, HDMI, audio) and the board slides into that corner. Gap to wall is how far the board's edge stays from the wall; change it and the pushed edges move at once.
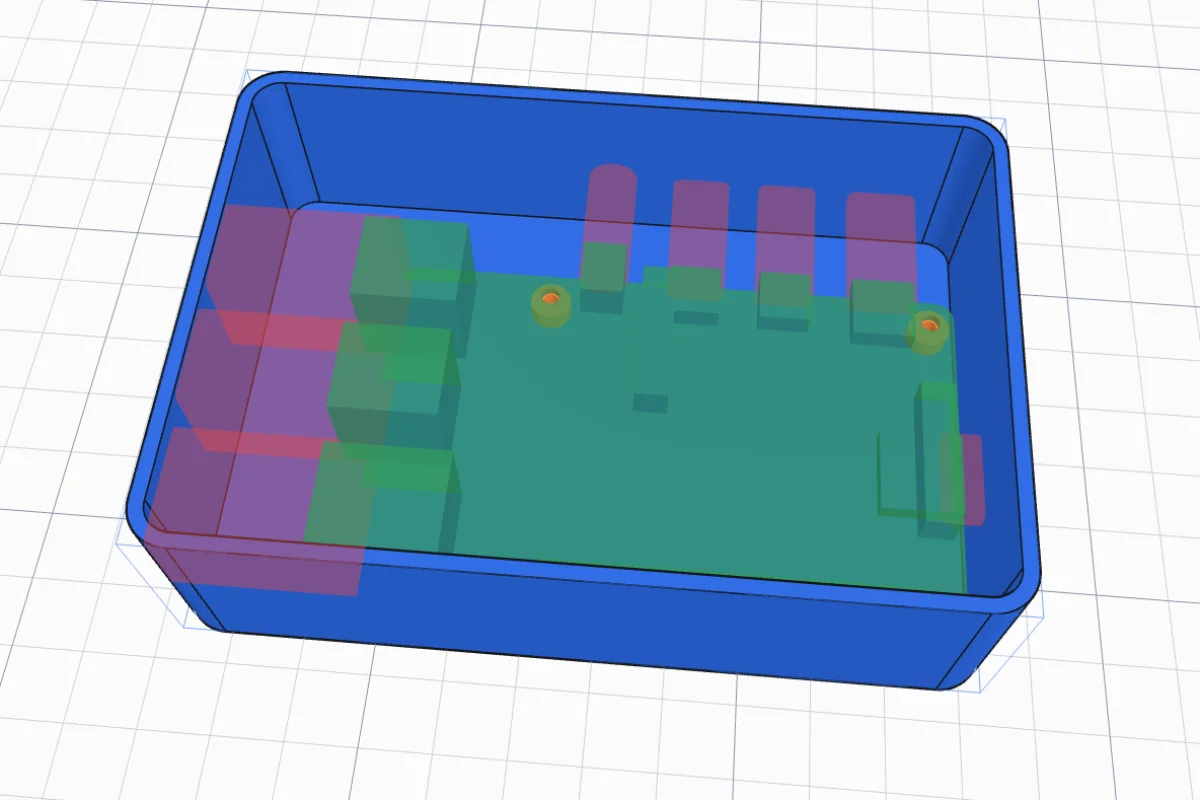
4How it is held
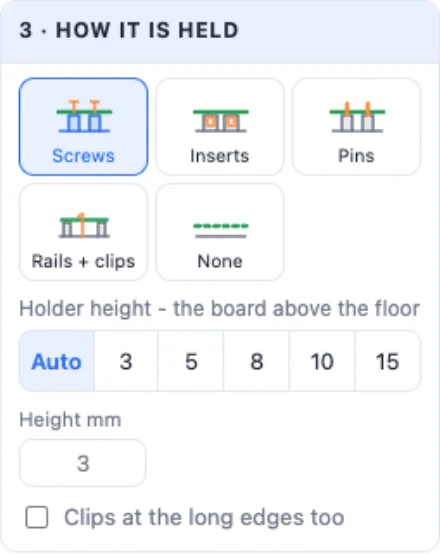
Five choices: Screws (standoffs under the board's mounting holes with pilot holes), Inserts (holes for heat-set inserts), Pins (the board drops onto pins), Rails + clips (rails under the ends, clips at the edges - also what a board without holes gets) and None (only the openings).
Holder height is how far the holders lift the board above the floor: Auto leaves just the room the board's own parts need underneath; 3 to 15 mm or any value makes room for wires or a battery below. The port openings move up with the board.
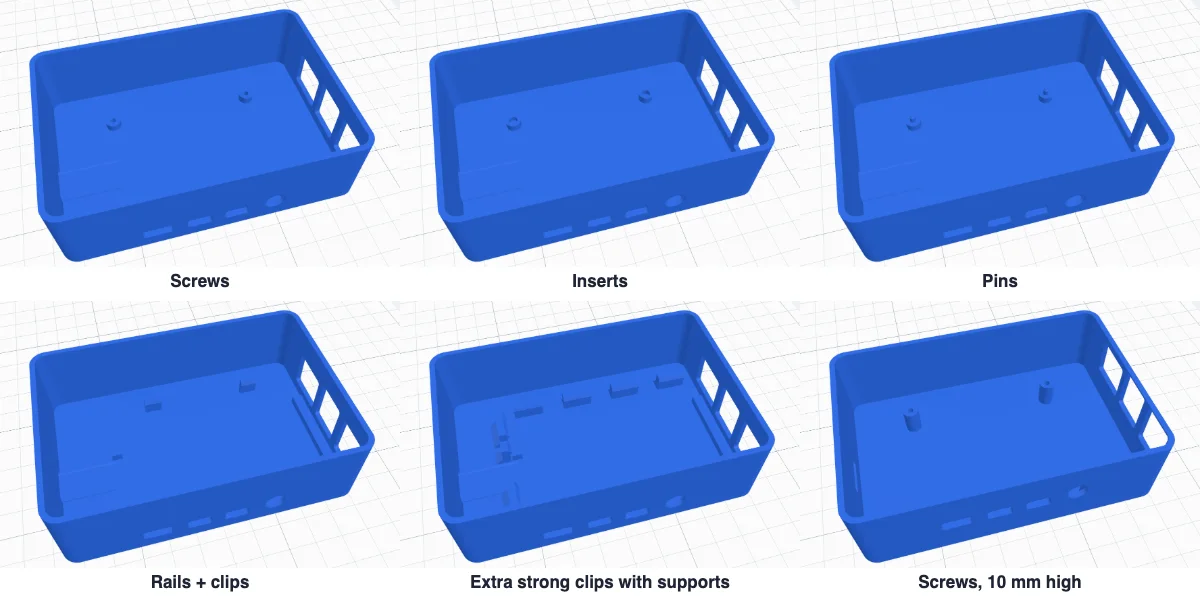
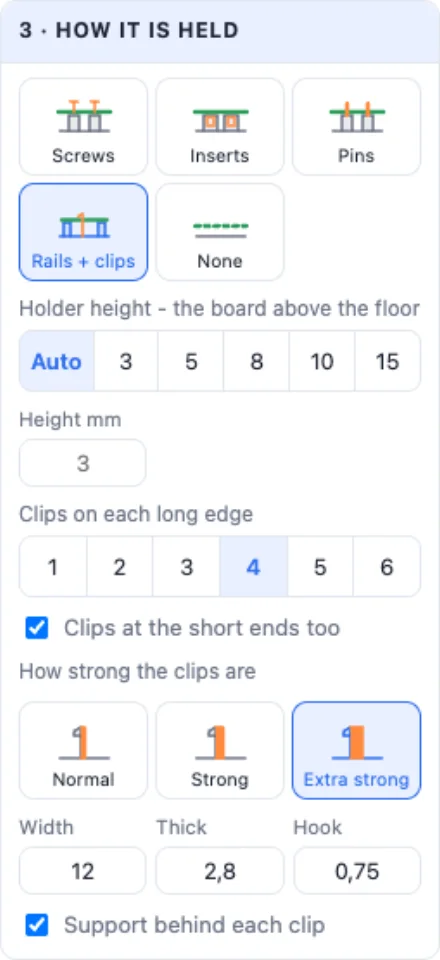
Clips: choose how many on each long edge (1 to 6) and tick Clips at the short ends too. They are placed only where the ports leave room, made narrower in a tight spot, with a shorter hook beside a pin header. How strong the clips are: Normal, Strong or Extra strong, or your own width, thickness and hook. Support behind each clip adds a sloped support from the floor to the board's underside - much harder to break off, and the hook above it still bends.
5The port openings
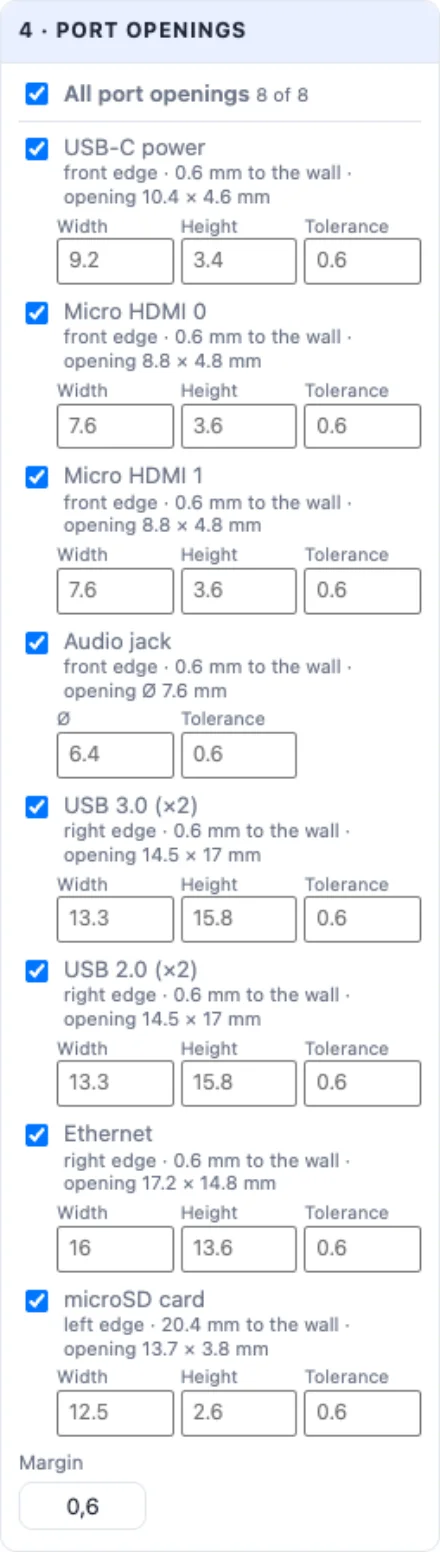
Every port on the board's edges is listed with its distance to the wall and the size of its opening. Untick the ones you do not need - All port openings ticks or unticks them all. A port with no wall near it is marked red and gets no opening.
Each port has its own boxes: Width and Height (the connector's size - for a thicker plug or a different connector) and Tolerance (the room round it on every side). Left empty they use the board's own sizes and the Margin at the bottom of the card. The opening stays centred on the connector.
6Add it to the box
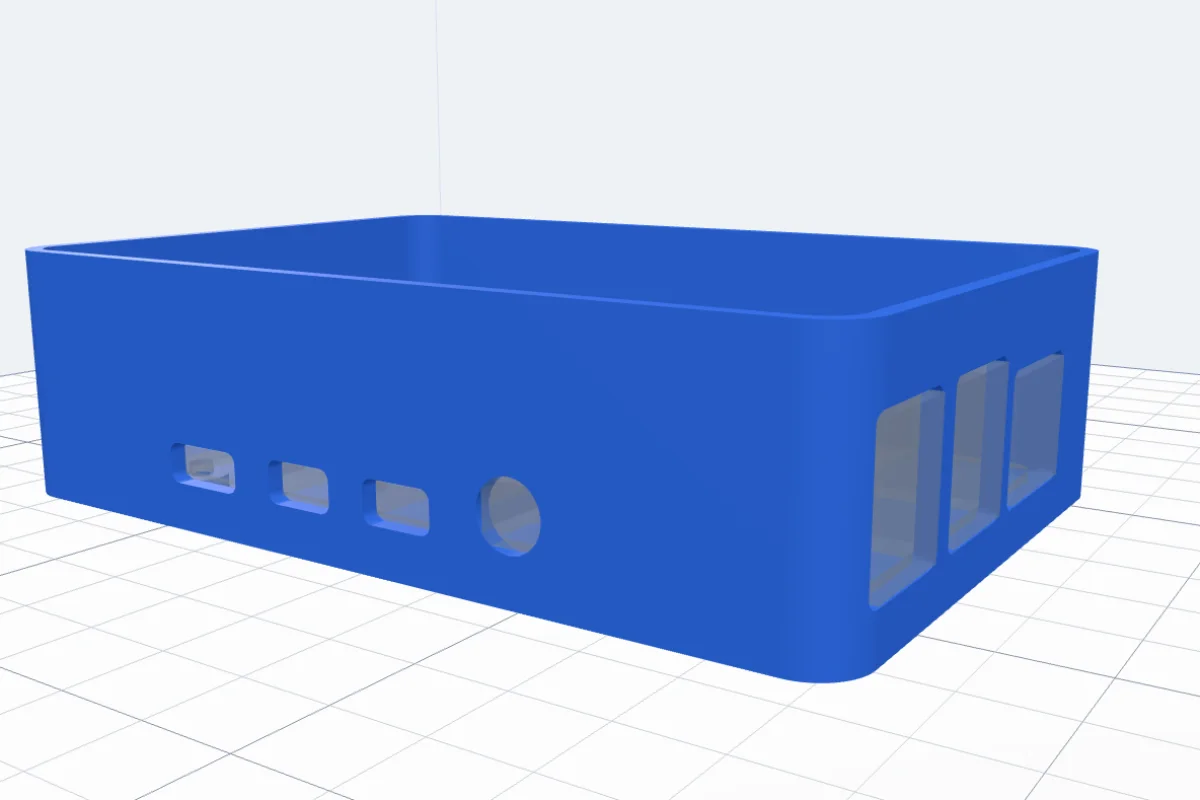
Click Add it to the box: the holders are joined to the box and every opening is cut, in one undo step. Tick Also leave the board in the box as a Hole body to keep the board's shape there for checking the fit - delete it before you export, or it cuts the box.

Need a lid? The Lid / cap tool makes one that fits. More openings for a button, an LED or a fan cable: the Port holes tool.
Questions
Which boards does it know?
The same list as the Board case generator: Raspberry Pi 5, 4 B, 3 B / B+, 3 A+, Zero and Pico; ESP32 DevKitC, DOIT DevKit, ESP32-S3, C3 SuperMini, XIAO, NodeMCU, Wemos D1 Mini and ESP32-CAM; Arduino Uno and Nano; RAK WisBlock, LilyGO T-Beam and Heltec LoRa boards; the Coralboard. The sizes are from the makers' drawings, rounded - check yours with a calliper, and use each opening's own size boxes when a connector differs.
Why is a port marked red, with no opening?
An opening is only cut when there is a wall within 30 mm in front of that port. Push that edge of the board to its wall (Push an edge to its wall), or untick the port if you do not need it.
How do I leave room for a plug?
Gap to wall is how far the board's edge stays from the wall when you push it there - 0.6 mm by default, so the connectors reach the wall. Each opening is the connector plus a margin on every side (0.6 mm); a thick plug housing needs a bigger opening - type a bigger Width and Height, or a bigger Tolerance, under that port.
Which holder should I choose?
Screws: standoffs with pilot holes, the screws cut their own thread - the usual choice. Inserts: holes for heat-set threaded inserts, for a box you open often. Pins: the board drops onto pins, no screws - add clips to keep it down. Rails + clips: for boards without mounting holes (many ESP32 boards) - the board rests on rails and clicks under clips at its edges.
My clips broke off. How do I make them stronger?
Under How strong the clips are pick Strong or Extra strong (wider and thicker), add more clips on each long edge and at the short ends, and tick Support behind each clip - a sloped support from the floor up to the board's underside. Print in PETG rather than PLA if the board goes in and out often: it bends further before it breaks.
Does it work in any box?
In any body with a flat floor and walls round it: a box from the Box generator, a body hollowed with Thickness, an imported STL. The holders stand on the face you click, and the openings go through whatever wall lies in front of each port.
Put your board into your own box
Click the floor, pick the board, push it to the wall - holders and port openings in one step.
Open 3DPrintCADAlso see: Port holes tool, Board case generator, Box generator and Lid / cap tool.