3DPrintCAD › Guides › Board editor
Board editor: draw your own board for a case
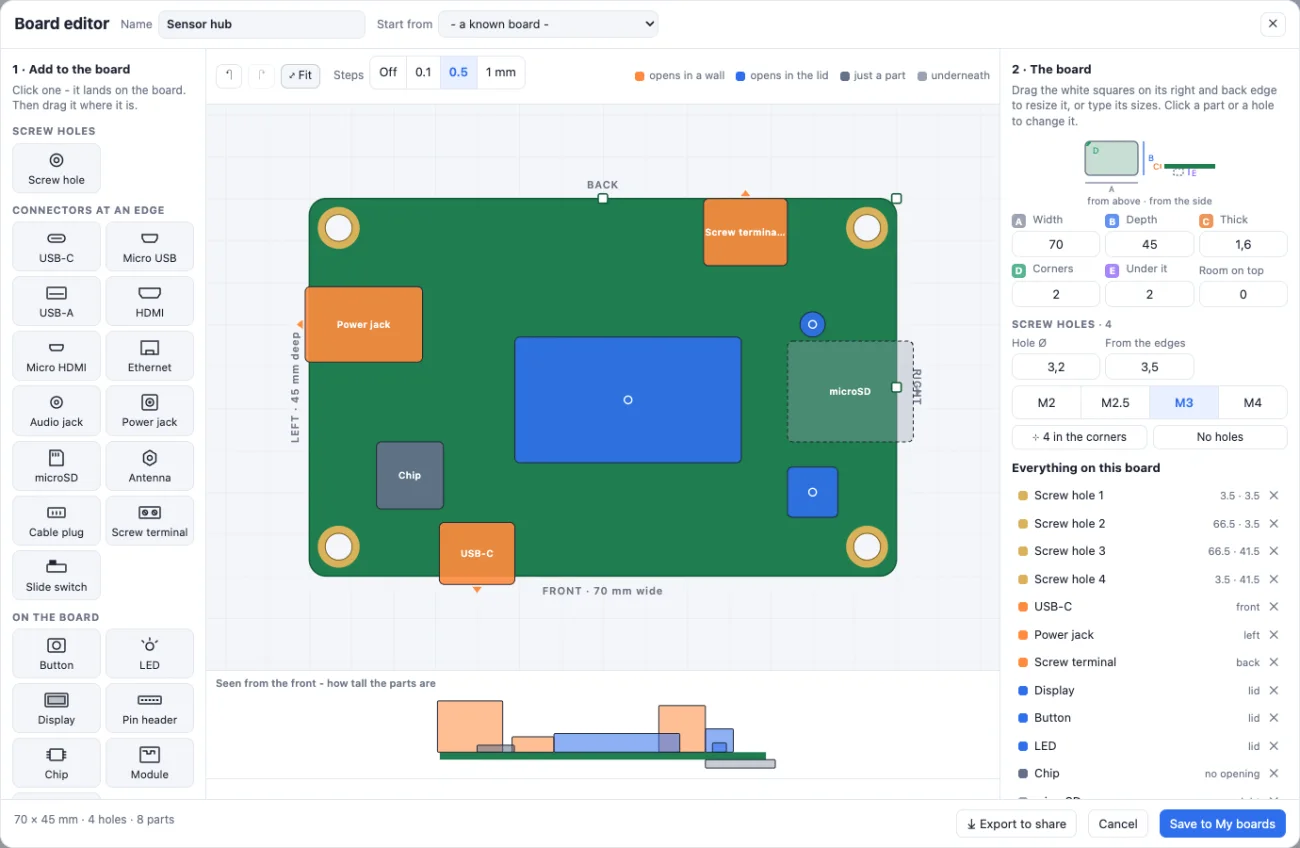
The Board case generator and the Board in a box tool know Raspberry Pi, ESP, Arduino and LoRa boards. For any other board - a relay module, a sensor hub, a board you designed yourself - open the Board editor: draw the board from above, drop its screw holes, connectors and parts on it, drag each one where it is, and say for every part where the case should open for it. Your boards are kept in My boards and work in both tools.
Watch the tutorial
Every step in under three minutes, narrated with subtitles: drawing the board, its parts and holes, the gallery, a case that fits and sharing. Watch on YouTube ↗
1Where to find it
My boards sits under My SVGs in the left panel. In the Board case generator it is the first thing in The board card, and in the Board in a box tool it is the group ★ My boards. Click + New board.


2The editor
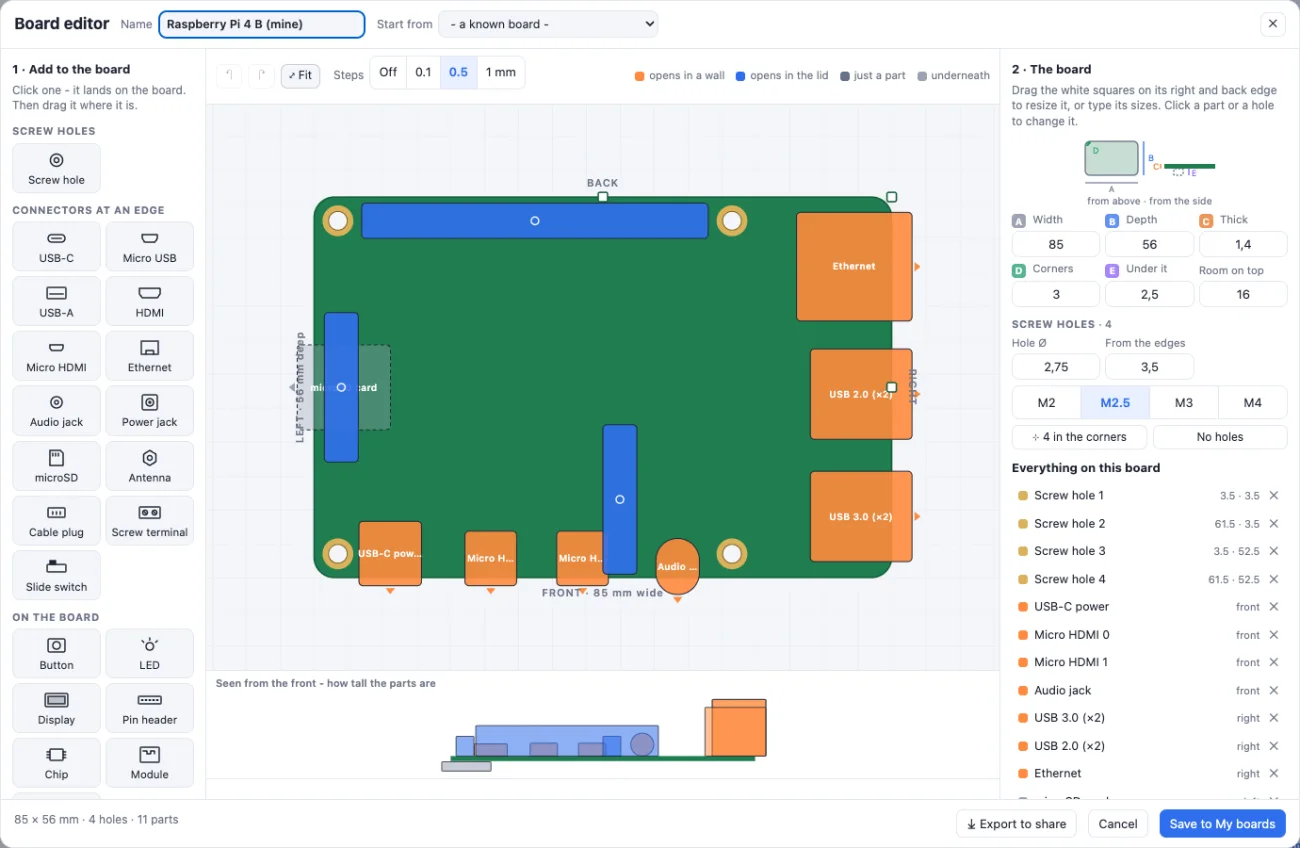
The board is drawn from above, its front edge at the bottom. On the left are the things to add, in the middle the board on a millimetre grid, on the right the settings of what is picked - the board itself when nothing is. Type the board's name at the top.
3The board: size, corners, screw holes
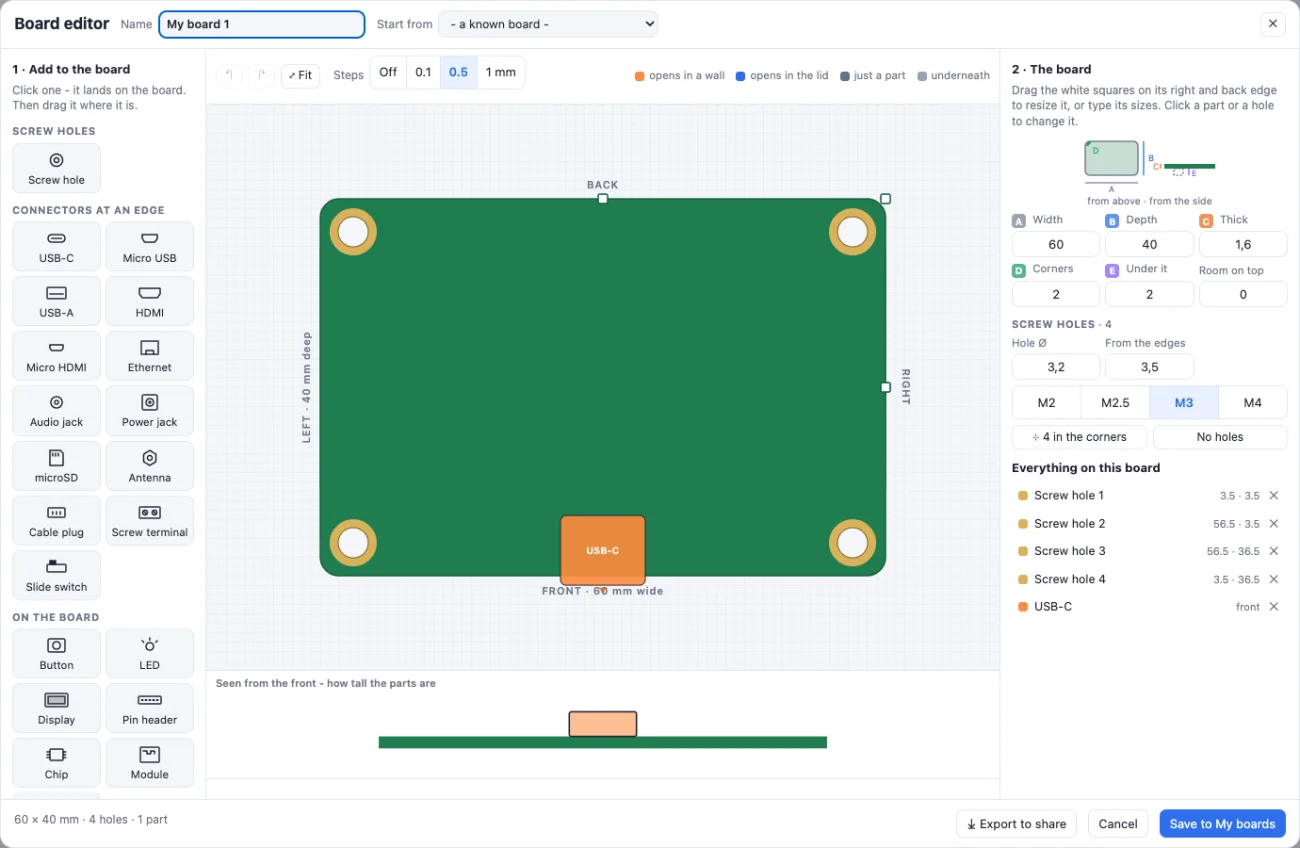
Drag the white squares on the right edge, the back edge or the corner to resize the board - or type A its width, B its depth, C its thickness (most boards are 1.6 mm), D the corner radius and E the room under it (solder joints, pins). Room on top keeps at least that much room over the board.
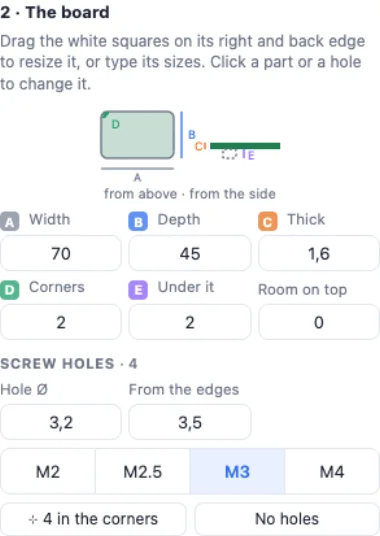
Screw holes: pick the screw (M2, M2.5, M3, M4) or type the hole's diameter. 4 in the corners puts one in each corner, From the edges away. Screw hole on the left adds one more; drag it, or click it and type where its middle is. A board with No holes rests on rails and clips.
4Add connectors and parts
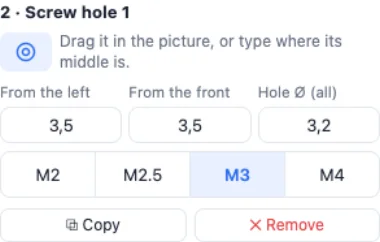
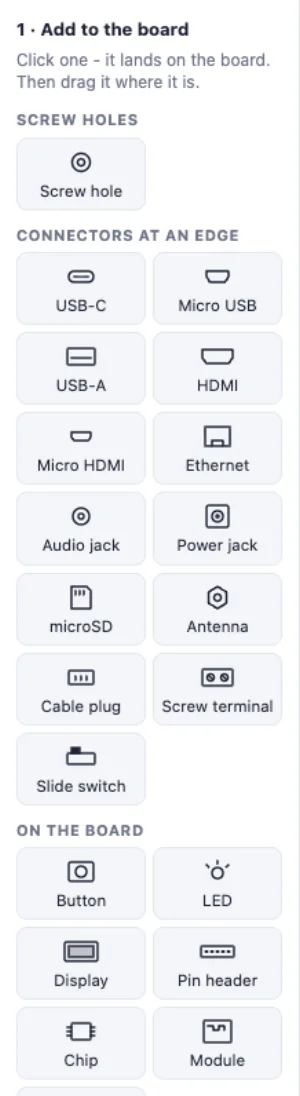
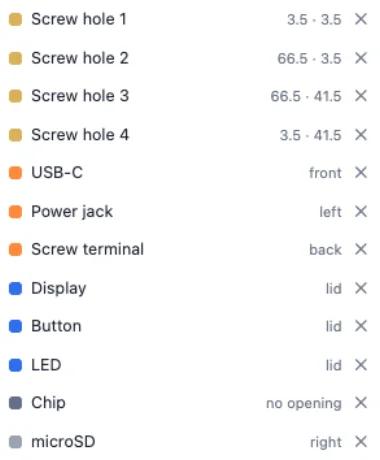
Click a tile and it lands on the board. Connectors at an edge: USB-C, Micro USB, USB-A, HDMI, Micro HDMI, Ethernet, an audio jack, a power jack, a microSD slot, an antenna socket, a cable plug, a screw terminal, a slide switch - each at its usual size, on the front edge. On the board: a button, an LED, a display, a pin header, a chip, a module, or Other part for anything else.
5Drag and resize
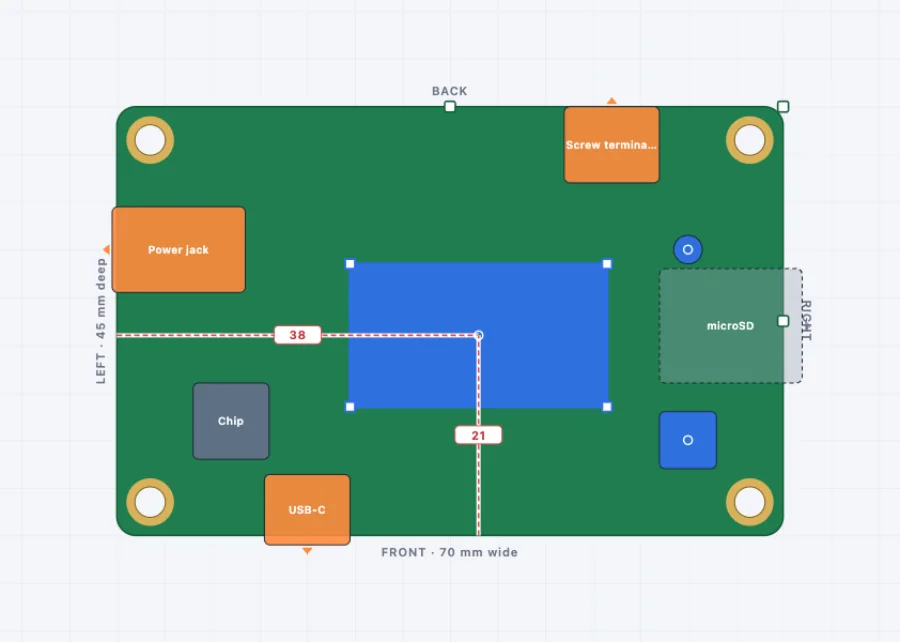
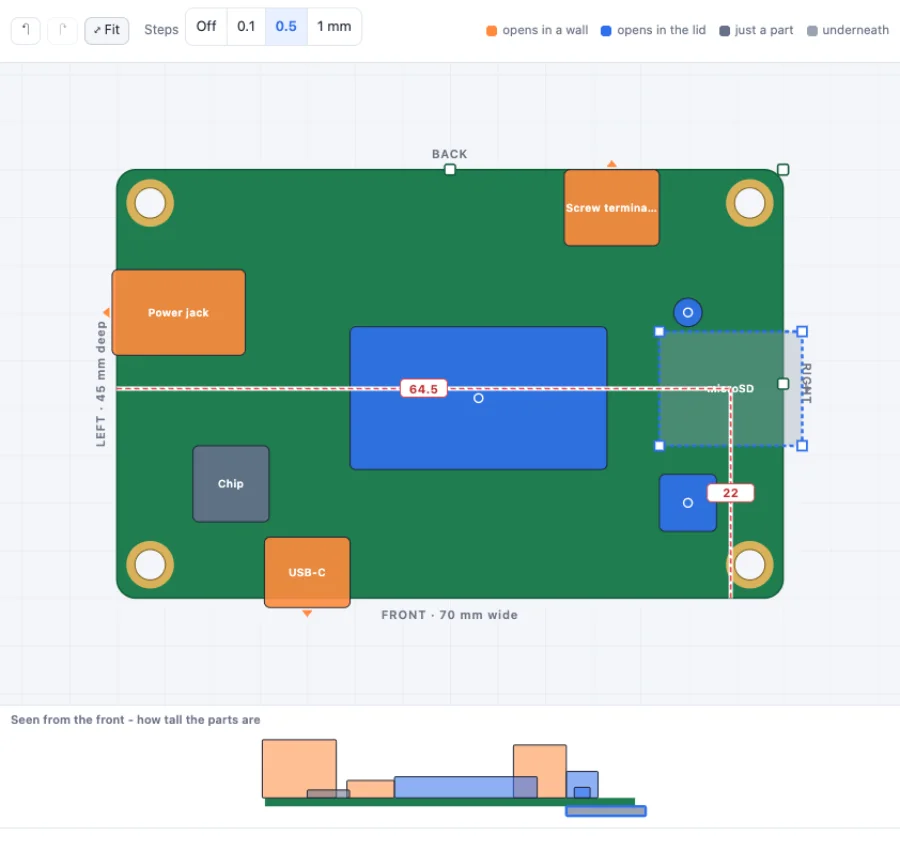
Drag a part or a hole where it is on your board. The red lines show how far its middle is from the left and from the front edge - the two numbers you measure. Drag a picked part's corner dots to resize it. Steps sets how it snaps (0.1, 0.5, 1 mm or off; hold Alt to move without steps); a part's edge also catches the board's edge. The arrow keys nudge, Delete removes, Ctrl+D copies, Ctrl+Z undoes. The wheel zooms; drag empty space to move the picture.
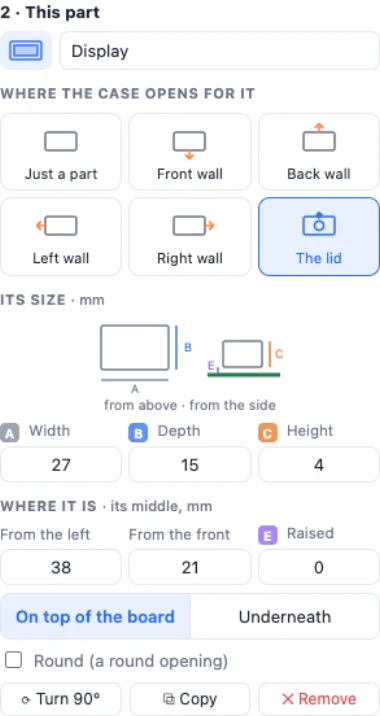
On the right, type the part's name, A its width, B its depth, C its height, where its middle is, and how far it is raised off the board. Round makes its opening a round hole (a jack, an antenna, a light). Turn 90° swaps width and depth.
6Where the case opens for it
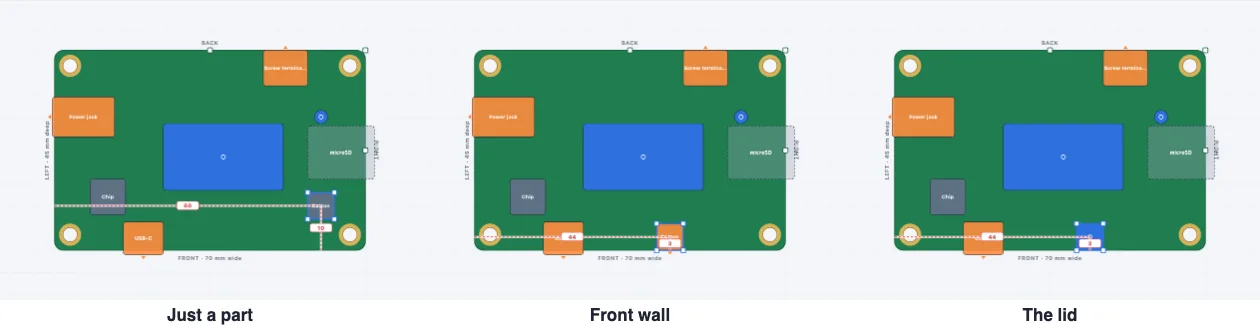
Every part says where the case should open: Just a part (grey - no opening, the case only makes room), a wall - front, back, left or right (orange, with an arrow: an opening through that wall, exactly where the connector is), or The lid (blue: a hole over a button, a light or a screen). Picking a wall turns the part to face it and moves it to that edge.
A part can sit Underneath the board - a microSD slot, a battery holder. It is drawn dashed, and the strip Seen from the front under the picture shows how tall everything is, above and below the board.
7Start from a known board
No need to start from nothing when your board is like one in the list. Start from at the top of the editor - or Edit a copy under the board tiles - copies a Raspberry Pi, an ESP, an Arduino or a LoRa board with every hole and connector, ready to change.
8My boards: the gallery
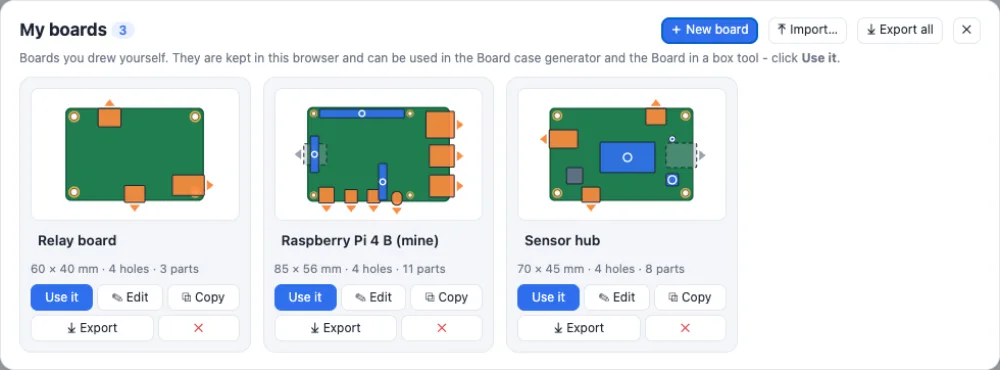
Save to My boards keeps the board. The gallery shows them all: Use it, Edit, type in the name to rename, Copy, Export, ✕ to delete. Import… loads .board files someone shared with you, Export all saves every board in one file. Export to share in the editor saves the board you are drawing.
9Use it: a case, or a box you made
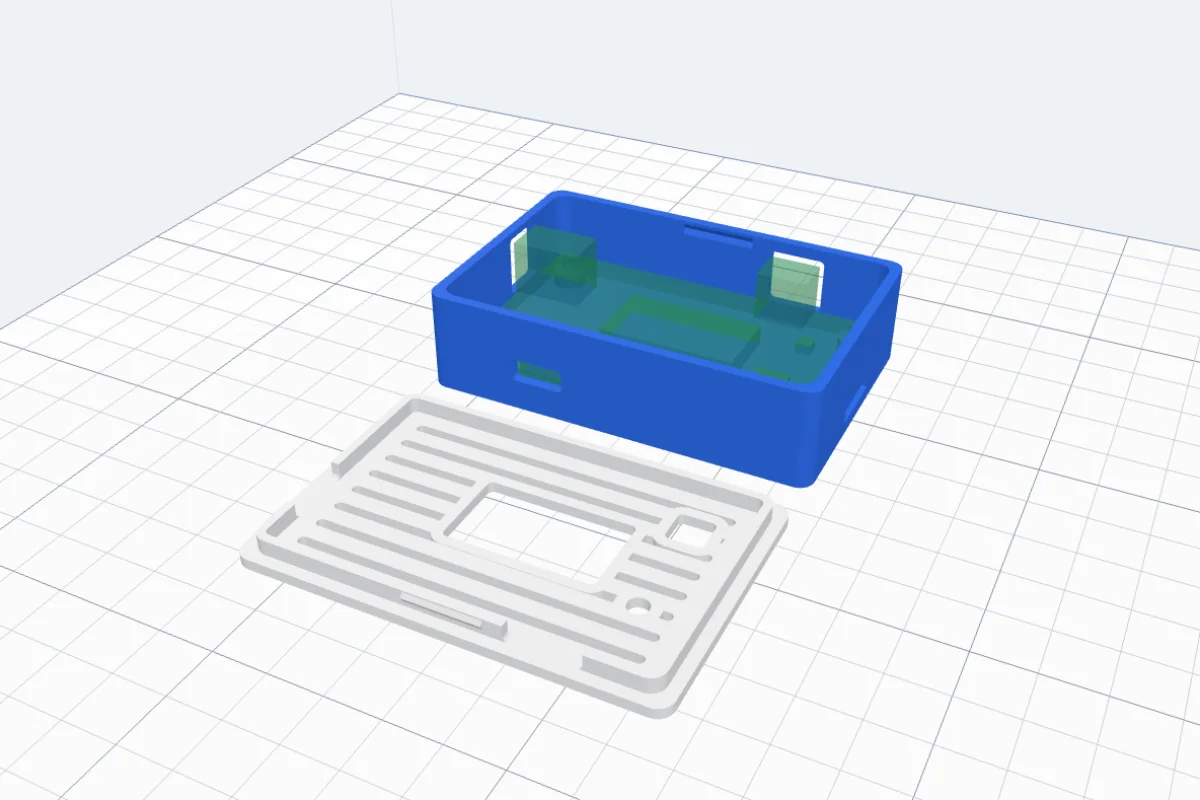
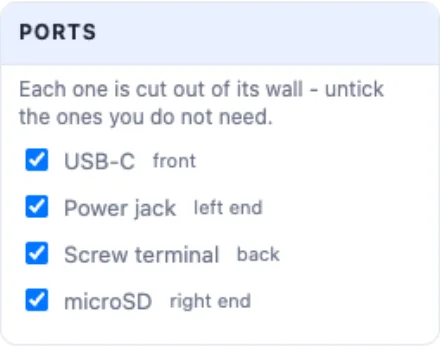
In the Board case generator your board gets a case like any other: standoffs under its holes, an opening for every part you marked - each can be switched off under Ports - a lid, vents, a mount.
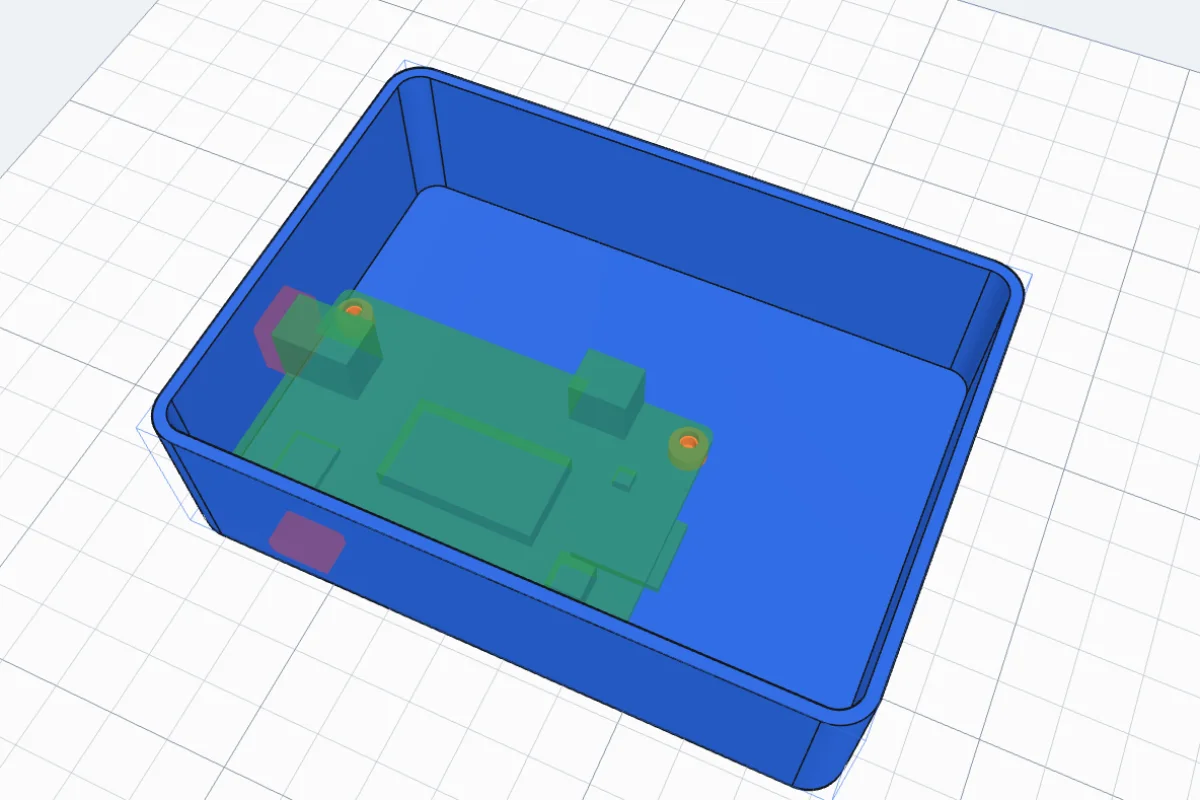
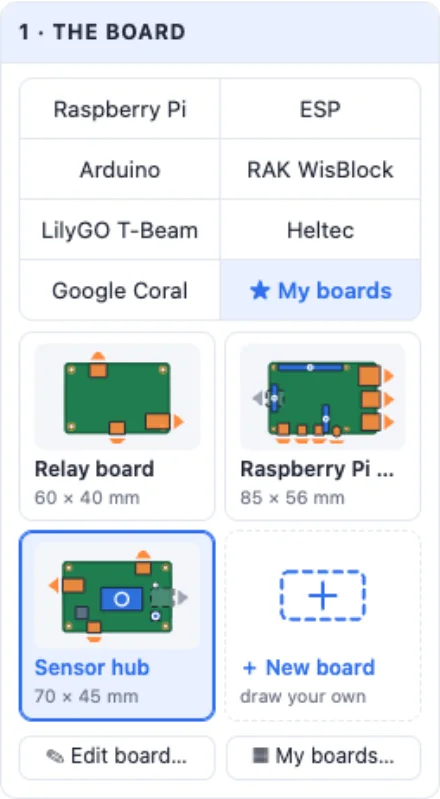
In the Board in a box tool the board goes into a box you already have: click the floor, pick the board under ★ My boards, push its edges to the walls - the holders are added and the openings cut through the walls.
Questions
What do I need to measure?
The board's width and depth, where its screw holes are (from the left and the front edge), and for every connector its width, depth, height and where it sits. A calliper does it in a few minutes. Start with the connectors that need an opening - the rest only has to be about right.
Which edge is the front?
Whichever you like - the editor draws the front at the bottom of the picture. Put the board on the table the same way, and "from the left" and "from the front" are easy to measure.
What does "where the case opens" do?
It tells the case what to cut. A wall (front, back, left, right) gets an opening the size of the connector, right where it is. The lid gets a hole over a button, a light or a screen. Just a part gets no opening - the case only makes room for it.
Can I share a board?
Yes. Export to share in the editor, or Export in My boards, saves a .board file. Send it to anyone - they load it with Import in My boards. Export all saves every board in one file. A board file holds only numbers and names; a file with anything else in it is refused.
Where are my boards kept?
In this browser, on this computer - like your projects. A case or a box you already made keeps its own copy of the board, so changing or deleting a board in My boards never changes it. Export your boards to keep a copy or to move them to another computer.
Can I change a Raspberry Pi or an ESP board?
Yes. Pick it, then Edit a copy - or Start from in the editor. The copy has every hole and connector of the board; move, resize, add or remove any of them and save it under your own name.
Draw your board
Any board, its own case.
Open 3DPrintCADAlso see: Board case generator, Board in a box, Port holes and Lid / cap.