3DPrintCAD › Guides › Tool insert generator
Tool insert generator: custom tool trays from a photo
Photograph a tool on white paper and get a tray with a pocket shaped exactly like it: the outline traced for you, a gap round it, finger notches to lift it out, labels, several tools on one tray, Gridfinity bins or any tray shape, and a floor in another colour so a missing tool shows at once. Everything happens in your browser and the insert is ready for the slicer.

Watch the tutorial
From one photo to a printable tray in about a minute and a half, with subtitles: the traced outline, the pocket, the tray, labels and the floor colour. Watch on YouTube ↗
1Take the photo
- Lay the tool on white paper, with nothing else on it.
- Put a calibration square at the top right: a 10 × 10 mm square printed in black or dark grey (15, 20 and 25 mm work too). It tells the app how big the tool is.
- Take the photo straight from above, in even light - near a window, no harsh shadows. Hold the phone level, the tool and the square both in the middle of the picture.
2Open the generator and upload
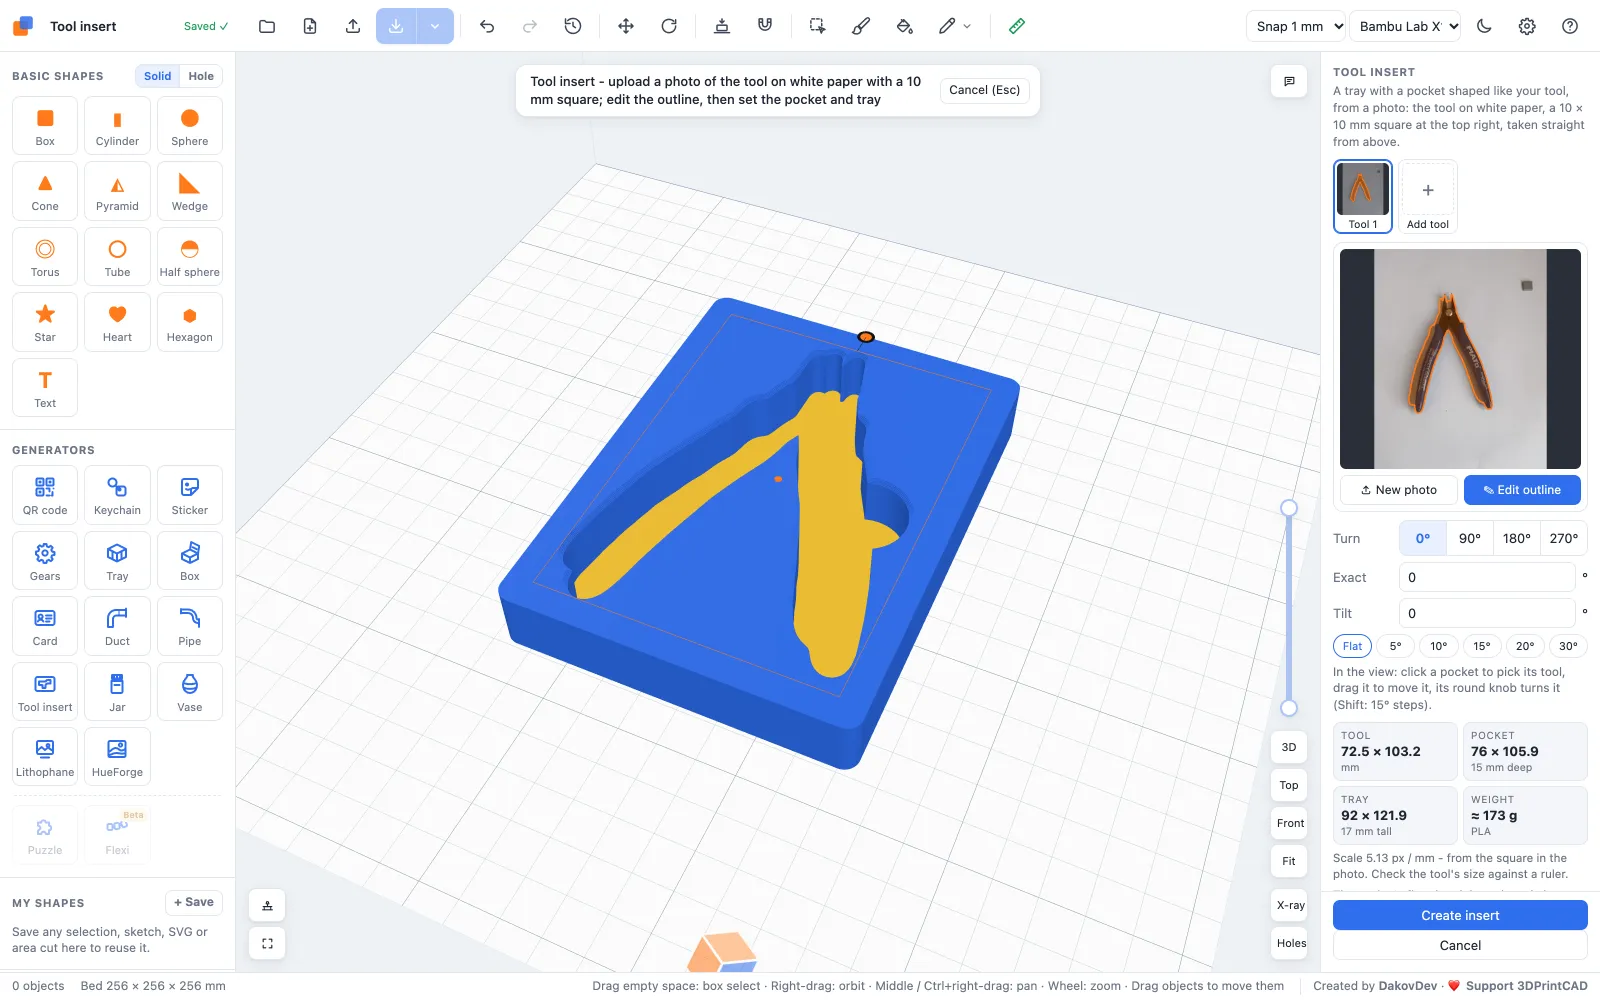
Open the app and click Tool insert under Generators on the left (or use this link). The Photo of the tool window opens: drop the photo on it or click to choose it. The app finds the paper, the square and the tool, traces the tool's outline and opens the outline editor.
3Check the outline
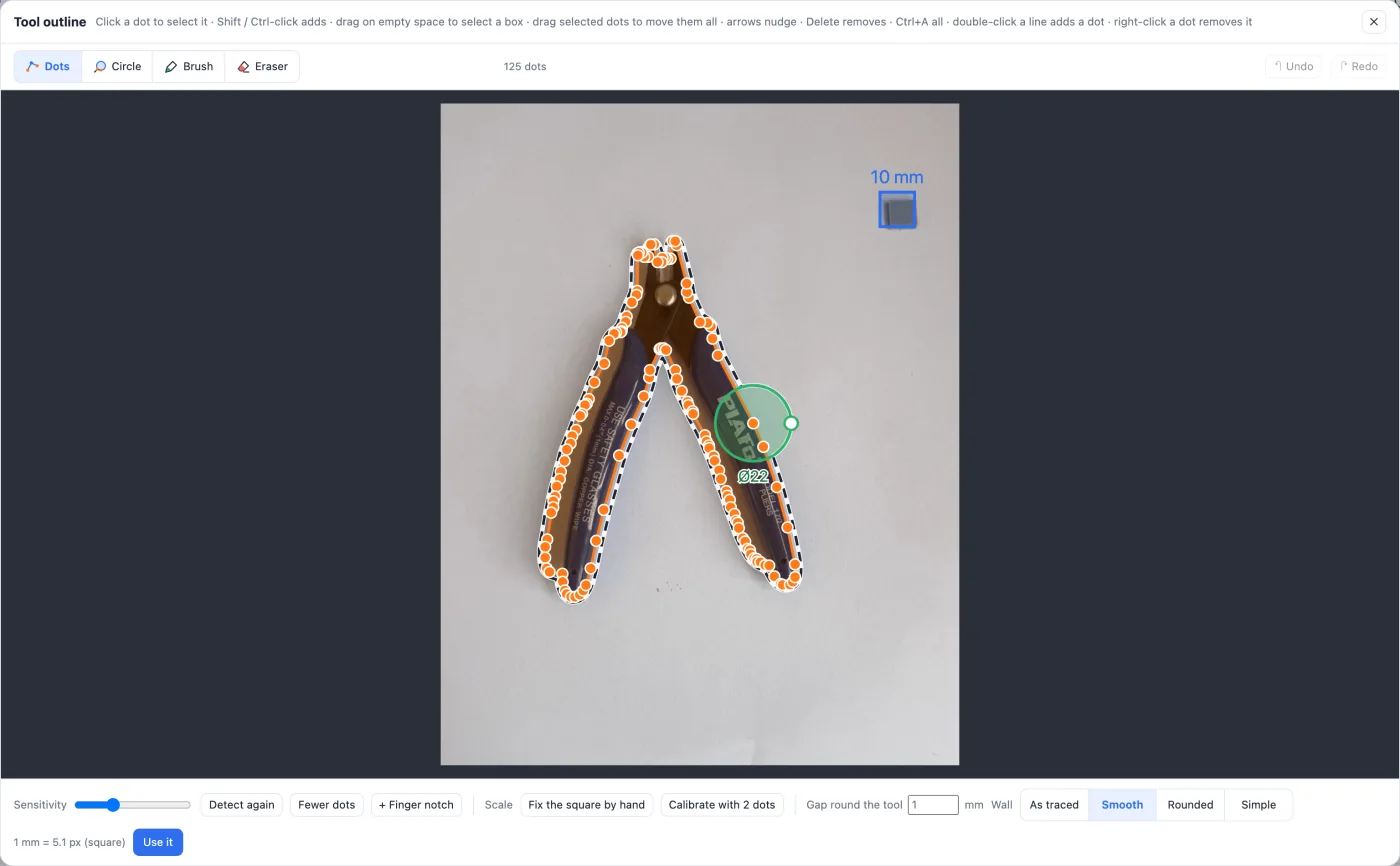
The outline editor shows the photo with the traced outline in orange dots and the square it found. Check that the outline follows the tool all round, then click Use it. To fix it:
- Dots (V) - drag dots, box-select several, Delete removes them, double-click a line adds one.
- Circle (C) - a circle you drag along the edge: from inside the outline it adds, from outside it cuts away.
- Brush / Eraser (B / E) - paint the tool in or out.
- Detect again with another sensitivity, Fewer dots, + Finger notch (a round notch to lift the tool out - drag it and its rim).
- Fix the square by hand when it was not found, or Calibrate with 2 dots: click two points a known distance apart.
- Gap round the tool and the wall style, with the real pocket outline dashed.
4Scale and pocket
- Scale: from the Square (pick its size: 10, 15, 20 or 25 mm), from Two dots a known distance apart, or from the photo's Width. Check the tool size the panel shows against a ruler.
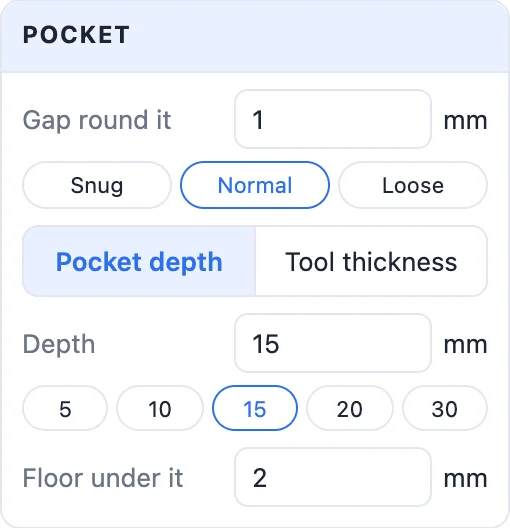
- Gap round it: Snug 0.5, Normal 1 or Loose 2 mm per side.
- Pocket depth (5 to 30 mm), or Tool thickness plus a gap over it; Floor under it.
- Pocket wall: Traced (exactly the outline), Smooth (pixel steps smoothed away; it still holds the tool), Rounded (inner corners and narrow gaps filled) or Simple. Top edge: sharp, chamfer or rounded.
- Each tool can be turned and tilted (5-35°): a sloped pocket, the tool easier to grab at the raised end.
5Tray, labels and colours
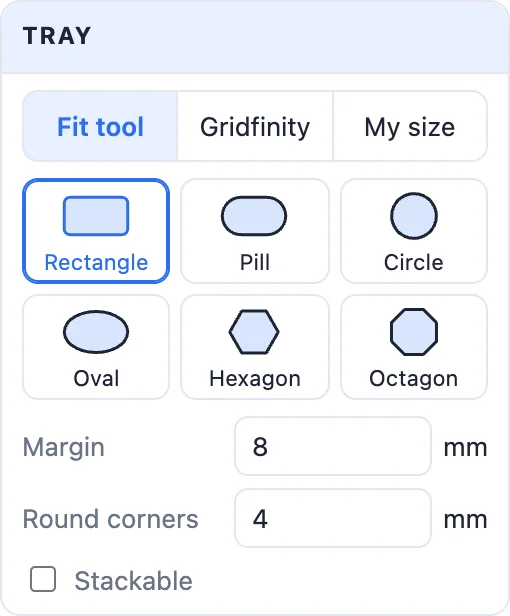
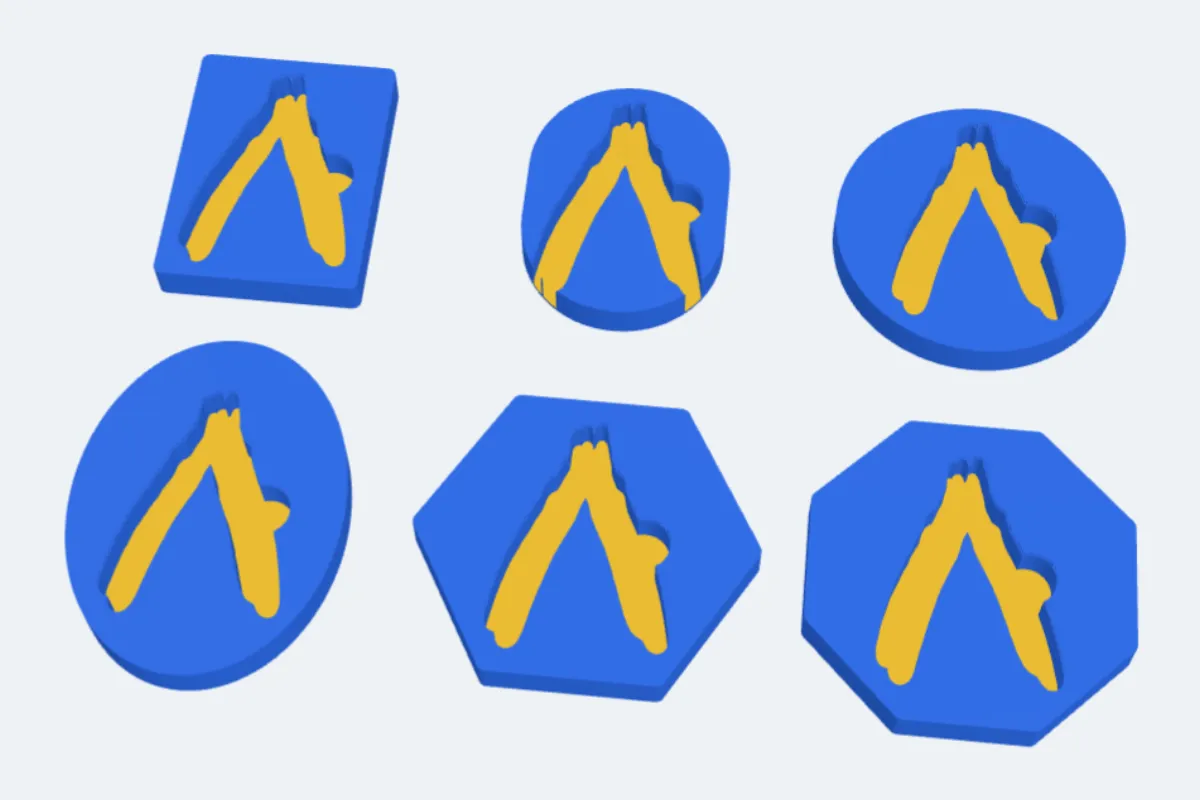
- Tray: Fit tool (the tool's outline plus a Margin), Gridfinity (sized in 42 mm cells, with feet) or My size; shape Rectangle, Pill, Circle, Oval, Hexagon or Octagon; Round corners.
- Stackable: a rim round the top and a stepped foot, so inserts stack with room for the tools.
- + Add tool puts several tools on one tray - each with its own photo; drag them in the view to arrange them, the round knob turns them.
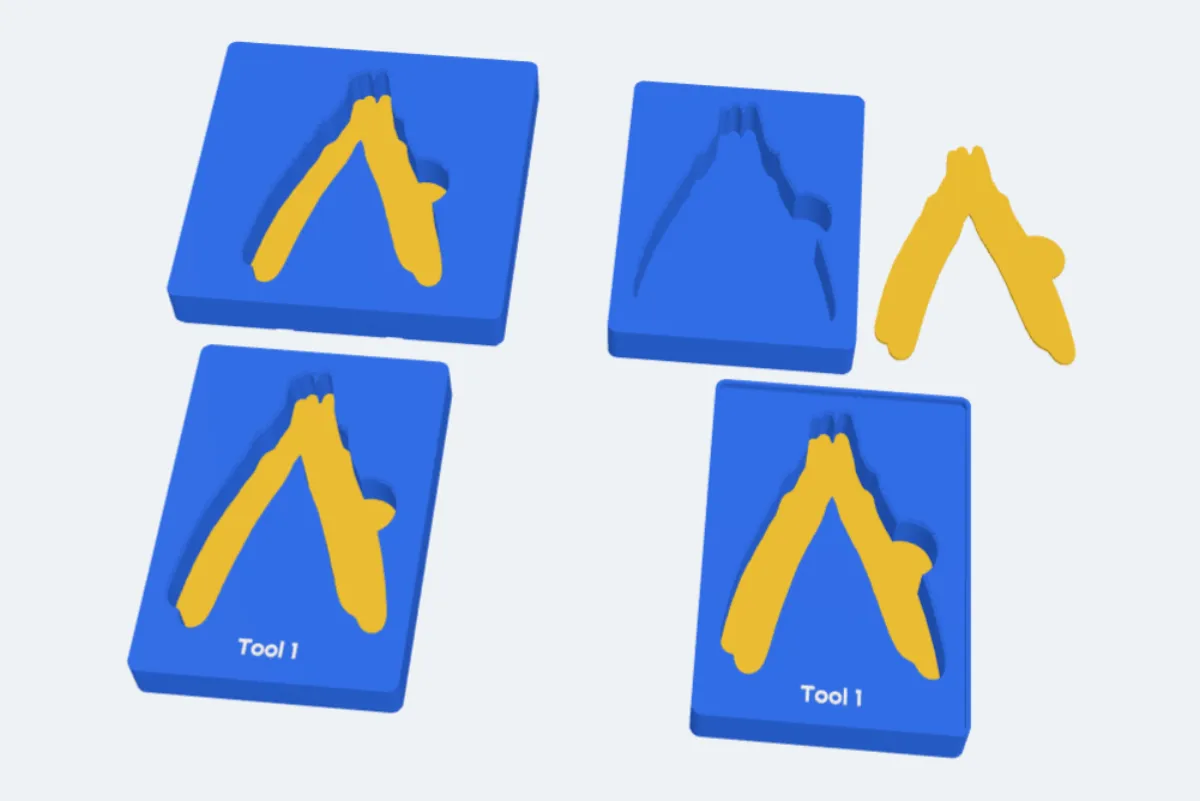
- Labels: raised, flush or engraved texts, dragged into place in the view.
- Floor in another colour: a thin layer of another colour under every pocket, so an empty pocket shows at once - Printed in (multi-colour) or a Loose plate printed on its own and dropped in.
6Create and print
Click Create insert, then Export an STL - or a multi-colour 3MF for a printed-in floor colour. Print it flat on the bed; it needs no supports. Double-click it later to change it.
Questions
Do I need the square?
It is the easiest way to get the size right: a printed 10 × 10 mm square at the top right of the paper. Without it, use Two dots (click two points a known distance apart) or the photo's Width.
The outline is not right - what can I do?
Fix it in the outline editor: drag dots, push the edge in or out with the circle, paint with the brush or the eraser, or Detect again with another sensitivity. Even light and white paper give the cleanest outline.
How much gap should the pocket have?
Normal (1 mm per side) suits most tools. Use Snug (0.5) for a tight hold and Loose (2) for a tool that has to drop in.
Can I put several tools on one tray?
Yes. Click + Add tool and upload the next photo. Drag the tools in the view to arrange them and turn them with the round knob.
Does it work with Gridfinity?
Yes. Choose Gridfinity under Tray: the insert is sized in 42 mm cells with the standard feet, and Stackable adds the stacking lip.
Make your tool insert now
Take a photo of your tool on white paper with a 10 mm square, upload it and print.
Make a tool insert nowAlso see: Tray generator, Box generator, Image to 3D sticker and all guides.